Google搜索引擎的使用技巧
一.垃圾话
我们通常使用搜索引擎都是直接搜索自己想要的内容,正常情况下我们都是直接使用语言进行描述问题来进行搜索,然后搜索引擎也有特定的语法可以使用,熟练掌握搜索引擎的语法可以让你的搜索效率和准确率大幅度提升,当然我们学习这种技巧是为了寻找存在漏洞的页面,或者存在敏感信息的文件。
二.Google 常用语法说明
1 | site #指定域名,如:xuegod.cn |
我们通常使用搜索引擎都是直接搜索自己想要的内容,正常情况下我们都是直接使用语言进行描述问题来进行搜索,然后搜索引擎也有特定的语法可以使用,熟练掌握搜索引擎的语法可以让你的搜索效率和准确率大幅度提升,当然我们学习这种技巧是为了寻找存在漏洞的页面,或者存在敏感信息的文件。
1 | site #指定域名,如:xuegod.cn |
[toc]
1 | git config -l |
查看系统配置
1 | git config --system --list |
查看用户配置
1 | git config --global --list |
Git相关的配置文件
1 | Git\etc\gitconfig #Git安装目录下的gitconfig --system 系统级 |
1 | git config --global user.name "名称" |
创建本地仓库有两种方法:一.创造全新的仓库,二.克隆远程仓库
1.创建全新的仓库,需要用GIT管理的项目的根目录执行:
1 | 在当前目录新创建一个Git代码库 |
2.执行完之后可以在项目目录多了一个.git目录,关于版本等的所以信息都在这个目录里面。
1.另一种方式是克隆远程目录,就是将远程服务器上的仓库完全镜像到本地
1 | # git clone [url] |
2.去gitee或者github上克隆一个测试!
下面这个地址192.168.0.102:8101是我的旁路由代理
1 | git config --global http.proxy "http://192.168.0.112:8101" |
[toc]
要使用window的远程连接mstsc的话需要树莓派安装了xrdp这个软件;当然如果你觉得自带的不香的话也可以用树莓派自带的vnc,这得需要你去官网下一个vncviewer 这个客户端
raspberry设置
1 | sudo apt-get install xrdp |
将树莓派打开vnc功能,然后就可以通过vnc远程连接了
raspberry设置
因为我使用的系统是manjaro那么我就推荐arch的软件咯
manjaro设置
1 | yay -S realvnc-vnc-viewer |
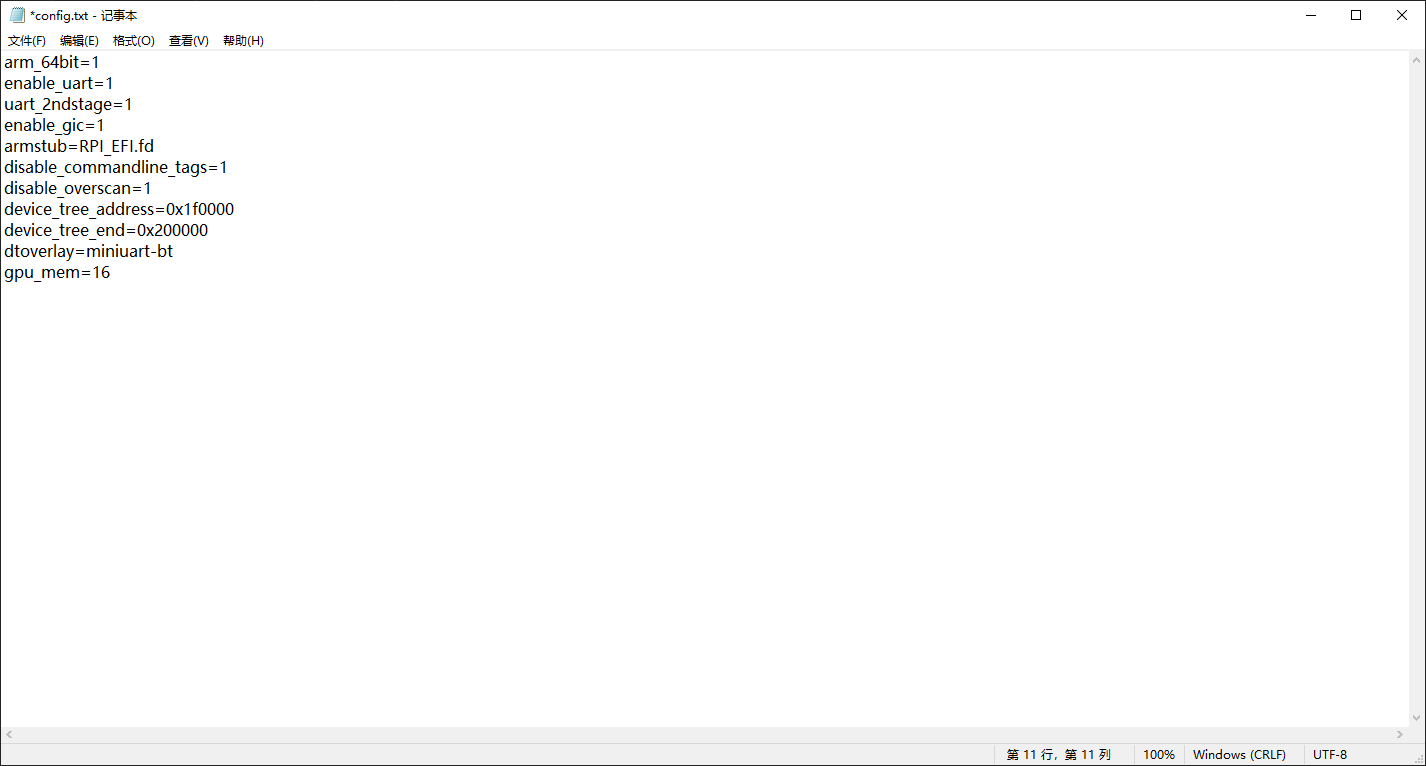
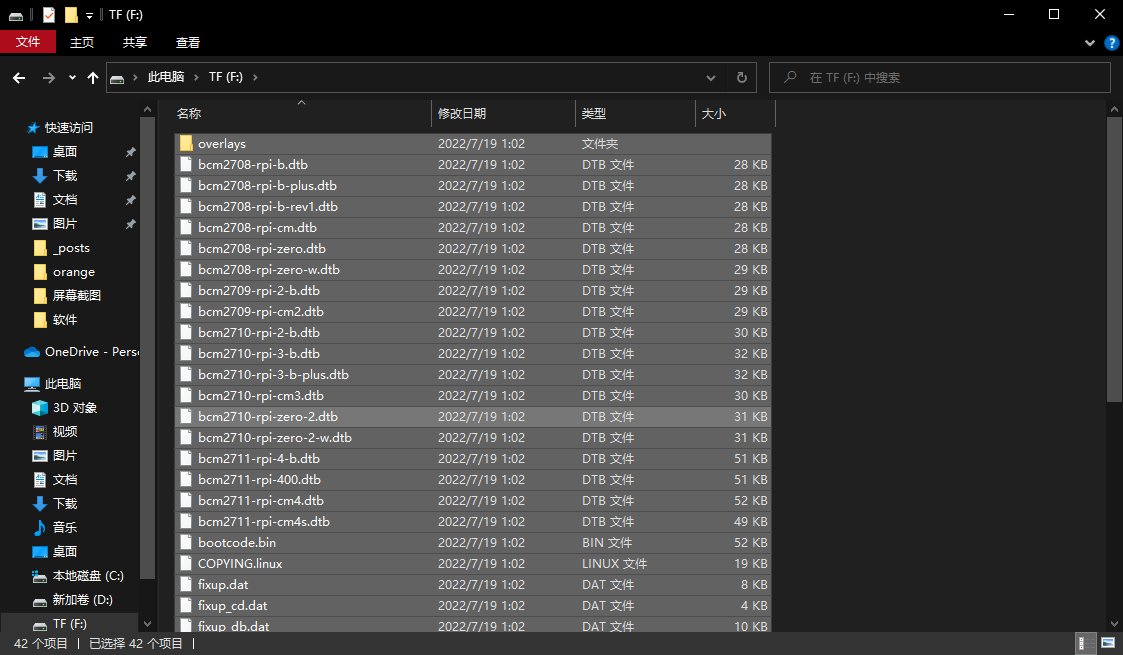
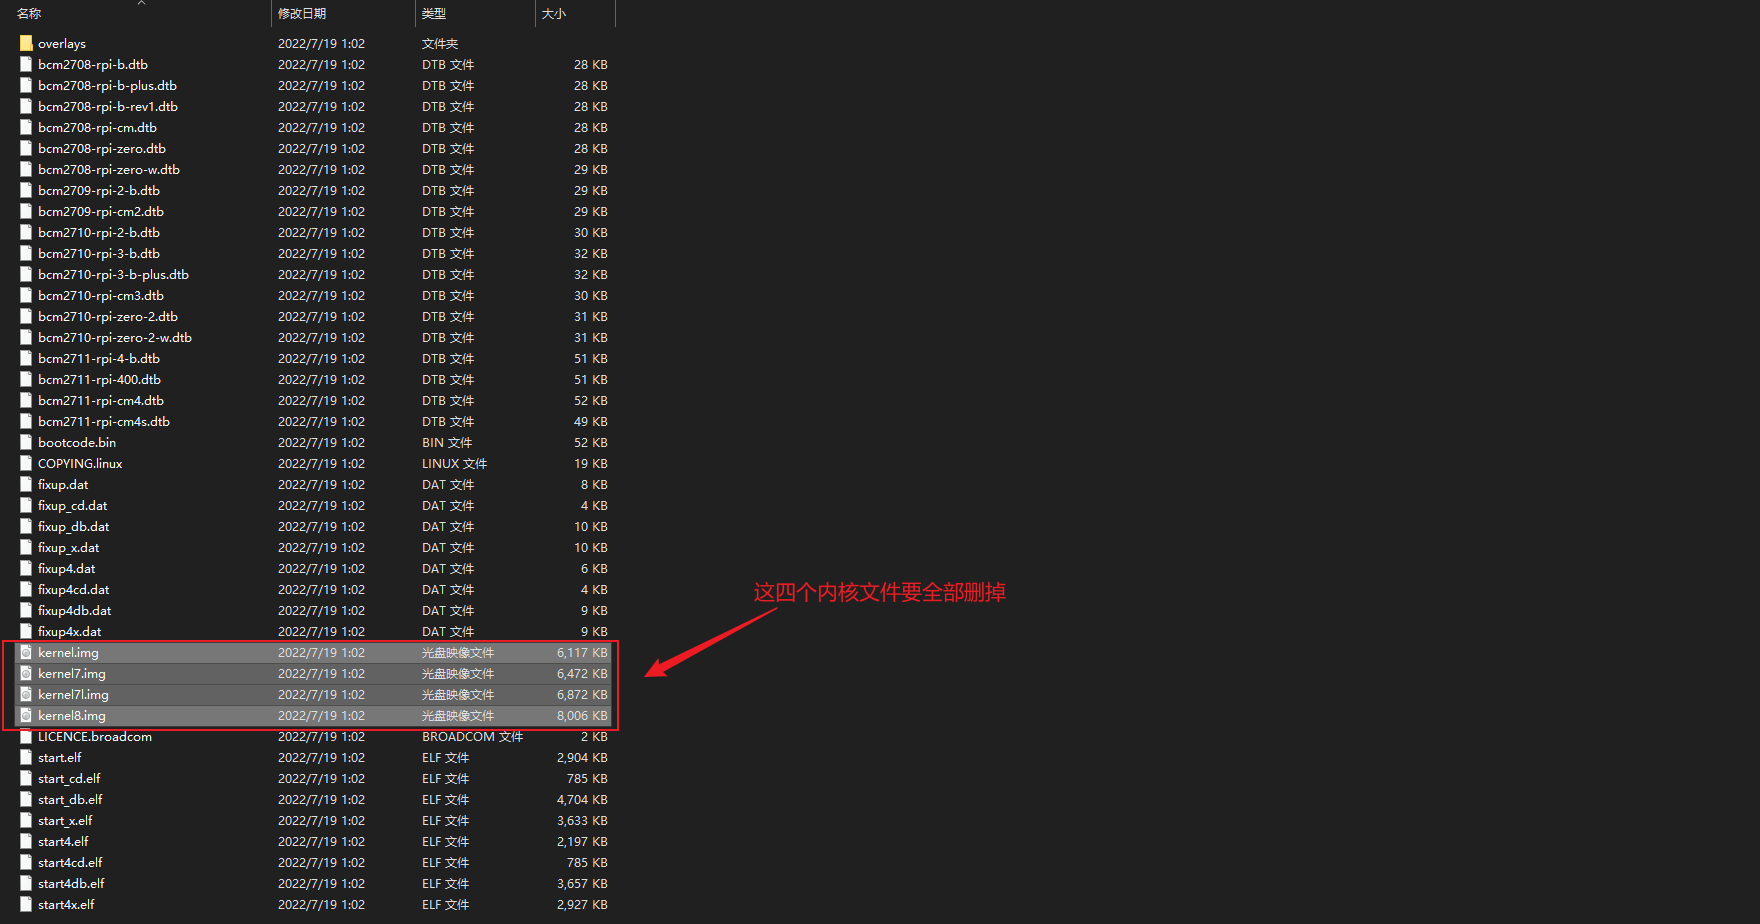
下载到以上的文件之后,先解压firmware-master.zip这个文件,弹出文件是否替换,单击全部选否,解压完成之后进入boot文件目录,拷贝里面的全部内容到你格式化好的tf卡中,并且删除掉这几个kernel*的文件。

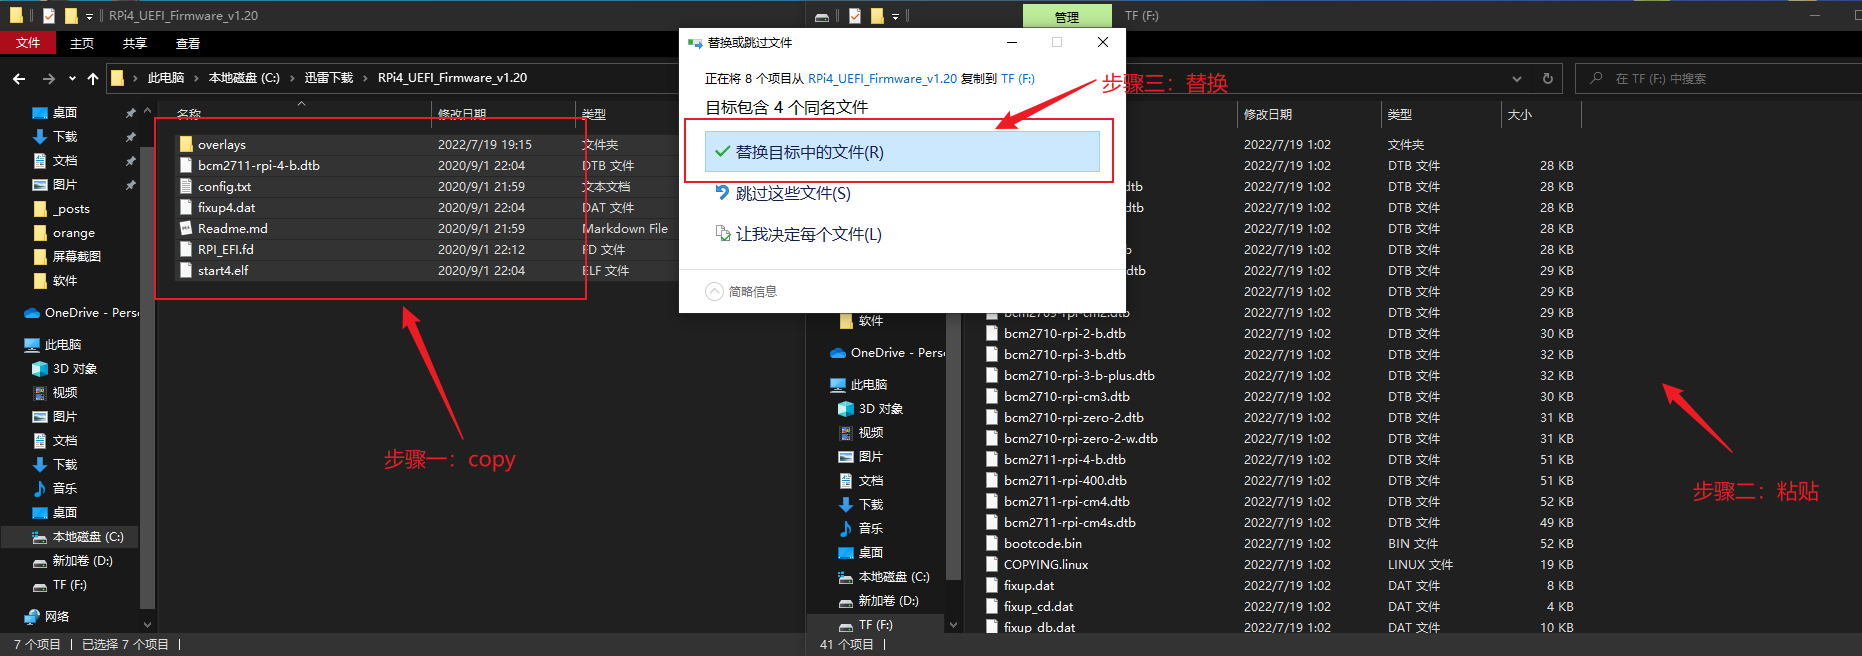
接下来解压RPi4_UEFI_Firmware_v1.20压缩包,把里面的所有的内容拷贝到tf卡里面,弹出是否要替换文件的时候选择替换目标中的文件
在config.txt文件中添加gpu_mem=16